
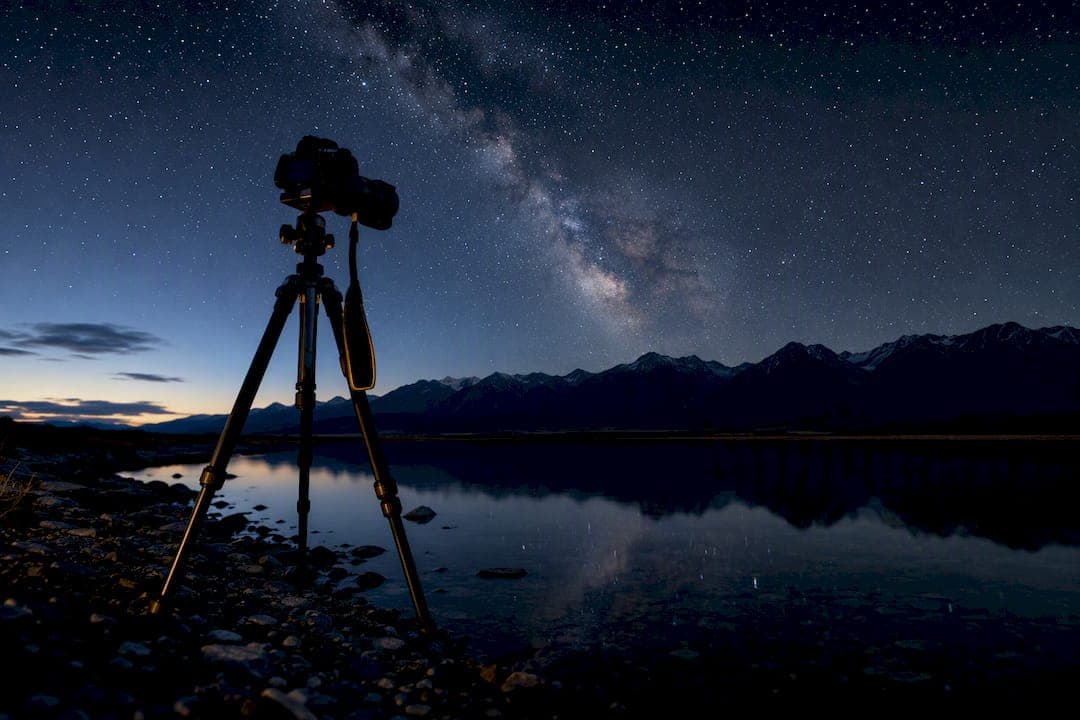
New Zealand's South Island rewards photographers with a concentration of scenery rarely matched anywhere else: Lake Tekapo, Aoraki/Mount Cook, Lake Pukaki, Wanaka, and Milford Sound anchor any serious shortlist. The Mackenzie region deserves special mention for night-sky work, sitting inside one of the world's premier dark-sky reserves. What follows is a curated list of the island's finest spots, paired with the timing, access, and gear notes a working photographer actually needs.
TL;DR:
- Most top South Island locations are best photographed during early morning or late evening light, with specific spots like Tekapo and Matheson ideal at sunrise.
- Using a wide-angle lens (14-24mm) for dark sky photography and a polarizer or neutral density filter for landscape shots helps maximize image quality and detail.
- Access and conditions vary, with remote sites like George Sound or Milford Sound needing careful planning, permits, and safety precautions, especially for multi-day trips.
- The Mackenzie region's dark skies offer exceptional astrophotography opportunities, especially during a new moon and with low artificial light pollution.
- Prioritizing fewer locations and timing trips around weather and light conditions results in higher-quality images than rushing through numerous sites.
Table of Contents
- The top South Island photo locations at a glance
- Where to stand and what to shoot at each spot
- When to plan your trip for the best light
- Why the Mackenzie region is a magnet for astrophotographers
- Staying safe and legal on conservation land
- Gear and technique for South Island conditions
- Building a realistic South Island itinerary
- Photographing the South Island's wildlife responsibly
- Cultural moments and local events worth photographing
- Editing South Island landscapes for accurate color and mood
- What I prioritize when I plan a South Island shoot
- Learning and bringing home South Island imagery through Mark Gray Gallery
- Sources
- FAQ
The top South Island photo locations at a glance
Some places earn their reputation through sheer repetition in every serious photographer's portfolio, and the South Island has more than its share. This shortlist moves roughly north to south, giving you a sense of sequence as well as subject.
- Lake Tekapo: turquoise water and the Church of the Good Shepherd, best at sunrise before crowds arrive.
- Lake Pukaki: mountain reflections with Aoraki/Mount Cook as backdrop, strongest in still morning light.
- Aoraki/Mount Cook National Park: New Zealand's highest peak framed by glacial valleys, dramatic at golden hour.
- Tasman Glacier and the Mount Cook lake area: iceberg-dotted meltwater lake, compelling under flat midday light for texture.
- Wanaka: home to the famous lone willow tree, magical at dawn in calm conditions.
- Glenorchy: wetlands and mountain backdrops near Queenstown, superb for reflections at first light.
- Queenstown: alpine town views from the Skyline gondola or Queenstown Hill, striking at blue hour.
- Milford Sound and Fiordland: waterfalls and vertical cliffs, moody and atmospheric in overcast or misty weather.
- Lake Matheson: mirror reflections of Aoraki/Mount Cook and Mount Tasman, calmest at sunrise.
- Franz Josef Glacier: receding ice tongue accessible by a short walk, best photographed in soft midday light.
- Punakaiki Pancake Rocks: layered limestone formations on the West Coast, dramatic when swells hit at high tide.
- Twizel: a practical base with nearby canal and mountain views, useful for sunrise scouting.
- Mount Sunday: the isolated hill made famous by film, best under dramatic cloud at golden hour.
- Ahuriri Valley, Benmore, and Lindis Pass: rolling high-country light and texture, particularly rich in late afternoon.
- Haast and West Coast beaches, including Wharariki: rugged coastline and sea stacks, best at sunset with an incoming tide.
- Moeraki Boulders: spherical boulders scattered on an open beach, iconic at sunrise with a low tide.
- George Sound and the Dusky Track: remote Fiordland routes for photographers seeking true isolation, requiring serious planning.
Where to stand and what to shoot at each spot
Lake Tekapo rewards a wide-angle lens (16-24mm) positioned low near the shoreline, with the Church of the Good Shepherd as a foreground anchor against the lake and mountains. Parking sits close to the church, so access is straightforward.
Lake Pukaki is best shot from the viewpoint near the visitor center, using a 24-70mm to balance the lake's foreground with Aoraki/Mount Cook in the distance. A polarizing filter cuts glare and deepens the blue.
Aoraki/Mount Cook National Park offers the Hooker Valley Track as the classic approach, a well-formed path leading to views of the peak. A short telephoto (70-200mm) compresses the summit against the valley walls.
The Tasman Glacier lake area, reached via a short walk from the car park, suits a mid-range zoom to isolate icebergs against the milky water.
Wanaka's lone tree is one of the most photographed subjects in the country, so arrive early. A 24-70mm lens with a slow shutter smooths the water when conditions allow.
Glenorchy rewards patience at the wetlands boardwalk, where a wide lens captures reflected peaks in glassy water at dawn.
Queenstown offers elevated views from Queenstown Hill, a moderate walk from town, ideal with a standard zoom during blue hour.
Milford Sound demands flexibility: cruise-based shots benefit from a mid-range zoom, while cliffside viewpoints along the road suit wide-angle framing of waterfalls. The Milford Sound photography guide covers the fjord's access points and seasonal light in more depth.
Lake Matheson's short forest walk leads to the famous mirror viewpoint, best photographed with a wide lens at dawn when wind is calmest.
Franz Josef Glacier is reached by a well-marked track, with a standard zoom useful for compressing the ice against the valley.
Punakaiki Pancake Rocks are viewed from a paved loop path, where a wide-angle lens captures the layered rock against crashing surf, especially near high tide.
Twizel serves better as a logistics base than a headline subject, though the nearby canals offer clean reflection shots at sunrise.
Mount Sunday requires a short walk across open farmland, rewarding a wide lens under dramatic sky.
Ahuriri Valley, Benmore, and Lindis Pass are best explored by car with frequent pullovers, using a telephoto to isolate rolling light patterns on the hills.
Haast and Wharariki Beach need a tide chart: a wide lens low to the sand captures sea stacks and foreground texture as the tide recedes.
Moeraki Boulders are most photographable at low tide, when a wide-angle lens with a slow shutter smooths water around the boulders.

George Sound and the Dusky Track are for prepared, experienced trampers only, given multi-day river crossings and limited cell coverage; carry a wide-angle setup and expect to prioritize safety over shot lists.
When to plan your trip for the best light
Season and time of day shape almost every image on this list, so matching your schedule to your priority subjects matters more than chasing every location at once.
- Summer (December through February) brings long days and easier alpine access, though popular spots get crowded and skies can haze over.
- Winter (June through August) delivers snow-capped peaks and the clearest night skies, but shorter days and limited access to higher routes.
- Shoulder seasons (autumn and spring) often provide the best balance: manageable crowds, decent light, and reasonable access.
- Sunrise and sunset remain the most reliable windows for lakes like Tekapo, Pukaki, and Matheson, where wind is calmest.
- Blue hour suits urban and alpine silhouettes around Queenstown and Wanaka.
- Night-sky shoots depend on moon phase: plan around a new moon for the darkest conditions in the Mackenzie region.
Weather in the South Island changes quickly, so build contingency days into any itinerary rather than expecting a single attempt at each location to succeed.
Why the Mackenzie region is a magnet for astrophotographers
The Aoraki Mackenzie International Dark Sky Reserve is the largest dark sky reserve in the Southern Hemisphere by area, and most of its land area ranks Bortle Class 1, the darkest classification on the scale. That combination puts the Milky Way, star trails, and even faint nebulae within reach of a standard camera setup.
Most of the reserve's land area sits at Bortle Class 1, meaning artificial light pollution is essentially absent across a large stretch of the Mackenzie basin.
For technique, pair a fast wide-angle lens (14-24mm, f/2.8 or faster) with exposures in the 10 to 20 second range to avoid star trailing, and include a lit foreground element such as a lakeshore or mountain silhouette for scale. Plan foreground composition before dark, since precomposing at dusk and returning after astronomical twilight saves time and frustration once the sky is fully black.

The region also supports active dark-sky stewardship: a certification scheme exists for local homes and businesses that comply with lighting guidelines, and photographers can support that effort by avoiding unnecessary light spill from vehicles or headlamps near certified properties.
Pro Tip: Shoot a test frame at ISO 3200 before committing to a full sequence: it reveals foreground exposure and framing issues faster than reviewing a single long exposure.
Staying safe and legal on conservation land
Much of the South Island's best scenery sits on land managed by the Department of Conservation, which means safety and permit rules apply before you set up a tripod.
- Fiordland routes like the George Sound Route can take multiple days one way and become impassable after heavy rain, so check conditions with the Fiordland Visitor Centre before departing.
- Carry a personal locator beacon or satellite messenger on remote or multi-day routes, since river crossings and rapidly changing weather are common in alpine and Fiordland environments.
- Expect paid parking at major hotspots, typically for a small per-hour or per-day fee, and use designated car parks rather than roadside verges.
- Drones on conservation land fall under DOC's zone-based system, where green zones can be approved quickly while orange and red zones require case-by-case review and fees, so check the drone map and carry your permit before flying.
Gear and technique for South Island conditions
The island's mix of glacial water, alpine light, and clear night skies calls for a focused kit rather than an exhaustive one.
- A wide-angle lens (16-24mm) covers most landscape and astro compositions, while a short telephoto (70-200mm) isolates peaks and compresses distant ridgelines.
- A circular polarizer cuts glare on lakes like Pukaki and Matheson, and a graduated neutral density filter balances bright skies against darker foregrounds at sunrise and sunset.
- A sturdy tripod is essential for long exposures at waterfalls and glaciers, and an intervalometer helps with astro sequences or exposure bracketing for high dynamic range scenes.
- Cold weather drains batteries fast, so carry spares in an inside pocket and keep your camera body shielded from wind when possible.
Pro Tip: Use foreground elements like boulders, jetties, or tussock grass to anchor wide shots: they give scale to landscapes that can otherwise feel flat in a single frame.
Building a realistic South Island itinerary
A seven-day loop covering Tekapo, Pukaki, Aoraki/Mount Cook, Wanaka, Queenstown, and Milford Sound is achievable if you accept early starts and limit driving to two to three hours between bases. Prioritize Milford Sound and Aoraki/Mount Cook, since both depend heavily on weather.
A fourteen-day route allows time for Fiordland's quieter corners, West Coast glaciers like Franz Josef, and a genuine attempt at a remote Fiordland track if conditions allow. Book accommodation in Queenstown and Wanaka well ahead during summer, and build at least two contingency days into any itinerary for weather delays, particularly around Milford Sound and the high country.
Photographing the South Island's wildlife responsibly
The South Island offers genuine wildlife photography opportunities, from Fiordland's fur seal colonies to the yellow-eyed penguins found along the Otago coast and the seabirds that gather around Kaikoura's marine environment. A telephoto lens in the 300mm to 500mm range keeps you at a respectful distance without disturbing feeding or nesting behavior.

Approach any wildlife encounter slowly and avoid direct eye contact with seals, which can read prolonged staring as a threat. Never bait or feed animals to get a shot, and give nesting birds a wide berth, particularly during breeding season. DOC's drone rules include minimum distance requirements from wildlife, so check the relevant zone conditions before flying near colonies or coastal cliffs. Patience beats proximity here: a longer lens and a stationary position for twenty or thirty minutes will often produce a more natural image than moving in close.
Cultural moments and local events worth photographing
Beyond landscapes, the South Island offers photography opportunities tied to Māori culture and regional events. Small-town agricultural shows, seasonal festivals, and Māori cultural performances in towns like Te Anau or Queenstown give photographers a chance to document local life alongside the scenery.
Always ask permission before photographing people at cultural events, and be mindful that some ceremonial elements may be considered sacred or restricted from public photography. Local visitor centers can advise on which events welcome photographers and which require particular sensitivity. These moments add depth to a South Island portfolio that otherwise leans heavily on empty landscapes, and they reward photographers willing to slow down and engage with a place rather than simply passing through it.
Editing South Island landscapes for accurate color and mood
South Island light tends toward cool blues in alpine lakes and warm golds at sunrise on tussock country, so white balance adjustments in post often matter more here than heavy-handed color grading. Start with a modest lift to shadows in glacier and lake shots to recover detail in ice and water without flattening contrast.
For astro images from the Mackenzie region, stack multiple exposures where possible to reduce noise, and keep star colors natural rather than pushing saturation too far. Graduated adjustments in software like Adobe Lightroom or Capture One help balance bright skies against darker foregrounds without the harsh lines a physical filter sometimes leaves. Resist the temptation to oversaturate turquoise lakes: Tekapo and Pukaki already carry striking natural color, and restraint in editing tends to produce images that hold up better over time.
What I prioritize when I plan a South Island shoot
Chasing every location on a list rarely produces your best work. I favor fewer places shot properly under the right light over a rushed circuit, and Mackenzie's night skies are worth building an entire evening around. For more South Island planning notes, see our New Zealand landscape guide.
— Mark
Learning and bringing home South Island imagery through Mark Gray Gallery
If the planning above has you thinking about guided instruction rather than solo trial and error, available 1 Day Photography Courses and multi-day Photography Tours cover composition, light, and camera technique in small groups led by experienced photographers.

For those who would rather bring finished South Island imagery home without packing a camera, our Limited Edition Prints are produced from panoramic medium format film, and commercial clients can explore Image Licensing for brochures, signage, and websites. Browse the courses page to check upcoming dates and reserve a place.
Sources
FAQ
What is the 3:1 rule in photography?
The 3:1 rule refers to lighting ratios in portrait photography, where the key light is three times brighter than the fill light, rather than a landscape composition rule. It is not directly related to South Island landscape shooting, where composition guides like the rule of thirds are more commonly applied.
What should I not miss on the South Island of New Zealand?
Lake Tekapo, Lake Pukaki, Aoraki/Mount Cook, Wanaka, and Milford Sound form the core of most photography itineraries, each offering a distinct combination of water, mountains, and light. The Mackenzie region adds a further reason to stay overnight, given its dark-sky status for astrophotography.
What is the most stunning place in New Zealand?
Preferences vary, but Milford Sound and the Aoraki/Mount Cook area are consistently named among the South Island's most photographed landscapes for their scale and dramatic light. Lake Matheson's mirror reflections of Aoraki/Mount Cook are also frequently cited as a standout scene.
Who are some of the best photographers in New Zealand?
New Zealand has a strong community of landscape and astrophotographers working across the South Island, many of whom specialize in Fiordland and Mackenzie region imagery. Mark Gray, an internationally recognized landscape photographer whose prints are collected in 32 countries, has photographed extensively across New Zealand alongside his work in other countries.