
Prioritize the Great Eastern Drive combined with Cradle Mountain, Bay of Fires, and Freycinet. Together they deliver Tasmania's most photogenic coastlines, alpine reflections, and waterfalls inside one compact driving loop. Give yourself enough days to fully enjoy the experience, favor the months from March through August for dramatic light and thinner crowds, and build in buffer days. Weather in Tasmania rewards patience far more than mileage.
TL;DR:
- The 8 to 10 day itinerary most effectively balances travel time and optimal shooting conditions across Tasmania's major coastal locations, including Freycinet, Bay of Fires, and Cradle Mountain.
- Weather and light conditions significantly influence photo quality, making buffer days and flexible schedules essential for capturing the best shots.
- Roads are sealed along the Great Eastern Drive, allowing a standard rental car to handle the route without requiring four-wheel drive, which simplifies logistics for photographers.
- Shooting locations like Maria Island and Bruny Island require tide and wildlife considerations to maximize photo opportunities while maintaining ethical wildlife practices.
- Essential gear includes sturdy tripods, filters, weather protection, and lenses ranging from wide-angle to telephoto, with techniques focused on in-camera exposure adjustments to handle Tasmania’s fast-changing light.
Table of Contents
- Which Itinerary Fits Your Timeline: 5, 10, or 14 Days?
- Where to Shoot: A Location-by-Location Field Guide
- How Do You Get There and Get Around?
- What Gear and Techniques Work Best in Tasmania?
- How Do You Photograph Wildlife Safely and Ethically?
- A Working Photographer's Take on the Self-Drive Question
- Guided Options and Prints If You Want a Head Start
- Sources
- FAQ
Which Itinerary Fits Your Timeline: 5, 10, or 14 Days?
Every itinerary below assumes you're prioritizing light conditions over just covering distance. A photographer's day starts before the sun and often ends after it, which changes how you plan drive times compared to a standard tourist loop. Choose the version that matches how much flexibility you can afford, since weather in Tasmania rarely respects a tight schedule.
Compact 5 to 7 day: the highlight reel
This version strips the trip down to three anchor locations and accepts that you won't see everything. It works if you're flying into Hobart and out of Launceston, or looping back to Hobart.
- Day 1: Arrive in Hobart, collect your vehicle, drive to Freycinet National Park (about 2.5 hours). Scout The Hazards from the Coles Bay foreshore before dinner.
- Day 2: Sunrise hike to the Wineglass Bay lookout (roughly 1 to 1.5 hours return on a moderate track), then a second attempt at the summit or beach if cloud ruins the first light. Evening at Honeymoon Bay for a softer, easier sunset alternative.
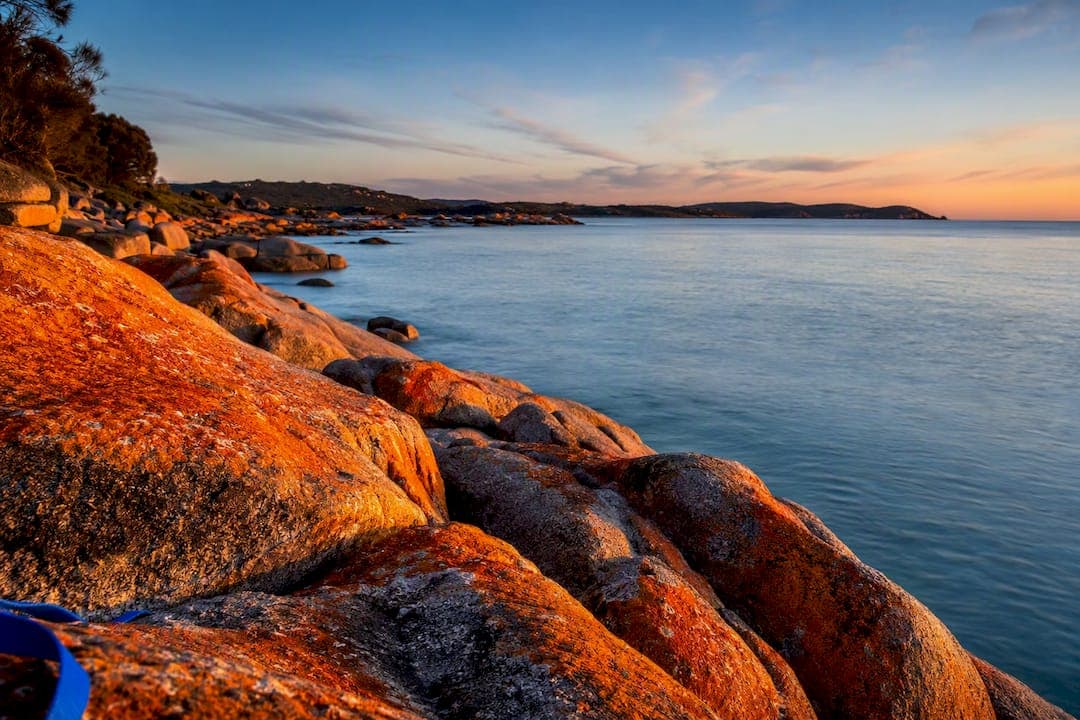
- Day 3: Drive north to the Bay of Fires (around 2.5 hours). Afternoon scouting of the lichen-covered granite boulders near the Gardens; sunset shoot there.
- Day 4: Early light again at the Bay of Fires (the boulders photograph differently in morning side light versus afternoon glow), then push toward Cradle Mountain (about 4 hours, plan for a late arrival).
- Day 5 to 6: Dawn at Dove Lake boatshed. Budget two mornings here if you can. One clean, windless reflection morning is worth more than four rushed ones, and Tasmania's alpine weather changes fast.
- Day 7: Return drive to Launceston or Hobart, with a flex morning built in for a re-shoot if day 2 or the Cradle Mountain mornings got fogged out.
This version skips Mount Field, Maria Island, Bruny Island, and the Tarkine entirely. If those are non-negotiable for you, move to the balanced itinerary.
Balanced 8 to 10 day: the Great Eastern Drive loop
This is the itinerary most enthusiast photographers should actually book. It follows the Great Eastern Drive, a route covering roughly 730 kilometers once you factor in the detours to Port Arthur, Maria Island, Freycinet, and the Bay of Fires. Researchers at the University of Tasmania have flagged it as one of the state's biggest tourism draws, and for photographers, it strings together almost every coastal subject worth shooting in one continuous line.
- Day 1: Hobart arrival, afternoon at the Tessellated Pavement near Eaglehawk Neck en route to Port Arthur. Late light hits the fractured rock shelf well.
- Day 2: Port Arthur Historic Site for early, quiet light on the sandstone ruins, then ferry or drive connection toward Maria Island for an afternoon arrival.
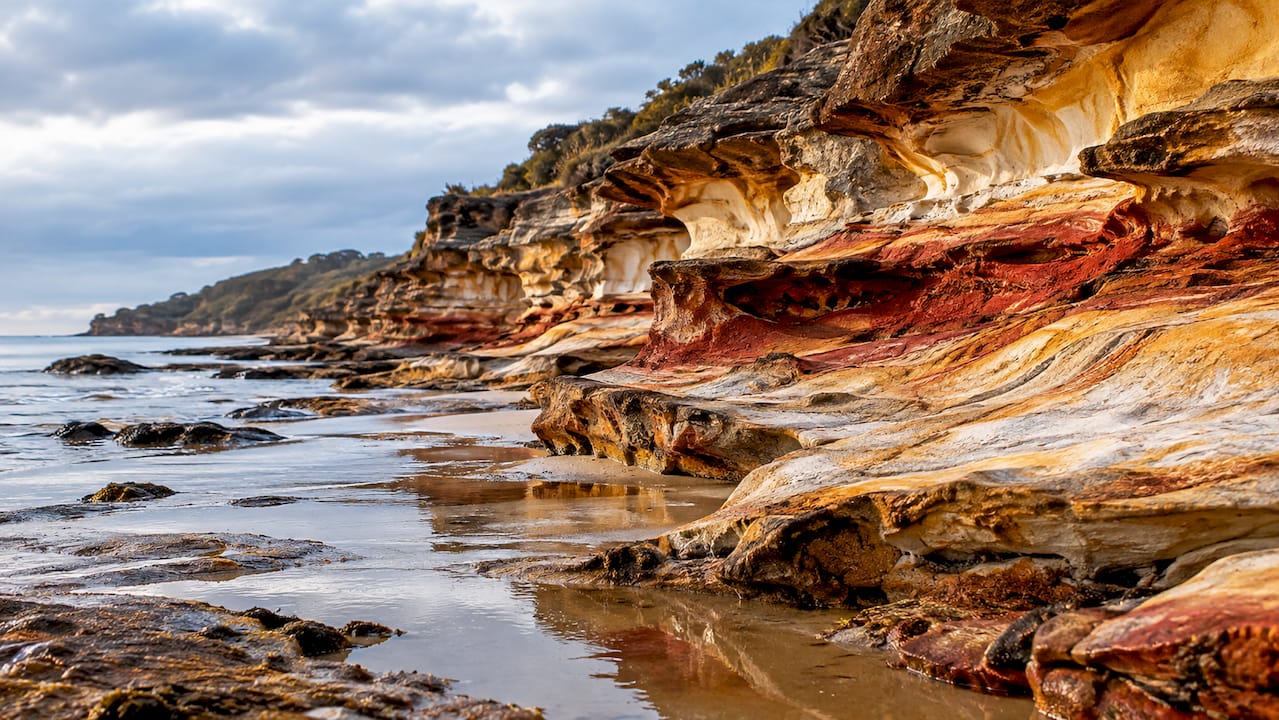
- Day 3: Full day on Maria Island photographing the Painted Cliffs (best near low tide, so check tide tables before you go) and wombats grazing near Darlington. This island has no vehicles, so plan foot access time into your shot list.
- Day 4: Return to the mainland, drive to Freycinet (around 2 hours from the Maria Island ferry terminal at Triabunna). Afternoon scout of The Hazards.
- Day 5: Sunrise at Wineglass Bay lookout. Afternoon rest or a second location scout, since the sunrise hike is demanding enough to need recovery time before an evening shoot.
- Day 6: Drive to the Bay of Fires (about 2.5 hours). Sunset on the lichen boulders at Binalong Bay or the Gardens.
- Day 7: Morning repeat at the Bay of Fires, then push inland toward Cradle Mountain (roughly 4 to 5 hours, so leave by midmorning).
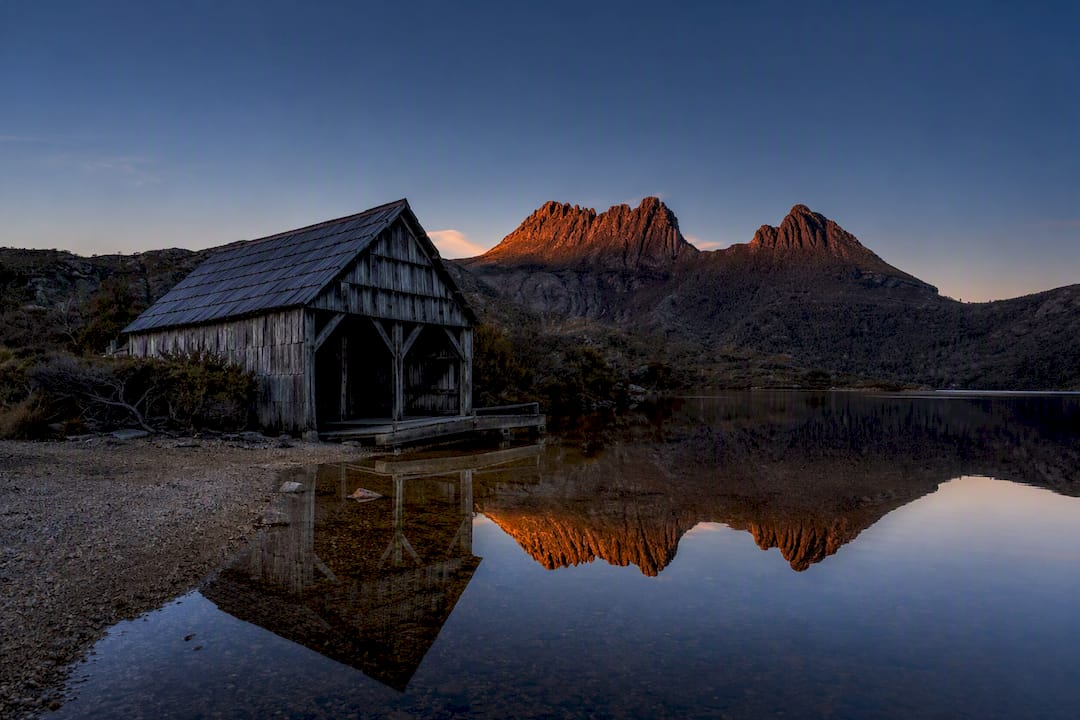
- Day 8: Dawn at Dove Lake boatshed, the single most photographed reflection shot in the state. Afternoon walk partway around the lake circuit for alternate compositions away from the crowd at the boatshed itself.
- Day 9: Buffer day. Use it for a second Cradle Mountain sunrise if clouds ruined day 8, or detour to Mount Field National Park (about 1.5 hours from Hobart) for Russell Falls and Horseshoe Falls on your way back south.
- Day 10: Return to Hobart or Launceston, with time for a final stop if a location earlier in the trip needs revisiting.
The Great Eastern Drive's roads are sealed the entire way, and a standard hire car handles the route without issue. That matters for photographers hauling tripods and filter kits. You don't need a 4WD budget line for this loop.
Relaxed 12 to 14 day: the full circumnavigation
This version adds Bruny Island and the Tarkine (takayna) in the northwest, turning the trip into a genuine circuit of the state rather than an east-coast-plus-highlands run.
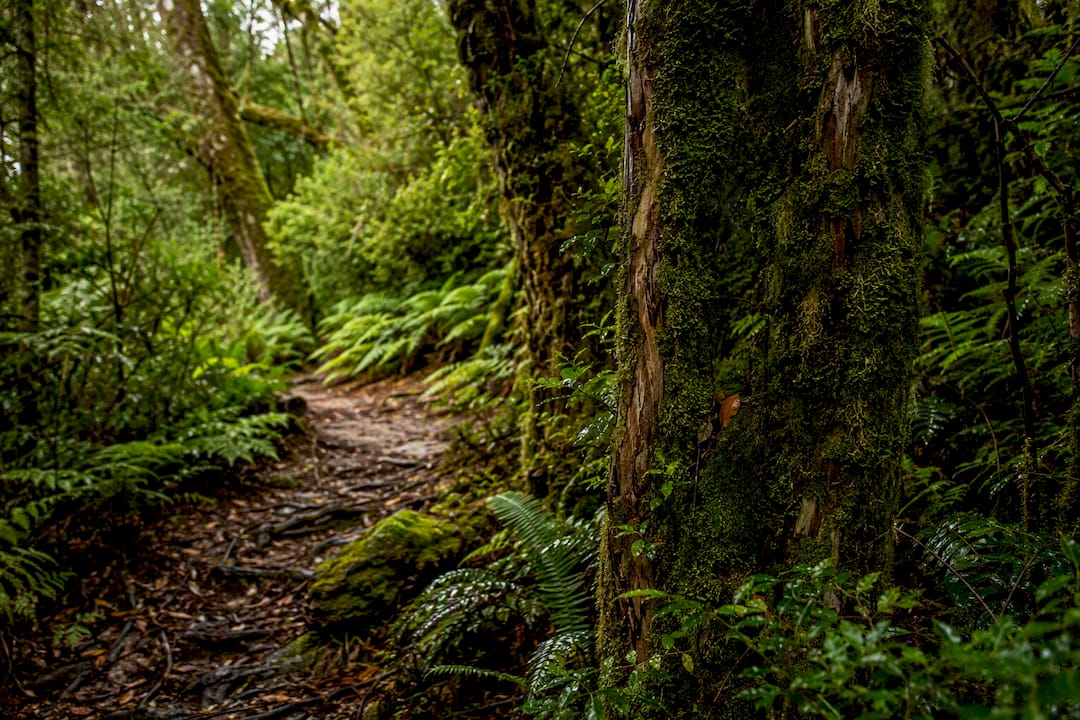
Extend the balanced itinerary by inserting Bruny Island between Hobart and Port Arthur (a day trip via the Bruny Island ferry from Kettering, focused on the Neck lookout and Cape Bruny Lighthouse) and adding three to four days after Cradle Mountain to reach the Tarkine's rainforest and coastal sections around Arthur River. The Tarkine rewards slower, moodier shooting: temperate rainforest, moss-covered myrtle, and a wilder coastline than anything on the east side of the state. Expect gravel sections on some Tarkine access roads, which slows your daily average and should factor into your fuel and time planning.
Whichever version you choose, treat the itinerary as a skeleton, not a script. Tasmania's weather turns fast, and the photographers who get the best results plan for delay, not just distance.
Where to Shoot: A Location-by-Location Field Guide
Each of these locations rewards a different approach. Knowing the access time and light window before you arrive saves you from wasting a sunrise on the wrong angle.
Bay of Fires. The orange lichen on the granite boulders is the whole point, and it photographs best in low, raking light rather than the flat overhead sun of midday. The named stretch runs close to 50 kilometers of coastline, so don't fixate on one pull-off. Binalong Bay and the Gardens are the most photographed access points; walk 10 to 15 minutes further along the shoreline from either car park and you'll likely have a boulder formation entirely to yourself. A wide-angle lens (16 to 24mm on a full-frame body) captures the boulder-to-horizon relationship well, and a polarizing filter cuts glare off wet rock after rain.
Freycinet National Park (Wineglass Bay and The Hazards). The classic lookout shot is a moderate 1 to 1.5 hour return hike, steep enough that arriving in the dark for sunrise requires a headlamp and caution on the track. The Hazards themselves, the pink granite peaks that frame the bay, catch superb alpine glow from the Coles Bay foreshore at sunset without any hiking at all. That's your fallback if the lookout track feels like too much before dawn.
Cradle Mountain (Dove Lake boatshed). This is arguably Tasmania's most reproduced image, and for good reason. Windless dawn conditions turn the lake into a mirror for the boatshed and the mountain behind it. Parks Tasmania maintains current access details for the park, and it's worth checking before you go since high-altitude weather here can close tracks or restrict access even outside peak winter. Arrive at least 30 minutes before official sunrise; the reflection light often peaks before the sun clears the ridge. A mid-range zoom (24 to 70mm) covers both the tight boatshed composition and wider lake shots without a lens change in the cold.
Mount Field National Park (Russell Falls and Horseshoe Falls). About 1.5 hours from Hobart, this is the easiest waterfall photography in the state. Russell Falls has a flat, well-maintained path suitable even in poor weather, and its tiered drop photographs well with a neutral density filter for smoothing the water at shutter speeds around 1 to 2 seconds. Horseshoe Falls, a short walk further up the same track, gives a tighter, more intimate composition if Russell Falls feels too popular when you arrive.
Maria Island. No vehicles are permitted, which forces a slower, more deliberate pace that suits photography better than most locations on this list. The Painted Cliffs, streaked with iron-oxide patterns, need a low tide to expose the full formation, so check tide tables before booking your ferry slot. Wombats graze in open daylight near Darlington in numbers rarely seen elsewhere in Tasmania, giving you a genuine wildlife photography opportunity without a long lens requirement, though a 100 to 200mm range still helps for tighter portraits.
Port Arthur and the Tessellated Pavement. The Tessellated Pavement near Eaglehawk Neck is a naturally fractured rock shelf that looks almost engineered, and it photographs best within an hour of low tide when the tessellated pattern sits just above the waterline. Port Arthur Historic Site itself rewards early arrival, both for the empty-of-tourists light and because the sandstone ruins take on a warmer tone in first light than under midday sun.
Bruny Island. A short ferry ride from Kettering puts you at the Neck lookout, a narrow isthmus with sweeping views in both directions, and further south at Cape Bruny Lighthouse for rugged coastal cliffs. Little penguins and short-tailed shearwaters nest near the Neck; approach any burrow area at dusk slowly and keep well back, since flash photography and close approaches disturb nesting birds.
Tarkine (takayna). The least crowded location on this list by a wide margin. Rainforest sections around the Tarkine Drive suit a mid-zoom lens and overcast light, which flatters mossy greens far better than harsh sun does. The coastal edge near Arthur River adds a wilder, more exposed seascape than anything on the east coast.
Pro Tip: Check tide tables before you commit a sunrise to the Bay of Fires or the Tessellated Pavement. High tide can submerge the exact features that make both locations worth photographing, and there's no recovering that lost morning.
How Do You Get There and Get Around?
Most photographers fly into Hobart or Launceston, though the Spirit of Tasmania ferry from Melbourne is worth considering if you want to bring your own vehicle loaded with gear rather than pack it into checked luggage. A standard rental car handles the Great Eastern Drive and the Cradle Mountain approach without trouble, since those roads are sealed throughout. A campervan adds flexibility for chasing last-light locations without racing back to a booked room, at the cost of slower handling on some of the tighter coastal bends.
- Allow at least 5 to 6 days just for the east-coast Great Eastern Drive if photography, not just sightseeing, is the goal.
- Check Parks Tasmania for current park pass requirements before you arrive at Cradle Mountain or Mount Field, since both sit inside fee-paying reserves.
- If you plan to license any images commercially, confirm permit requirements with Parks Tasmania's filming and photography guidance well before your trip, not on the morning you arrive.
- Gravel sections appear on some Tarkine access roads and a few minor detours off the main coastal route; a standard car manages them at reduced speed, but don't push a low-clearance vehicle hard on unsealed stretches after rain.
- High-altitude roads and lookouts near Mount Wellington and Cradle Mountain occasionally close for weather even outside deep winter, so build a check into your morning routine rather than assuming yesterday's conditions still apply.
- Wildlife crosses roads heavily at dawn and dusk, exactly the hours you'll be driving to shooting locations. Slow down on unlit stretches and treat every rural road as a potential wombat or wallaby crossing.
The Discover Tasmania mobile app gives real-time road and safety updates, which is genuinely useful when a closure could cost you a sunrise you've built an entire day around.
What Gear and Techniques Work Best in Tasmania?
Tasmania's light changes fast, and the kit that works for a calm alpine reflection won't necessarily hold up on an exposed coastline an hour later.
- Tripod with a solid head. Non-negotiable for the long exposures that smooth waterfalls at Mount Field or blur seascapes at the Bay of Fires.
- Neutral density and polarizing filters. ND filters let you drag shutter speed on moving water; a polarizer cuts glare on wet rock and saturates skies over The Hazards.
- Weatherproof cover or a rain sleeve. The Tarkine and highland locations see sudden weather shifts regardless of season.
- Spare batteries and a dual card-backup workflow. Cold mornings at Cradle Mountain drain batteries faster than you'd expect.
- A wide-angle (16 to 24mm), a mid-zoom (24 to 70mm), and a telephoto (at least 100 to 400mm) for wildlife. The telephoto range matters most on Maria Island and Bruny Island, where wombats, penguins, and seabirds are the subject.
For long exposure seascapes, start around f/8 to f/11 for depth of field, meter for the highlights, and bracket two or three frames if the dynamic range between sky and rock is wide. Nature TTL's guidance on Tasmanian shooting backs this up: wide-angle glass and filtration do more work here than any amount of post-processing, particularly at waterfall and coastal locations where getting the exposure right in-camera saves hours later.
Pro Tip: Shoot RAW and slightly underexpose seascapes by a third of a stop in bright coastal light. Tasmania's water and sky often blow out highlights before you notice on a small camera screen.
How Do You Photograph Wildlife Safely and Ethically?
Tasmania's wildlife is a genuine draw, but the same dawn and dusk hours that produce the best light also put you in direct contact with animals that don't expect company.
- Keep distance from wombats, wallabies, and seabirds. A longer lens gets you the shot without forcing you closer than the animal is comfortable with.
- Never feed wildlife to draw it closer for a photo. It changes animal behavior in ways that outlast your visit.
- Check both Parks Tasmania and CASA drone rules before flying anywhere in a national park. Restrictions vary by location and season, and many reserves prohibit drone use outright near nesting sites.
- If you're shooting for commercial use or running a paid tour, written permission is often required before you set foot in the park with that intent.
- Watch for wildlife on roads at dawn and dusk, and favor sealed roads unless you know both the vehicle and the route well.
A Working Photographer's Take on the Self-Drive Question
The gap between a good Tasmania trip and a great one usually comes down to buffer days, not gear. Photographers who build in a spare morning at Cradle Mountain or the Bay of Fires almost always come home with a stronger shot than the ones who treated the itinerary as a fixed schedule to defend. Central bases matter too: staying near Coles Bay or Cradle Mountain village rather than commuting in from Hobart each day buys you the flexibility to chase a break in the weather instead of watching it happen through a windshield.
Where a small-group workshop earns its cost is local knowledge. Someone who's shot Dove Lake through forty different weather systems knows which cloud pattern means wait twenty minutes, and which one means pack up. That kind of timing and composition coaching is hard to replicate solo on a first visit, and it comes with a safety net on exposed coastal and alpine ground that solo travel doesn't offer.
If you've got the time and a flexible schedule, self-driving with buffer days works well. If your window is tight and you want the highest hit rate on a short trip, a guided option closes that gap fast.
— Mark
Guided Options and Prints If You Want a Head Start
If you'd rather not spend your trip guessing which cloud break is worth chasing, a guided option shortcuts that learning curve entirely. A multi-day landscape photography tour covers the exact locations in this guide with the timing, access, and composition decisions already worked out. Small-group workshops run with the kind of local knowledge that takes years of solo trips to build, which is a direct advantage if your Tasmania window is fixed and you want the highest possible hit rate on your shots.

If you want targeted coaching rather than a full multi-day commitment, a 1-day photography course sharpens technique at a single location without extending your itinerary. Prefer one-on-one attention over a group setting? Private lessons adapt to your pace and gear. And if you'd rather bring home a finished image than chase your own, browse the limited edition prints gallery, shot on panoramic medium format film across locations much like the ones in this guide. Ready to lock in dates? Check current workshop availability directly on the tours page.
Sources
- UTAS news: Great Eastern Drive research
- Tasmania Trails: Hobart to Launceston East Coast Road Trip (Great Eastern Drive) — 2026
- Nature TTL: Nature photography guide to Tasmania
FAQ
What are the best places to take pictures in Tasmania?
Bay of Fires, Freycinet's Wineglass Bay and The Hazards, Cradle Mountain's Dove Lake boatshed, Mount Field's waterfalls, Maria Island, Port Arthur and the Tessellated Pavement, Bruny Island, and the Tarkine cover the state's strongest photography locations.
What is the best itinerary for a road trip in Tasmania?
An 8 to 10 day loop combining the Great Eastern Drive with a Cradle Mountain detour balances travel time against shooting time best, giving you sunrise and sunset windows at every major location without rushing between them.
What is the most scenic drive in Tasmania?
The Great Eastern Drive is widely considered the state's premier scenic route, covering roughly 730 kilometers with detours to Port Arthur, Maria Island, Freycinet, and the Bay of Fires.
How long would it take to do a road trip around Tasmania?
A full circumnavigation including the Tarkine and Bruny Island needs 12 to 14 days at a comfortable pace, while the east-coast Great Eastern Drive alone needs a minimum of 5 to 6 days for photography-focused travel.
Do I need a permit to photograph in Tasmania's national parks?
Personal photography doesn't require a permit, but certain commercial uses do require written permission from Parks Tasmania, so check before any shoot intended for licensing or paid tour use.