
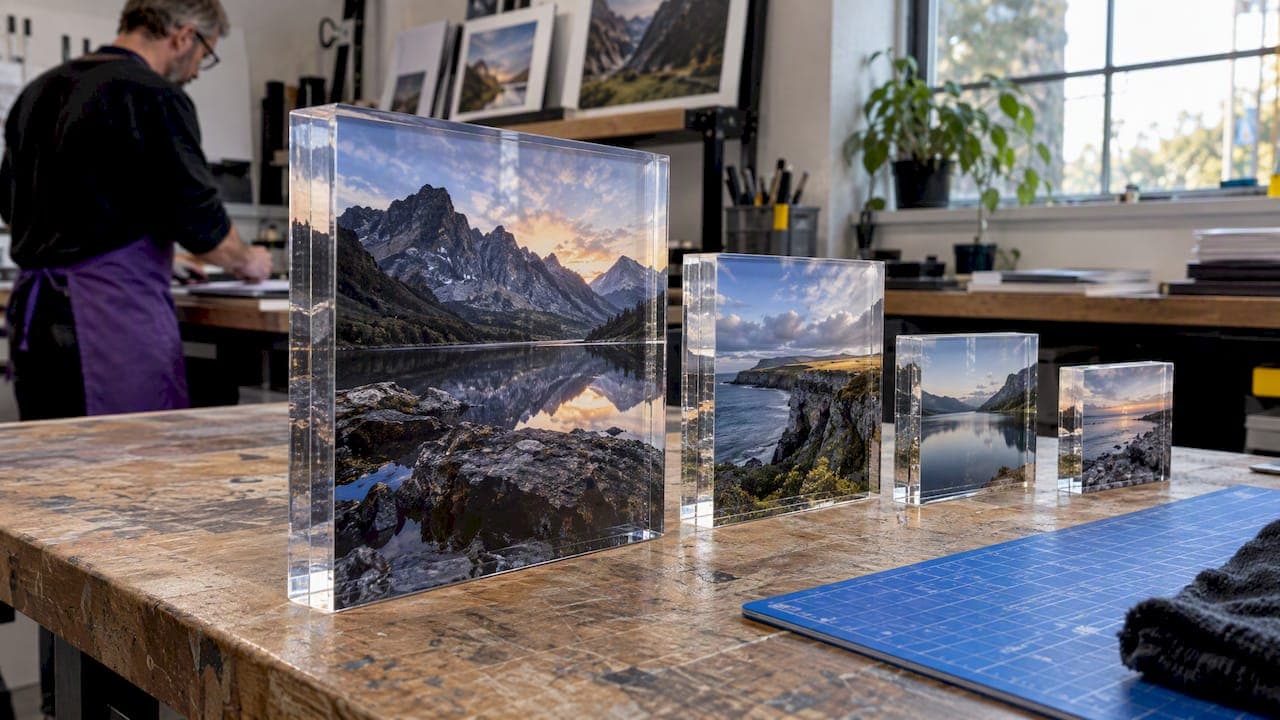
Most acrylic photo blocks fall between a 5x5-inch keepsake and a 16x20-inch feature piece, with 20mm to 25mm of depth being the standard across the range. The one-sentence rule we rely on: choose a small block for a gift or desk keepsake, a medium block for a mantel or shelf, and a large block when the photo itself is the centerpiece of a room.
TL;DR:
- Check the image before choosing a size: sharp 300 PPI output needs about 1,200 by 1,800 pixels for a 4x6 inch block.
- Measure the display surface first; aim for a block about one third of its width, with 2 to 3cm of clearance from the edge.
- A 5x7 or 6x8 inch block suits common gifts, while a living room feature viewed from a sofa generally needs 11x14 inches or larger.
- Face mounted blocks deliver clearer optics but cannot be changed later; magnetic sandwich designs are thinner, at 10mm to 20mm, and let you swap photos.
- Ask for UV stabilized or conservation grade acrylic for valued photos, and keep blocks out of direct sunlight and away from temperature swings.
Table of Contents
- 1. Standard Acrylic Block Sizes and Formats
- 2. How to Choose the Right Size for Your Space or a Gift
- 3. Image Resolution and Pixel Requirements for Each Size
- 4. Thickness, Finish, and How Optical Effects Change With Depth
- 5. Mounting, Display Options, and Placement Tips
- 6. Care, Longevity, and UV Protection to Ask About
- 7. Why This Guidance Comes From Mark Gray's Print Experience
- 8. What Actually Matters When Sizing an Acrylic Block
- Where to View Sizes and Place an Order
- FAQ
- Sources
1. Standard Acrylic Block Sizes and Formats
Acrylic photo blocks come in three broad families: squares, rectangular portrait or landscape formats, and panoramic or novelty shapes. Squares dominate the small end of the range because they suit a single subject, a close crop, or a pet portrait without forcing an awkward composition.
- Mini squares: 50x50mm (5x5cm), popular as a desk keepsake or a small gift add-on.
- Small portrait or landscape: 4x6 inches (approximately 10x15cm), the most common starting size for a first acrylic block.
- Mid-range formats: 5x7 inches and 6x8 inches, both well suited to a bedside table or a bookshelf.
- Larger display sizes: 8x10 inches and 11x14 inches, which read clearly from across a room.
- Panoramic and long formats: wide strips built for a horizon shot, a skyline, or a multi-subject family photo.
- Novelty shapes: hearts and other cut forms, generally reserved for sentimental gifts rather than gallery display.
Custom sizing is also common, since a photo lab producing blocks to order can usually accommodate a width or height outside the standard list, provided the image resolution supports it. Depth tends to track with size: smaller blocks are often finished at a slimmer profile, while anything from 6x8 inches upward is usually cut to the fuller 20mm to 25mm depth that gives the image its sense of dimension. A 5x7 gift block and an 11x14 feature piece can share the same photograph, cropped differently, and still each feel intentional rather than stretched.
2. How to Choose the Right Size for Your Space or a Gift
Picking a size is less about the photo and more about where it will live. A block that looks perfect on a photographer's monitor can overwhelm a narrow shelf or disappear on a large mantel, so we work backward from the surface before the subject.
- Measure the surface first. Note the width of the shelf, desk, or mantel before shopping for a size.
- Apply the one-third rule. Scale the block so it covers roughly one third of the available tabletop or shelf width for visual balance, leaving 2 to 3cm of clearance from the edge.
- Check viewing distance. A desk block viewed at arm's length can stay small, while a living room feature piece viewed from a sofa needs the 11x14 or larger range to register clearly.
- Match the size to the recipient. A 5x7 or 6x8 suits a housewarming or anniversary gift, while a mini square works well as a stocking stuffer or add-on.
- Plan groupings in odd numbers. Three blocks in graduated sizes, for example a 4x6, a 5x7, and an 8x10, create a more natural arrangement than a matched pair.
Pro Tip: When in doubt between two sizes, size up only if the display surface has room to spare; a slightly undersized block still looks deliberate, while an oversized one looks accidental.
3. Image Resolution and Pixel Requirements for Each Size
Before settling on a size, confirm the image file can actually support it. Printable size is a direct function of pixel dimensions and resolution, and the standard for photographic print quality is 300 pixels per inch, meaning a sharp 4x6-inch print needs an image roughly 1,200 by 1,800 pixels.
- 4x6 inches: approximately 1,200 x 1,800 pixels at 300 PPI.
- 5x7 inches: approximately 1,500 x 2,100 pixels at 300 PPI.
- 8x10 inches: approximately 2,400 x 3,000 pixels at 300 PPI.
- 11x14 inches: approximately 3,300 x 4,200 pixels at 300 PPI.
The quick math: dividing an image's pixel width by 300 gives the maximum print width in inches without resampling, which is the fastest way to check a file before ordering a block.
Cropping for the block's aspect ratio comes next, and it pays to protect the parts of the image that matter most, keeping faces or horizon lines away from the edge where mounting hardware or the block's frame might sit. When a file falls short of the pixel count a chosen size needs, the honest options are to upscale using interpolation software or simply choose the next size down; a heavily upscaled image rarely looks as crisp as a correctly sized original.

4. Thickness, Finish, and How Optical Effects Change With Depth
Depth is not just a specification, it is part of how the image reads. A thicker block refracts light through more acrylic, which deepens shadows and adds a sense of dimension that a thin print behind glass cannot match.
- Standard depth range: 20mm to 25mm for most desktop and feature-size blocks.
- Face-mount construction: the photograph is permanently bonded to the acrylic, which typically delivers the clearest optical result but cannot be swapped once finished.
- Magnetic sandwich construction: the print sits between two acrylic layers held by magnets, usually at a slimmer 10mm to 20mm profile, trading some clarity for the ability to change the photo later.
- Edge polish: a smoothly polished, beveled edge is one of the clearest visual signals of a well-finished block, since a rough or machine-cut edge catches dust and light unevenly.
- Conservation-grade material: worth requesting whenever the photo has sentimental or lasting value, since not every acrylic sheet ages the same way.
Our acrylic face mounting guide covers the dibond backing process in more detail for anyone deciding between a permanent mount and a swappable one.
5. Mounting, Display Options, and Placement Tips
Most acrylic blocks are freestanding and need no hardware at all, which is part of their appeal over a framed print. A block simply rests on its base, though anything in the 11x14 range or larger benefits from a felt pad underneath to protect the shelf and keep the block from sliding.
- Freestanding placement suits desks, mantels, and shelves without the need for drilling or wall anchors.
- Grouped displays work best in odd numbers with graduated sizes, mixing a portrait and a landscape orientation for visual rhythm.
- Shelf safety calls for a few centimeters of clearance on either side and a surface rated to hold the block's weight, since larger acrylic pieces are heavier than they look.
- Office or gallery-style displays benefit from consistent spacing between blocks rather than tight clustering, which lets each image register on its own.
For larger or multiple-piece arrangements, our guide to displaying large format prints and our notes on hanging landscape prints correctly carry over well to heavier acrylic pieces.
6. Care, Longevity, and UV Protection to Ask About
Fading and yellowing are the two failures that shorten an acrylic block's life, and both are largely preventable with the right material and placement. Museum and archival standards generally classify UV transmission in tiers: under 5% for general museum-grade material, under 2% for photographs, and under 1% for the highest-priority archival pieces.
- Ask about UV-stabilized acrylic before ordering, since some suppliers explicitly label their Perspex as UV-stabilized while cautioning against prolonged direct sun.
- Avoid direct sunlight and temperature swings, both of which accelerate yellowing regardless of the acrylic's quality.
- Clean with a soft microfiber cloth and a mild, ammonia-free cleaner made for acrylic, never a glass cleaner.
- Request conservation-grade acrylic for anything irreplaceable, since products advertising up to 99% UV block exist specifically for archival use.
Our UV protection guide for prints goes further into what to ask a supplier before committing to a finish.
7. Why This Guidance Comes From Mark Gray's Print Experience
This sizing guidance draws on years of producing fine art prints and acrylic pieces from medium format landscape photography, where resolution, mounting method, and UV stability determine whether a print holds up for decades or fades within a few years. The same technical standards that govern a gallery print, face-mounting precision, correct PPI, and conservation-grade materials, apply directly to acrylic blocks at any size. Readers weighing a mounting method can review our face-mounting and conservation guide and our UV protection notes for the fuller technical picture before ordering.
8. What Actually Matters When Sizing an Acrylic Block
The sizing charts get most of the attention, but they are the easy part. The harder, more neglected step is checking the image file against the size before falling in love with a number on a page, because a gorgeous 11x14 composition built from a 1,200-pixel-wide phone photo will never look as good printed as it does on a screen.

Conventional advice leans heavily on matching size to furniture or wall space, and that matters, but it understates how much a block's thickness changes the emotional read of an image. A 20mm block of a dramatic sky feels substantial in a way a thin print never will, and that depth is often worth prioritizing over simply choosing the largest size a budget allows.
If we had to rank priorities for a first-time buyer, it would run: confirm resolution, then pick depth and finish, then size the piece to the surface. Most people do it in reverse, which is exactly why so many acrylic blocks end up either disappointingly soft or awkwardly oversized for where they sit.
— Mark
Where to View Sizes and Place an Order
We produce our Acrylic Blocks using the same face-mounting and conservation-aware standards covered throughout this guide, so the sizing and resolution advice above applies directly to what we ship. Browsing for yourself beats guessing from a chart, and our product page lists every available size alongside ordering details.

- View current sizes and place an order on the Acrylic Blocks page.
- Postage fees for delivery within Australia and internationally are listed on the shipping information page of our website.
- Pair a block with a Gift Certificate from $50 when the recipient prefers to choose their own image.
If a panoramic landscape shot calls for an especially wide custom format beyond our standard sizes, our large-format print partner at A3M handles bespoke production and finishing for readers planning an unusually long or oversized piece.
FAQ
What are the available sizes for acrylic photo blocks?
Standard sizes typically range from a 50x50mm mini square up through 4x6, 5x7, 6x8, 8x10, and 11x14 inches, with panoramic and custom formats available for wider images. Thickness usually falls between 20mm and 25mm across the range, giving the image a sense of depth regardless of size.
What is a 2x2 acrylic photo block used for?
A 2x2-inch or similarly small square block works best as a novelty keepsake, a desk accent, or an add-on gift rather than a primary display piece. Its small footprint suits a single close-up subject, such as a face or a logo, more than a detailed landscape.
How do I prepare my photo for an acrylic block print?
Start by checking the image's pixel dimensions against the target size at 300 pixels per inch, since that resolution is the standard for sharp photographic prints. Crop to match the block's aspect ratio while keeping key details away from the edges, and choose a smaller size rather than heavily upscaling a low-resolution file.
What size acrylic block should I choose as a gift?
A 5x7 or 6x8-inch block suits most gifting occasions, such as a housewarming or anniversary, while a mini square works well as a smaller add-on gift. For a group photo or a scenic shot meant to anchor a room, an 8x10 or 11x14 gives the image enough presence to work as a feature piece.
Why does acrylic block thickness matter?
Thickness between 20mm and 25mm deepens the optical effect of the print, making colors and shadows appear more three-dimensional than a thinner piece or a standard framed print. Thinner magnetic sandwich blocks, often 10mm to 20mm, trade some of that optical clarity for the ability to swap photos later.
Sources
- Museum-Grade Acrylic Display Cases: UV, Oddy Test & Sealing Specs | Wetop Acrylic
- Digital Image Representation Worksheet — Pixel dimensions, resolution and image size
- Image resolution & print size (The Print Lab, University of Colorado Boulder)
- Perspex VA/VE product specification (Mitchell Group)