

Match your mounting method to what the print is worth and how it will be shown. Reversible hinge and corner methods belong under matboard for original and limited-edition prints, while rigid substrates like gatorboard, styrene, or acrylic face mounts suit frameless display. Dry-mount only inexpensive reproductions where flatness matters more than permanence, and always skip pressure-sensitive tape that isn't archival.
TL;DR:
- Mounting methods should be chosen based on the print's value, size, and display location, with reversible techniques favored for valuable or limited-edition prints.
- Gatorboard is recommended for large prints intended for direct hanging, while styrene suits smaller or mid-size frameless pieces due to its rigidity and resistance to warping.
- Dry-mounting offers flatness but is irreversible, making it appropriate only for inexpensive reproductions, whereas hinge mounting is preferred for originals and limited editions for its reversibility.
- Reversible mounting options like hinges, corners, and conservation supports help preserve both the print and its potential for future reframing or reassessment.
- Proper handling, careful measurement, and choosing archival materials are essential to ensure longevity and protection of the print during mounting and display.
Table of Contents
- Photo Print Mounting Options: Matching Substrate to Print
- Mounting Techniques: Dry-Mount, Hinges, Corners, and Float
- How to Choose the Right Substrate and Technique
- Preparing, Mounting, and Hanging Prints the Right Way
- Notes From Handling Limited Edition Prints
- Why Reversibility Deserves More Weight Than Most Advice Gives It
- Get Your Landscape Prints Mounted and Framed Right
- Sources
Photo Print Mounting Options: Matching Substrate to Print
Every substrate trades off rigidity, weight, and cost differently, and picking the wrong one either shortens a print's life or wastes money on protection it doesn't need. Mounting itself simply means attaching a print to a backing so it stays flat and ready for framing or display, but the substrate underneath that print does most of the heavy lifting.
Matboard comes in single and double weight, and it remains the standard for matted, framed work because it handles well and stays archival when acid-free stock is used. Foamcore is light and easy to cut, which makes it popular for framing and temporary displays, but it warps more readily than denser boards over time.
Gatorboard (sometimes called Gatorfoam) is a different animal entirely. It's dense, rigid, and far more warp resistant than standard foamcore, which is why labs recommend it for large prints meant to hang without a frame. Styrene is a thin, rigid plastic that resists warping at moderate sizes and gives a clean, modern, frameless look for smaller or mid-size prints.
Wood and MDF panels bring a warmer finish to frameless presentation and often arrive ready to hang, which matters if you want a gallery feel without visible hardware. Acrylic face mounts on Dibond or aluminum deliver the glossiest, most contemporary presentation available. They're also the heaviest and most expensive option on this list.
Quick reference by use case:
- Matted, framed originals: double-weight matboard
- Large frameless prints for direct hanging: gatorboard
- Small to mid-size frameless pieces: styrene
- Warm, ready-to-hang wall pieces: wood or MDF panel
- High-gloss contemporary statement pieces: acrylic face mount on Dibond
Mounting Techniques: Dry-Mount, Hinges, Corners, and Float
The technique you choose determines whether your print can ever be removed from its backing again, and that distinction should guide every other decision.
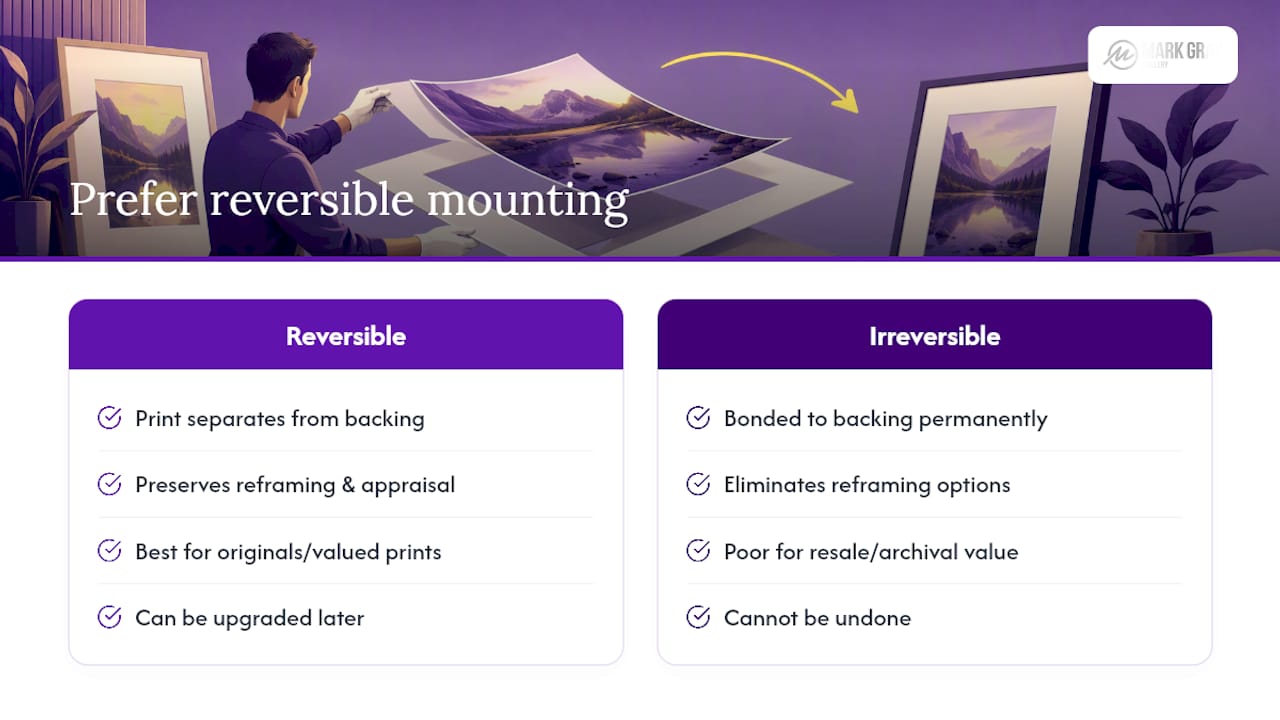
- Dry-mounting uses heat-activated tissue and a mounting press to bond the print permanently and perfectly flat. It's generally considered irreversible, which makes it a fine choice for posters and inexpensive reproductions but a poor one for anything with lasting value.
- Hinge mounting, using T-hinges or folded hinges, is the conservator-preferred method for originals and limited editions. Japanese paper paired with wheat-starch paste, or archival linen tape, holds the print in place while remaining fully reversible.
- Photo corners and corner pockets hold a print without touching its face at all. Size the corners to the print's weight, leave a small clearance for paper expansion, and attach the corners to the backing rather than the print itself.
- Float mounting hinges the print from behind so all four edges, including any deckled paper edge, remain visible against the mat or backing. A gap of a quarter inch to a half inch between print and mat edge is typical.
- Non-adhesive conservation methods, such as paper pockets, slings, and polyester or Mylar supports, avoid adhesive contact with the print entirely and suit prints you may need to reframe, resize, or rehouse later.
Pro Tip: If your print has a deckled or irregular edge that's part of its composition, float mount it. Cropping that edge under a tight mat erases part of what makes the piece distinctive.
How to Choose the Right Substrate and Technique
Three variables decide the right combination almost every time: what the print is worth, how big it is, and where it's going to live.
- Small, inexpensive prints: foamcore behind glass, or simple photo corners if you want to swap prints later.
- Framed fine-art originals: matboard with hinge mounting, always reversible, always archival.
- Limited editions: hinge or corner mounting paired with an archival mat and UV-filtering glazing to protect long-term value.
- Large, unframed gallery pieces: gatorboard for a lighter option, or acrylic face mount on Dibond for a glossier, heavier statement piece.
- Canvas or stretched alternatives: worth considering when you want texture rather than a flat photographic surface.
Budget and conservation pull against each other more than people expect. Archival hinge mounting and acid-free mats cost more upfront, but they protect resale value and prevent the yellowing or embrittlement that non-archival tape causes over years. Dry-mount is genuinely fine for a $20 reproduction you'll replace in five years. It is never fine for a limited-edition print you paid real money for.
Renters and frequent movers should also weigh transportability. A lightweight foamcore mount with adhesive hanging strips travels far better than a heavy acrylic panel that needs proper wall anchors.
Preparing, Mounting, and Hanging Prints the Right Way
Handle prints with clean hands or cotton gloves, work on a clean flat surface, and keep interleaving paper between stacked prints to prevent scuffing. Humidity control in your workspace matters more than most people realize. Paper expands and contracts with moisture, which is exactly why mounted prints need clearance room rather than a rigid, edge-to-edge bond.
Before you mount anything, run through this checklist:
- Measure the print and backing so margins are even on all sides.
- Choose acid-free, archival-rated materials for anything you intend to keep.
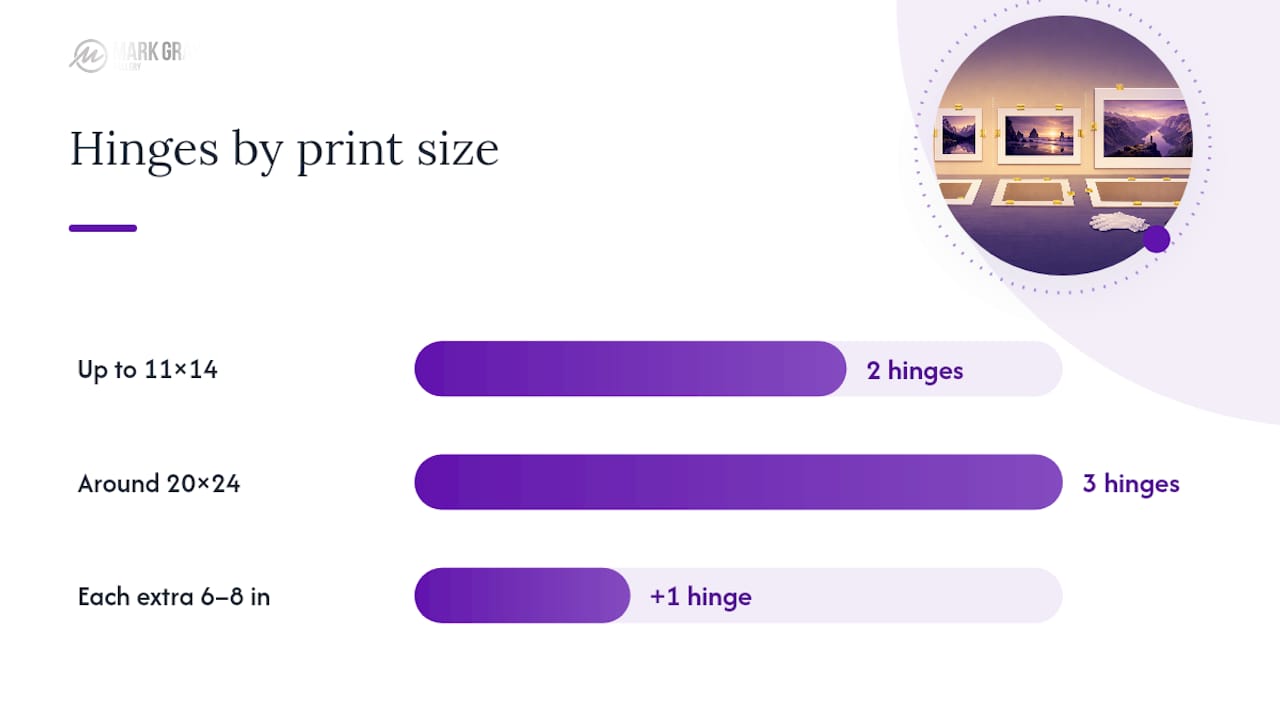
- Use two hinges for prints up to 11x14 inches, three hinges around 20x24 inches, and add roughly one hinge per 6 to 8 inches beyond that for larger works.
- Leave clearance for the paper to expand rather than mounting it drum-tight.
Some prints arrive ready to hang with rear hardware already installed; others need gator hooks, standouts, or a rear frame added separately, and rental walls generally call for lighter, less invasive hardware. When glazing a piece for long-term display, keep the print from touching the glass or plexi directly with spacers, and choose UV-filtering glazing to slow fading. Clean plexi with water and a soft cloth only, since paper towels and household glass cleaners will scratch the surface far more easily than they would scratch actual glass.
Notes From Handling Limited Edition Prints
Working with limited-edition landscape prints day to day teaches you quickly which mounting choices hold up and which ones don't. Acrylic face mounts get reserved for large-format pieces meant to read as contemporary wall statements, where the glossy surface and Dibond backing carry real visual weight. Float mounting gets the nod whenever a print's paper edge is worth showing rather than hiding under a mat.
For readers who want workshop-level detail beyond what fits here, our guides on acrylic face mounting with Dibond, displaying large-format prints, and caring for fine art photography prints go deeper into technique and long-term care.
Why Reversibility Deserves More Weight Than Most Advice Gives It
Most mounting advice treats substrate choice as the main decision and treats reversibility as an afterthought. That ordering is backwards. The substrate affects how a print looks on a wall; the mounting technique affects whether that print can ever be reframed, reappraised, or passed down intact. A gorgeous gatorboard mount means nothing if the print underneath it was dry-mounted and can never be separated from its backing again.
The overlooked mistake I see most often is applying the same mounting logic to a $30 reproduction and a limited-edition original. They deserve completely different treatment. Cheap flatness is a reasonable trade for a poster. It's a poor trade for anything with lasting or resale value, where hinge mounting or float mounting preserves options you don't yet know you'll want.
If you take one rule from this guide, take this: default to reversible methods unless the print is genuinely disposable. You can always upgrade a corner-mounted print to a fuller archival treatment later. You can never undo a dry-mount.
— Mark
Get Your Landscape Prints Mounted and Framed Right
Choosing the right mounting option only matters if the print underneath is worth protecting in the first place. Limited edition and open edition landscape photography prints are typically built for archival treatment like hinge-mounted originals or acrylic face mounts on Dibond. Every print is produced with long-term display and conservation in mind, so the mounting decisions you make actually pay off over decades rather than years.

If you're weighing acrylic face mounting against a framed matboard presentation for a specific piece, browse the limited edition print collection to see finished examples of both approaches before you commit. Whichever mounting route fits your wall and your budget, start by picking the print worth mounting properly.
Sources
- Mounting, Matting, and Framing - Reframing Photography
- Custompictureframes
- Simple Non-Adhesive Methods for Conservation Mounting of Photographs