
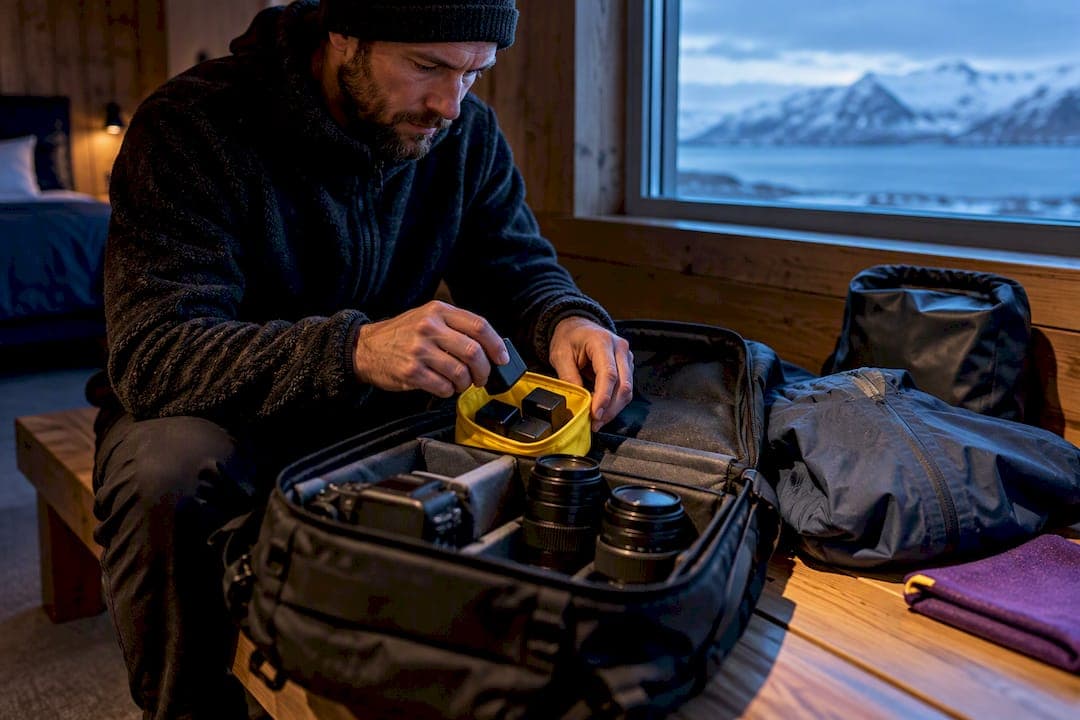
For Iceland photography, prioritize a three-layer clothing system with waterproof outerwear and no cotton, then build a compact camera kit around a weather-sealed body, a general-purpose lens, a travel tele, a stable tripod, ND and polarizer filters, and three to four spare batteries. Before any field shoot, check Safetravel and road conditions, since Iceland's weather can turn fast enough to end a session in minutes.
TL;DR:
- Using weather-sealed mirrorless or DSLR cameras with rain covers and dry bags is essential to withstand Iceland's rain and spray, but sealing is not waterproofing.
- Packing a versatile zoom lens (24–70 or 24–105) and a travel telephoto (70–200 or 100–400) covers most landscape, wildlife, and distant shot needs.
- Carry at least three to four spare batteries kept warm and regularly offload images nightly to a portable storage device to prevent cold-related power loss.
- Wear a three-layer clothing system with moisture-wicking base, insulating mid-layer, and waterproof outer shell, avoiding cotton entirely for moisture control.
- Check weather and road conditions daily, share your itinerary with trusted contacts, and secure permits for commercial or drone photography in protected areas.
Table of Contents
- Printable checklist for camera gear and clothing
- Camera gear that handles Iceland's waterfalls, aurora, and coastlines
- How to dress for Iceland's layers, boots, and gloves
- Protecting your gear from rain, spray, sand, and condensation
- Packing smart and keeping power flowing every day
- Safety checks and planning steps before you head out
- Field-tested tips from real tours and workshops
- Personal care items that suit Iceland's climate
- Permits and documentation for shooting in protected areas
- Cutting luggage weight without cutting essentials
- Why preparation and habits beat extra gear
- Practicing your kit before you fly
- Where to check conditions and further gear guidance
- Sources
- FAQ
Printable checklist for camera gear and clothing
A trip to Iceland rewards photographers who pack with intention rather than volume. This checklist covers the essentials that show up in nearly every field-tested kit list for the country's coastlines, waterfalls, and highlands.
- Camera body (ideally weather-sealed), primary zoom lens, travel telephoto lens, and a sturdy tripod.
- ND filter and circular polarizer for waterfalls, black sand beaches, and glacier lagoons.
- Several spare batteries carried close to your body, plus a charger and a power bank.
- Base layer (merino or synthetic), insulating mid-layer, and a fully waterproof, windproof outer shell.
- Waterproof hiking boots with solid tread, plus a two-part glove system for warmth and dexterity.
- Camera rain cover, dry bag for river crossings and boat trips, microfiber lens cloths, and silica gel packs.
- Memory cards with spare capacity and a portable SSD or laptop for nightly backups.
This is the frame the rest of this guide fills in. Iceland punishes photographers who assume mild weather will hold, and rewards those who treat layering and gear protection as part of the shot list, not an afterthought.
Camera gear that handles Iceland's waterfalls, aurora, and coastlines
Weather-sealed mirrorless bodies have become the practical default for Iceland trips because they tolerate light rain and blowing spray better than unsealed cameras. That said, sealing is a buffer, not a guarantee. Rain covers and dry bags still belong in your bag for coastal shoots and waterfall visits, since modern weather-sealed bodies are not waterproof and sustained spray will eventually find a gap.
Lens choice matters more than lens count. Field-tested packing lists for Iceland consistently point to a general-purpose zoom in the 24 to 70 or 24 to 105 range for landscapes, paired with a travel telephoto (70 to 200 or 100 to 400) for compressing distant mountains, isolating glacier details, and reaching wildlife such as puffins along sea cliffs. A small set of versatile lenses covers most trips without forcing you to carry a bag too heavy for long hikes to remote waterfalls. An ultra-wide or a fast wide-aperture lens earns its place only if aurora photography is on your itinerary, since capturing the night sky demands wide framing and a lens that gathers enough light without excessive noise. Our landscape photography gear essentials list covers additional lens and body considerations if you are still finalizing your kit.
Tripod selection is a balance between stability and the weight you are willing to carry up a lava field. A mid-weight carbon fiber tripod with sturdy leg locks handles most conditions, but stability in Iceland's wind comes from technique as much as hardware. Lower the center column when possible, adopt a wide, low stance, and hang your camera bag from the center hook to add ballast. These adjustments do more for image sharpness in coastal gusts than upgrading to a heavier tripod ever will.
Filters do real work here. A range of ND filters from roughly 3-stop to 10-stop lets you manage shutter speed for silky waterfall exposures and smoothed ocean surf, while a circular polarizer cuts glare on wet rocks and deepens color saturation in glacier lagoons and mossy lava fields. Remove the polarizer for aurora work, since it can introduce uneven darkening across wide skies. Our piece on why landscape photographers use ND filters walks through exposure math if you want to plan shots in advance.
Power management deserves its own line of thinking. Cold temperatures drain camera batteries fast, and Icelandair's photography guidance recommends carrying at least three to four spare batteries, keeping them in an inner jacket pocket where body heat preserves charge, and charging everything overnight. Memory card redundancy matters just as much: carry more capacity than you think you need, and offload images to a portable SSD or laptop each night rather than waiting until the end of the trip.
- Match your lens range to your itinerary: general zoom for landscapes, travel tele for compression and wildlife, ultra-wide only if aurora shooting is planned.
- Choose a tripod you can lower and stabilize quickly, since technique beats raw weight in coastal wind.
- Carry ND filters from 3-stop to 10-stop plus a polarizer, and know when to remove the polarizer for night skies.
- Keep several spare batteries warm against your body and charge all batteries nightly.
- Offload memory cards to a second storage device every evening rather than relying on cards alone.
Pro Tip: Rehearse a full battery swap and lens change with gloves on before you leave, so cold fingers and time pressure at a waterfall don't turn a 20-second task into a two-minute one.
How to dress for Iceland's layers, boots, and gloves
Clothing in Iceland is a system, not a series of individual choices. Safetravel's official clothing guidance recommends a three-layer approach: a moisture-wicking base layer in merino wool or synthetic fabric, an insulating mid layer such as fleece or down, and a fully waterproof, windproof outer shell. Cotton has no place in any layer, since it holds moisture against your skin and raises the risk of hypothermia once temperatures drop or wind picks up.
Footwear needs to match the terrain. Waterproof hiking boots with deep, confident tread handle wet lava rock, riverbank mud, and icy patches near glaciers. Gaiters add a layer of protection on snow or loose scree, and a good pair of wool or synthetic hiking socks, never cotton, keeps feet dry through long shooting days.
Gloves are where many photographers compromise unnecessarily. A thin liner glove worn under a waterproof, insulated outer glove lets you keep your hands warm between shots while still allowing quick removal of the outer layer for lens changes or precise dial adjustments. Round out your kit with a beanie or neck gaiter, quick-dry base layers for changeable weather, and a small repair kit with safety pins, tape, and a spare shoelace.
- Base layer: merino wool or synthetic, never cotton, for moisture control against the skin.
- Mid layer: fleece or down for insulation that still breathes during active hiking.
- Outer shell: fully waterproof and windproof, sized to fit over your mid layer without restricting movement.
- Footwear: waterproof hiking boots with strong tread, gaiters for snow or scree, wool or synthetic socks.
- Gloves: thin liners under waterproof outer gloves for warmth without losing dexterity.
Pro Tip: Pack one complete spare base and mid layer in a dry bag. A single soaked layer on a multi-day trip can turn an otherwise manageable day into a cold, miserable one.
Protecting your gear from rain, spray, sand, and condensation
Waterfalls and coastal spray zones are where cameras fail fastest if you are not prepared. A rain cover paired with a lens hood cuts down on direct spray hitting the front element, and a dry bag protects your full kit during boat transfers or stream crossings. Keep a lens cloth within easy reach rather than buried in a pack, since wiping a lens the moment spray hits it prevents streaking and water spots from setting in.

Condensation is the quieter threat. Moving cold gear into a warm car, guesthouse, or cabin causes moisture to form inside the camera body and lens barrels. Sealing your gear in a plastic bag or closed camera case before bringing it indoors lets it warm gradually, and silica gel packs inside your bag absorb ambient moisture over the course of a trip.
Know when to stop. If wind is strong enough to make tripod work unsafe, or if a squall rolls in faster than forecast, protecting yourself matters more than protecting the shot.
- Use a rain cover and lens hood together near waterfalls and sea spray.
- Wipe lenses immediately after exposure to spray rather than waiting until you're done shooting.
- Seal gear in a plastic bag or case before moving from cold to warm environments.
- Keep silica gel packs in your camera bag at all times to manage ambient moisture.
Packing smart and keeping power flowing every day
How you pack matters as much as what you pack. Fragile items like camera bodies and lenses belong in carry-on luggage, padded and positioned away from the bag's edges, while bulkier clothing and boots can go in checked bags. Check your airline's battery rules in advance, since most carriers require spare lithium batteries to travel in carry-on rather than checked luggage.
Build a nightly routine and stick to it. Charge every battery, offload memory cards to a portable SSD or laptop, and store spare batteries against your body or in an inner jacket pocket overnight rather than leaving them in a cold vehicle. This single habit does more to prevent lost shots than any single piece of gear.
A mid-capacity power bank covers phones and smaller accessories between charging stops, and a universal travel adapter is essential since Iceland uses the European two-pin plug standard at 230 volts. Confirm your camera charger and any USB-C devices are compatible before you leave, since not all chargers handle that voltage without a converter.
Decide your daily kit based on the day's plan. A lightweight hike toward a remote waterfall calls for one body, one lens, and a compact tripod. A car-based day with multiple stops can justify the fuller kit, including the travel tele and both filters, since you are never far from the vehicle if weather shifts.
- Pack camera bodies and lenses in carry-on luggage, padded and protected from impact.
- Charge all batteries and offload memory cards every night without exception.
- Carry a universal adapter for Iceland's 230-volt, two-pin outlets.
- Choose a lighter kit for long hikes and a fuller kit for car-based touring days.
Safety checks and planning steps before you head out
Iceland's weather and road conditions shift quickly enough that a clear morning can become a dangerous afternoon. Safetravel and road.is are the two references worth checking daily, since weather is the single biggest outdoor safety concern in the country and official guidance updates in near real time. The SafeTravel app allows you to log a travel plan that emergency services can access if you don't check in as expected.
Respect local warnings without exception. If a hut warden, ranger, or local resident tells you conditions are dangerous, assume they are right and adjust your plans rather than pushing forward for a shot.
Confirm your travel insurance covers camera equipment specifically, since many general policies cap gear coverage well below replacement value, and separately confirm your medical coverage extends to outdoor activity in remote areas.
- Check Safetravel and road.is each morning before heading to remote locations.
- Log your itinerary with the SafeTravel app or share it with a trusted contact.
- Treat local warnings as final, not as a suggestion to reconsider later.
- Confirm your insurance covers both camera equipment and remote medical evacuation.
- Build weather buffer days into your itinerary rather than scheduling back-to-back locations.
Field-tested tips from real tours and workshops
Small habits separate a smooth Iceland trip from a frustrating one. Keeping spare batteries in an inner jacket pocket, close to body heat, slows the cold drain that catches many first-time visitors off guard, and a silica gel pack tucked into that same pocket keeps humidity away from stored batteries and cards.
At windy coastal sites and waterfalls, a low tripod stance with the center column dropped and a bag hung from the center hook holds steadier than a taller setup, even with a lighter tripod. Facing the camera directly into the wind, rather than at an angle, reduces the surface area catching each gust.
Practicing lens changes and glove swaps before the trip, in a calm, controlled setting, builds the muscle memory needed to work quickly once spray and wind are part of the equation. The same discipline applies to aurora setups: know your settings and framing before dark falls, so you spend cold hours shooting rather than fumbling with menus.
Personal care items that suit Iceland's climate
Iceland's sun sits low even on clear summer days, and reflective surfaces like glaciers, snow, and black sand amplify UV exposure, so sunscreen belongs in your bag regardless of season. Wind and cold air dry out skin and lips fast, making a good lip balm with SPF a small item that prevents a persistent annoyance.
Insect repellent is worth packing for summer trips to inland lakes and wetlands, where midges can be a nuisance during calm evenings, though coastal and highland sites see far fewer of them. A basic first aid kit with blister plasters, pain relief, and any personal medication rounds out the essentials, since pharmacies can be sparse outside larger towns.
Hand cream and a moisturizing face cream help counter the drying effect of wind and cold, particularly on multi-day trips with repeated outdoor exposure. Pack a reusable water bottle too, since tap water across the country is safe to drink and refilling saves both money and plastic waste on longer itineraries.
None of these items need to be bulky. Travel-sized versions of each keep your pack light while covering the basics that keep you comfortable enough to focus on shooting rather than managing minor discomforts.
Permits and documentation for shooting in protected areas
Photography for personal use is generally unrestricted across Iceland's national parks and nature reserves, but drone use is a separate matter entirely. Many protected areas, including sections of Vatnajökull National Park and Þingvellir, restrict or prohibit drone flights, and rules can vary by specific zone within a single park.
Commercial photography, including shoots intended for stock licensing, advertising, or paid client work, often requires separate permission from the relevant park authority or landowner, particularly on private land where many popular waterfalls and coastal sites sit. If you need professional help to market your services and get found, consider Photography SEO Services designed to boost bookings and reach. Confirm requirements directly with the specific park or reserve authority before your trip, since rules change and vary by location.
Carry proof of any permit or permission you secure, since staff in protected areas do check when equipment suggests a commercial shoot is underway. When licensing images commercially afterward, keeping clear records of where and when each photograph was taken supports both your own documentation and any client requirements down the line.
Cutting luggage weight without cutting essentials
Every photographer packing for Iceland faces the same tension: cameras, lenses, and cold-weather clothing all add weight fast, and airline limits do not bend for creative ambition. The fix is prioritization, not elimination.
Choose one general-purpose lens and one travel tele rather than a full lens collection, since a small, well-chosen set of lenses covers most Iceland scenarios without the dead weight of glass you'll rarely use. Compress clothing with packing cubes, and choose merino base layers that can be worn multiple days without washing, cutting down on the volume of spare clothing you need to carry.
Dual-purpose items help too. A buff or neck gaiter doubles as a hat, scarf, or lens cloth in a pinch, and a lightweight rain jacket can double as wind protection over a mid layer on milder days. Leave a second tripod head, extra filter sizes you rarely use, and backup bodies you don't truly need at home, and trust the kit you've already tested.
Why preparation and habits beat extra gear
The photographers who come home with the strongest images from Iceland are rarely the ones carrying the most gear. They are the ones who can add a layer, protect a lens, or reposition a tripod in seconds when weather shifts. Practicing wet-weather routines before the trip, through a course or simply at home, builds that speed. A conservative itinerary with fewer, better-prepared stops consistently outperforms one that tries to squeeze in one location too many.
— Mark
Practicing your kit before you fly
The best way to test whether your packing list actually works is to use it under pressure, not to read about it. Our 1 Day Photography Courses give you a controlled setting to practice rapid lens changes, tripod stabilization, and wet-weather protocols before you're relying on them at a remote Icelandic waterfall.

For a deeper run-through, our Photography Tours place you in demanding outdoor conditions across a full multi-day itinerary, working alongside guidance built from years in the field.
- Practice wet-weather gear handling in a 1 Day Photography Course before you travel.
- Build full-trip confidence with a multi-day landscape photography workshop.
- Places on both fill quickly, so check current availability ahead of your travel dates.
Where to check conditions and further gear guidance
Before you travel, bookmark Safetravel for weather and road warnings, and consult Safetravel's outdoor safety guidance for advice on local warnings and sharing your itinerary. For gear-specific context, our most breathtaking Iceland photography destinations guide pairs well with the packing plan above.
Sources
- Photography in Iceland — Icelandair blog
- Safetravel — Be safe in Iceland
- What's in my camera bag? An Iceland photo adventure — Natural Photographer
FAQ
What is the 20 60 20 rule in photography?
The 20 60 20 rule is a rough budgeting guide some photographers use for gear spending: about 20% on the camera body, 60% on lenses, and 20% on accessories like filters, tripods, and bags. It's a general planning heuristic rather than a fixed standard, and your actual split will depend on the trip and shooting style.
What kind of camera should I bring to Iceland?
A weather-sealed mirrorless or DSLR body paired with a general zoom lens in the 24 to 70 or 24 to 105 range covers most Iceland landscapes, with a travel telephoto added for distant subjects and wildlife. Weather sealing helps in light rain and spray, but it is not a substitute for a rain cover near waterfalls and coastlines.
What not to bring into Iceland?
Skip cotton clothing entirely, since it retains moisture and raises hypothermia risk once it's wet, according to Safetravel's clothing guidance. Avoid overpacking heavy lens collections you won't use, and leave fresh food, plants, and unpasteurized dairy at home, since these are restricted at customs.
Is it okay to wear jeans in Iceland?
Jeans are not recommended for outdoor photography in Iceland, since denim is a cotton fabric that stays wet and cold once soaked and dries slowly. A synthetic or merino wool base and mid layer under a waterproof outer shell performs far better across changeable weather.
Do I need a permit to photograph in Iceland's national parks?
Personal photography is generally unrestricted in most protected areas, but commercial shoots and drone flights often require separate permission from the specific park authority. Rules vary by location, so confirm directly with the relevant park or reserve before your trip.