
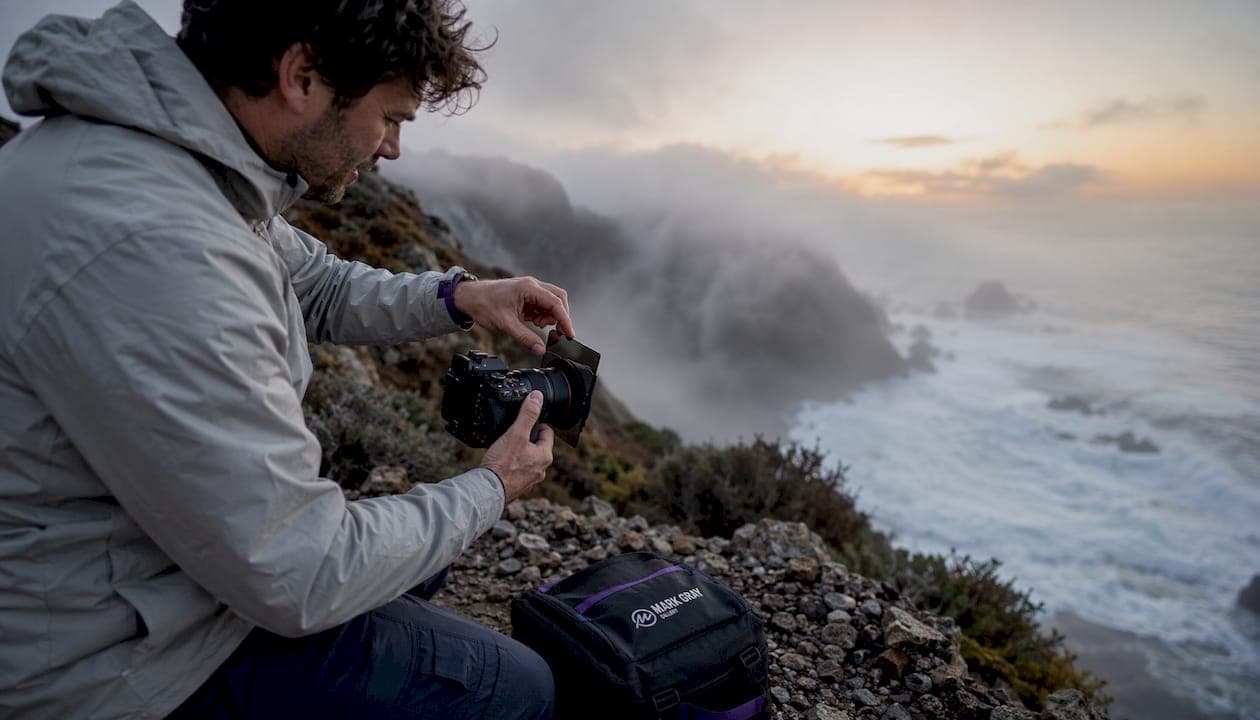
Landscape photographers use ND filters to control light and time — enabling long exposures and wider apertures that create motion blur, smoother water, and selective depth of field in conditions that would otherwise force a compromise. A neutral density (ND) filter is, at its core, a piece of optically neutral glass or resin that reduces incoming light without altering color balance. Think of it as a precise pair of sunglasses for your lens. The creative payoff is significant:
- Motion blur and silky water: Extended exposure times allow photographers to transform moving water and clouds into smooth, painterly elements.
- Wider apertures in bright light: ND filters let you shoot at wider apertures such as f/2.0–f/4.0 in full sun by overcoming shutter speed limits, giving you shallow depth of field when you want it.
- Consistent exposure control: In video or multi-minute exposures, they reduce scene brightness so you can hold a chosen shutter speed without overexposing.
A tripod and remote shutter release are essential companions — without a stable platform, the sharpness ND filters work to preserve is very likely lost before the exposure ends.
Table of Contents
- Why landscape photographers use ND filters: exposure logic and creative effects
- Which type of ND filter should you use?
- ND stop strengths, exposure multipliers, and sample recipes
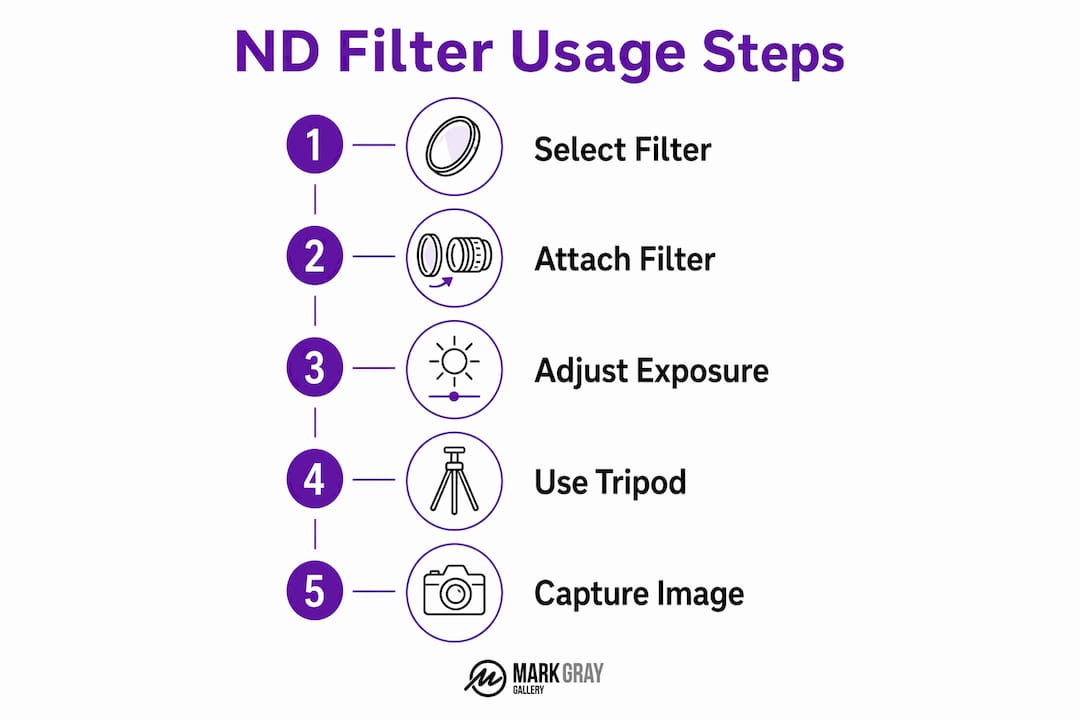
- How to use ND filters in the field: a step-by-step workflow
- What are the image-quality tradeoffs with ND filters?
- How do you choose the right ND filter for your lenses?
- Expert tips and common mistakes from professional practice
- Key Takeaways
- The filter that changed how I see light
- Learn ND techniques in person with Mark Gray
- Useful sources and further reading
Why landscape photographers use ND filters: exposure logic and creative effects
Reducing light entering the lens forces the camera to compensate — and that compensation is where the creative magic lives. Slow the shutter speed, and anything stationary stays sharp while anything moving blurs. Open the aperture, and you separate a subject from a busy background even under harsh midday sun.
The practical effects vary widely depending on exposure length:
- Waterfalls and streams: Multi-second exposures turn turbulent water silky and smooth.
- Ocean and coastal scenes: Extended exposures smooth wave chaos into a mist-like foreground.
- Cloud streaking: Long exposures paint clouds into dramatic leading lines across the sky.
- Crowd removal: Multi-minute exposures in busy plazas can cause pedestrians to disappear entirely, leaving architecture clean and undistracted.
One distinction worth making: this is not a post-processing effect. Motion blur captured in-camera with a long exposure carries a depth and authenticity that simulated blur in Lightroom or Photoshop cannot replicate. The tonal gradation across moving water, the way light accumulates across a 3-minute sky — these are photographic events, not digital approximations. That said, ND filters are a capture-phase tool and cannot recover highlights already blown to white. High-dynamic-range scenes — a bright sky over a dark foreground — may still require exposure blending or a graduated ND alongside your solid filter. For a deeper look at how post-processing fits into this workflow, the role of post-processing in landscape photography is worth understanding before you head into the field.
Which type of ND filter should you use?
Not all ND filters work the same way, and choosing the wrong type for your creative goal costs you time and image quality.
Solid (fixed) ND filters are the workhorse of landscape photography. Available as screw-on rounds or rectangular slots in a holder system, they offer a single, precise density — 3 stops, 6 stops, 10 stops, and beyond. For multi-second to multi-minute exposures, a solid ND is the most reliable choice. The optical path is simple, and quality glass versions introduce minimal color shift.
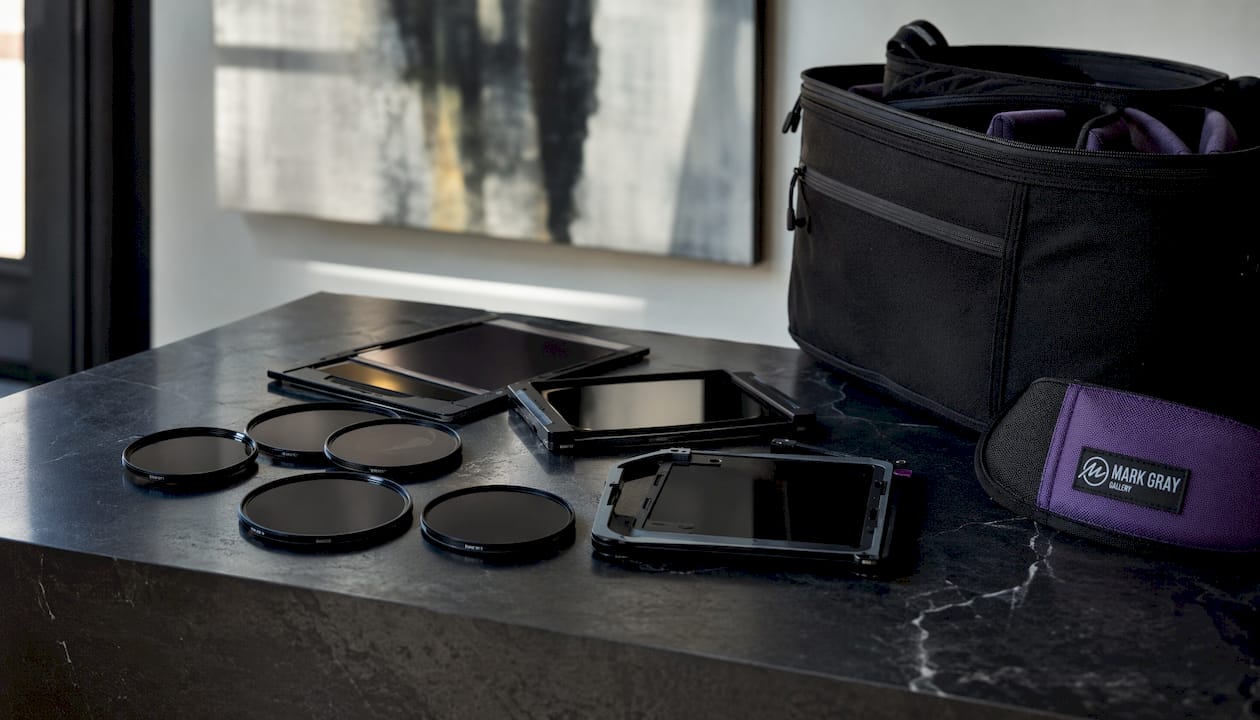
Variable ND filters rotate between two polarizing elements to dial in density without swapping filters. They are genuinely useful for video work, where quick exposure adjustments between shots matter. For high-resolution landscape stills, however, variable NDs can reduce sharpness and produce uneven attenuation — the notorious "X-pattern" that appears at higher density settings. If your goal is a gallery-quality print, a fixed solid ND is the safer choice.
Graduated ND filters (GND) transition from dark at one edge to clear at the other. Their purpose is to balance exposure across a high-dynamic-range scene — darkening a bright sky while leaving the foreground unaffected. A standard soft-edge GND suits most sunrise and sunset scenes. A reverse GND, which is darkest at the center transition zone and lighter toward the top, is specifically designed for the intense band of light at the horizon during golden hour.
- Solid ND: best for long-exposure creative work, waterfalls, seascapes, architecture.
- Variable ND: best for video; use cautiously for stills.
- GND: best for balancing sky and foreground brightness in a single frame.
- Reverse GND: best for sunrise and sunset when the horizon is the brightest point.
A note on polarizers: A circular polarizing filter (CPL) functions as roughly a 1–2 stop ND when rotated to its darkest position, while also cutting glare and deepening sky color. Some photographers combine a CPL with a solid ND for an additive stop effect. Stack carefully — every additional filter element is another opportunity for color cast and vignetting.
ND stop strengths, exposure multipliers, and sample recipes
Every stop of ND doubles the required exposure time. The table below maps common filter strengths to their exposure multipliers — the number you multiply your base (unfiltered) shutter speed by to get the correct long-exposure time.
| ND Stops | Multiplier | Example: base 1/125s | Example: base 1s |
|---|---|---|---|
| 1 stop | 2× | 1/60s | 2s |
| 3 stops | 8× | 1/15s | 8s |
| 5 stops | 32× | ~1/4s | 32s |
| 6 stops | 64× | ~1/2s | ~1 min |
| 10 stops | 1,000× | ~8s | ~16 min |
A 5-stop ND increases exposure time by 32× — so a base reading of 1/30s becomes approximately 1 second. At 10 stops, a midday base of 1/125s becomes roughly 8 seconds, which is enough to smooth most waterfalls and begin streaking clouds, and a base 1 second exposure extends to approximately 16 minutes.
Sample field recipes:
- Midday waterfall: Base reading 1/125s at f/8, ISO 100. Add a 10-stop ND (ND1000). Result: approximately 8–10 seconds. Water becomes silky; surrounding foliage stays sharp.
- Coastal cloud smoothing: Base 1/125s at f/11, ISO 100. Add a 6-stop ND (ND64). Result: approximately 0.5–1 second. Waves begin to soften; clouds show slight motion.
- Crowd removal, urban architecture: Base 1/60s at f/8, ISO 100. Stack a 10-stop and 6-stop ND (16 stops combined). Result: 3–4 minutes. Pedestrians vanish entirely.
- Sunrise seascape: Base 1/30s at f/11, ISO 100. Add a 10-stop ND. Result: approximately 30 seconds. Ocean surface becomes a mirror; horizon clouds streak dramatically.
For calculating these conversions in the field, smartphone apps such as Long Exposure Calculator or ND Filter Calculator handle the math instantly. Enter your base shutter speed and stop count, and the app returns the correct long-exposure time. This is especially useful when light is changing rapidly at sunrise or sunset and you need to recalculate between shots.
Pro Tip: Bracket your exposures when light is shifting quickly. Take one shot at the calculated time, one at 30% shorter, and one at 30% longer. Record your base settings so you can reproduce results at the same location in a different season.
How to use ND filters in the field: a step-by-step workflow
Consistent long-exposure results depend on a repeatable workflow, not luck. Here is the sequence that produces predictable, sharp images every time.
Equipment checklist before you leave:
- Sturdy tripod (carbon fiber preferred for stability and weight savings)
- Remote shutter release or cable release — or use the camera's 2-second self-timer
- Filter holder system matched to your lens diameter, or correctly sized screw-on rings
- Step-up rings if your lenses have different filter thread sizes
- Lens cloth (condensation and spray are common near water)
- Bubble level or camera with an electronic level
- Extra batteries (long exposures drain power faster)
- Smartphone with an exposure calculator app
For a complete rundown of field gear, the landscape photography gear essentials list covers tripods, remotes, and filter systems in detail.
Step-by-step workflow:
- Compose and level the shot with no filter attached. Take your time — a strong composition is the foundation of every successful long exposure. Check the landscape photography composition checklist if you want a structured approach.
- Focus precisely using autofocus or manual focus. Lock focus, then switch to manual focus so the camera does not hunt when the dark filter is attached.
- Meter the scene without the filter. Note your base shutter speed at your chosen aperture and ISO 100.
- Calculate the long-exposure time using the stop multiplier table or a phone app.
- Attach the filter carefully, shielding the lens from stray light. Check for vignetting at the corners.
- Enable mirror lockup (DSLR) or electronic first curtain shutter (mirrorless) to eliminate vibration at the start of the exposure.
- Trigger with the remote release — never touch the camera body during a long exposure.
- Review the histogram on the back of the camera. A well-exposed long exposure should show data across the full tonal range without clipping at either end.
Pro Tip: With a very dark ND like an ND1000, autofocus is essentially impossible after the filter is attached. Compose and focus first, mark your focus ring position with a small piece of tape if needed, then attach the filter. Confirm focus with live view at 100% magnification before triggering.
Cameras with autofocus challenges under heavy NDs are best handled this way — it is standard practice among professionals, not a workaround.
What are the image-quality tradeoffs with ND filters?
No filter is perfectly neutral, and understanding the tradeoffs helps you choose wisely and correct problems before they reach print.
Color cast is the most common issue. Even filters marketed as "neutral" can introduce a slight warm, cool, or magenta tint — particularly at high densities. Shooting in RAW gives you the latitude to correct white balance precisely in post without degrading image quality. High-end optical glass with multi-coatings minimizes cast significantly; cheap resin filters can degrade sharpness and create color shifts that are genuinely difficult to correct on large prints. For anyone printing at gallery scale, this distinction matters enormously in practice.
Sharpness tradeoffs come from two sources: filter glass quality and diffraction. A low-quality resin filter introduces optical aberrations that reduce fine detail. Diffraction, meanwhile, is a physics issue — stopping down past f/11 or f/16 softens the image regardless of filter quality. The practical rule: use the sharpest aperture your lens offers (usually f/8–f/11) and let the ND filter handle the exposure reduction, rather than stopping down to f/22 and skipping the filter.
Stacking filters multiplies these problems. Stacking can add color casts and vignetting; professionals typically prefer a single high-density filter — a 10-stop or 15-stop — over stacking a 6-stop and a 4-stop to reach the same density. Fewer glass elements in the optical path means fewer opportunities for degradation.
- Variable ND X-pattern: appears at high density settings; avoid by staying below the filter's rated maximum density.
- Autofocus with dark NDs: compose and focus before attaching; switch to manual focus to lock position.
- Vignetting: check corners at your working aperture before committing to a long exposure series.
For prints destined for display, shooting RAW is the single most effective safeguard — the reasons to shoot RAW for landscapes apply with even more force when you are correcting filter-induced color shifts.
How do you choose the right ND filter for your lenses?
Buying decisions come down to three factors: compatibility, quality tier, and which stop strengths actually match your creative goals.
Compatibility first:
- Screw-on filters must match your lens's filter thread diameter (49mm, 67mm, 77mm, 82mm are common). Step-up rings let one filter fit multiple lenses, but add a small amount of vignetting risk on wide-angle lenses.
- Rectangular holder systems (100mm or 150mm systems) accept multiple filter types simultaneously and allow the GND to be positioned precisely. They are the preferred choice for serious landscape work.
- Wide-angle lenses below 24mm often require a 150mm holder system to avoid corner vignetting.
Price bands and what to expect:
- Budget resin options ($20–$60): acceptable for learning and experimentation, but color cast and sharpness loss are real limitations for print work.
- Mid-range glass ($80–$200): multi-coated optical glass with noticeably better color neutrality; suitable for most landscape and travel photography.
- High-end multi-coated optical glass ($200–$400+): minimal color cast, maximum sharpness retention, and durable coatings that resist water and scratches. The right choice when prints are the end goal.
For gallery-quality landscape prints, the filter is part of the optical chain — a weak link there shows up at large print sizes.
Which stop strengths to prioritize:
- A 10-stop ND (ND1000) is the most versatile single purchase — it enables multi-second exposures in bright daylight and is the filter most landscape photographers reach for first.
- A 6-stop ND (ND64) is excellent for moving water and moderate cloud motion without committing to very long exposures.
- A 3-stop ND suits portrait and wedding photographers who want wide apertures in sun; for dedicated landscape work, it is a secondary purchase.
- A variable ND makes sense for video shooters or photographers who need quick density adjustments between scenes, accepting the optical tradeoffs.
Expert tips and common mistakes from professional practice
The gap between a technically correct long exposure and a genuinely compelling one usually comes down to a handful of habits — and a few avoidable errors.
Tips from professional practice:
- Compose and focus before attaching any dark ND filter. This is the single most repeated piece of advice from working landscape photographers, and it is repeated because beginners consistently skip it.
- Prefer one high-density filter over stacking two or three lighter ones. The optical quality difference is visible at print sizes above 20 inches.
- Use a remote trigger every time. Even a gentle press on the shutter button introduces vibration that ruins a 30-second exposure.
- Enable mirror lockup on DSLRs or electronic first curtain on mirrorless cameras to eliminate the mechanical shock at exposure start.
- Bracket exposures when light is changing rapidly — sunrise and sunset can shift two full stops in under five minutes.
- Check the histogram after every shot. A beautiful-looking LCD preview in bright sun is unreliable; the histogram tells the truth.
Common mistakes to avoid:
- Relying on cheap resin NDs for serious work. The color cast and sharpness loss become obvious at print scale.
- Forgetting to check for vignetting on wide-angle lenses after attaching a filter holder. A quick test shot at your working aperture before the long exposure saves a wasted series.
- Miscalculating exposure time as light changes at golden hour. Recalculate after every significant shift in ambient light — a base reading taken 10 minutes ago may already be wrong.
- Leaving autofocus active after attaching a dark ND. The camera will hunt, shift focus, and ruin the shot.
Mark Gray's landscape photography workshops address these habits directly in the field, where real-time exposure calculation and filter handling are practiced alongside composition and printing considerations. The skills that translate to better prints — understanding long-exposure landscape photography at a technical and creative level — are best built with a camera in hand, not just a screen in front of you.
Key Takeaways
ND filters give landscape photographers precise control over light and time, making long-exposure motion blur, wide-aperture selective focus, and balanced exposures possible in conditions that would otherwise force a technical compromise.
| Point | Details |
|---|---|
| Core creative purpose | ND filters extend shutter speeds from seconds to minutes, enabling silky water, streaking clouds, and crowd removal in daylight. |
| Stop-to-multiplier math | Every stop doubles exposure time; a 10-stop ND multiplies your base shutter speed by about 1,000×. |
| Workflow non-negotiables | Compose and focus before attaching a dark ND; always use a tripod and remote release for sharp results. |
| Quality over price | Optical glass with multi-coatings preserves color neutrality and sharpness — critical for gallery-scale prints. |
| Mark Gray Gallery | Mark Gray's workshops and courses teach ND techniques hands-on, from field exposure calculation to print-ready capture. |
The filter that changed how I see light
Learning to work with ND filters shifted something fundamental in how I approach a location. Before, I was reacting to the scene in front of me. After, I started thinking about time — how long an exposure would need to be to transform that rushing creek into something meditative, or to turn a crowded pier into a solitary composition. The filter slows you down in the best possible way. You set up, you calculate, you wait — and in that waiting, you start seeing the scene differently.
The photographers who get the most from ND filters are not necessarily the ones with the most expensive glass. They are the ones who have practiced the workflow enough that it becomes second nature, freeing them to focus entirely on the image. Hands-on field practice, with real light and real conditions, is where that fluency develops fastest.
Learn ND techniques in person with Mark Gray

The fastest way to build confidence with ND filters is to practice them in the field alongside an experienced guide. Mark Gray's one-day photography courses and multi-day landscape workshop tours across Australia and worldwide put you in front of inspiring locations with hands-on exposure calculation, real-time filter handling, and direct feedback on your results. You will leave understanding not just how ND filters work, but how to use them to create images worthy of a gallery wall.
Workshops cover the full workflow — from composition and metering without the filter, through exposure calculation and long-exposure capture, to the printing considerations that make filter quality matter at large scale. The skills developed in landscape photography courses go well beyond technique; they change the way you see and plan a shoot.
Browse upcoming courses and workshop tours at markgray.com.au and reserve your place.
Useful sources and further reading
These are the core resources used throughout this article — each one is worth bookmarking for deeper study.
- Neutral Density Filters in Photography, Explained — Photography Life: The most thorough technical overview available, covering stop math, stacking tradeoffs, and autofocus workflow. Start here for the full picture.
- Using Neutral Density Filters — Cambridge in Colour: Authoritative on exposure multiplier math and variable ND optical behavior. Best for understanding the numbers behind the stops.
- ND Filters for Landscape Photography — Kase Filters: Practical buying guidance with clear explanations of stop strengths and filter quality differences. Useful when choosing between glass and resin.
- How to Use a Neutral Density Filter — Lenscraft: A field-focused tutorial on creative applications and workflow, with honest notes on when ND filters are not the right tool.
- Understanding Lens Filters — Canon: Canon's overview of UV, polarizing, and ND filters, with useful context on how each type fits into a landscape kit.
- Landscape Photography Guide — Tamron Americas: Covers supporting gear (tripods, remotes) and field workflow in the context of broader landscape technique.
- Photography tips for travel and field shooting — Albumelu: A supplementary resource with practical field photography tips useful for photographers shooting on location.