Glacier landscape photography is the art of capturing the shifting ice, immense scale, and raw texture of glaciers using specialized equipment and compositional skills that reveal them as living, changing forces of nature. Unlike standard landscape photography, this discipline demands that you treat glaciers as dynamic subjects rather than frozen backdrops. The interplay of light on ancient ice, the geometry of crevasses, and the sheer physical scale of formations like those found in Iceland's Vatnajökull or Patagonia's Los Glaciares National Park create images that carry genuine emotional weight. Understanding landscape photography techniques specific to glacial environments is what separates a memorable shot from a forgettable snapshot.
What is glacier landscape photography and why does it matter?
Glacier landscape photography is a specialized branch of landscape photography focused on documenting and interpreting glacial environments through deliberate choices in timing, composition, and technical execution. The discipline goes far beyond pointing a wide-angle lens at a wall of ice. Glaciers like those in Los Glaciares National Park advance while others retreat, showing dynamic change over decades. That tension between permanence and impermanence is exactly what makes glacier photography so compelling as a storytelling medium.
The best glacier images communicate three things simultaneously: scale, texture, and time. Scale tells the viewer how vast and powerful these formations are. Texture reveals the layered history written into the ice itself, from ash bands deposited by ancient volcanic eruptions to the blue compression of deep glacial ice. Time is communicated through motion blur on meltwater streams, the sharp geometry of a freshly calved face, or the long shadows of golden hour stretching across a ridgeline. Together, these elements produce photographs that function as both art and record.
Capturing glacial beauty at this level requires you to understand the subject as a geologic force, not a scenic prop. Photographers who treat glaciers as static backgrounds consistently produce flat, uninspiring images. Those who study the terrain, plan their timing, and respond to the glacier's own movement produce work that resonates. That distinction is the foundation of everything that follows in this guide.
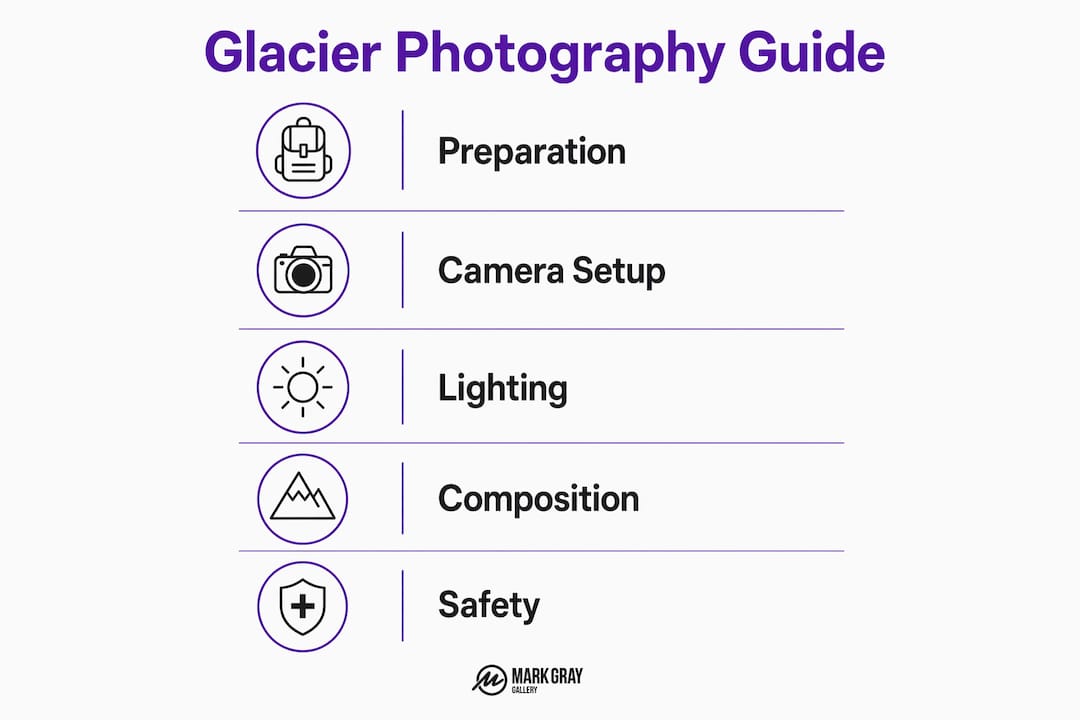
What gear and camera settings are essential for glacier landscape photography?
The right equipment makes the difference between a technically sound image and one that falls apart under scrutiny. Here is what belongs in your kit:
- Wide-angle lens (16-24mm): Captures the full sweep of a glacier face and emphasizes scale. Use it for establishing shots and compositions where the glacier fills the frame.
- 24-70mm zoom lens: The workhorse for glacier photography gear, offering flexibility for both landscape and detail shots without a lens change in harsh conditions.
- Lightweight carbon fiber tripod: Non-negotiable for ice cave interiors, blue hour shots, and any exposure longer than 1/60 second. Stability on uneven ice is critical.
- Polarizing filter: Correctly oriented, a circular polarizer reduces glare from wet ice surfaces and dramatically enhances color saturation in the sky and ice tones.
- Spare batteries (minimum three): Lithium-ion batteries lose 20-50% charge in cold temperatures. This is the single most common reason photographers miss their best shots on a glacier.
Camera mode selection matters as much as the gear itself. Setting your camera to "vivid" or "landscape" picture style boosts color saturation and contrast, giving your JPEGs immediate punch and providing a useful reference when shooting RAW. Using vivid or landscape modes enhances the visual impact of ice blues and sky tones that might otherwise appear flat in standard profiles.
Sharp focus is the top technical priority in glacier photography. Bright, reflective ice surfaces cause autofocus systems to hunt or lock onto the wrong plane. Autofocus can struggle with bright ice, making manual focus or focus peaking a necessary fallback. Even a beautifully composed image fails to engage viewers if the critical focus point is soft.
Pro Tip: Program a custom camera button to toggle instantly between your landscape exposure settings and a fast shutter speed preset. Custom button programming enables quick switching when a calving event happens without warning. Dramatic ice falls last seconds, and fumbling through menus costs you the shot.
How does light influence glacier photography, and when should you shoot?
Light transforms glacial ice in ways that no other subject quite matches. The same glacier face can appear brilliant white, deep cobalt blue, or warm amber depending entirely on the time of day and cloud cover. Understanding these lighting windows is what separates planned, purposeful glacier photography from lucky snapshots.
The four most productive lighting conditions for glacier work are:
- Golden hour: Low-angle sunlight rakes across the ice surface, creating long shadows that reveal texture and depth in ways that flat midday light completely erases. This is the prime window for showing the three-dimensional structure of seracs and crevasse walls.
- Overcast skies: Clouds act as a natural softbox, producing diffused, even light that renders ice tones accurately without blown highlights. Overcast skies provide diffused light that is ideal for capturing the subtle color gradations within glacial ice, particularly the transition from white surface snow to compressed blue ice below.
- Blue hour: The 20-30 minutes before sunrise and after sunset produce ethereal blue and purple tones that make glacier images feel otherworldly. Ice naturally amplifies these cool tones, and long exposures during blue hour can produce some of the most striking glacier images possible.
- Midday with cloud cover: Harsh direct midday sun creates flat, overexposed surfaces with no texture. However, intermittent cloud cover during midday can balance a composition by softening the brightest areas while still providing enough light for handheld shooting.
Location determines your specific timing strategy. In Iceland's June, golden hour occurs between 11:30 PM and 3 AM, requiring photographers to completely restructure their schedules around near-midnight light. This is a genuinely surprising constraint for photographers visiting Iceland for the first time. Planning flexible schedules around these windows, rather than fixed daily itineraries, is what allows you to capitalize on the best light when it arrives. Weather on glaciers changes rapidly, and the difference between a mediocre shot and an extraordinary one can be a 15-minute window of perfect light breaking through storm clouds. How weather shapes your photography is a subject worth studying in depth before any glacier expedition.
What compositional techniques best convey glacier scale and beauty?
Composition in glacier photography requires a fundamentally different approach than standard landscape work. The scale of glacial environments defeats conventional framing instincts. Here is how to work with that scale rather than against it.
Using wide angles and low angles together
A wide-angle lens shot from a low position, close to the ice surface, creates a powerful sense of scale and draws the viewer into the scene. This combination makes the glacier feel enormous and immediate rather than distant and abstract. Shooting from knee height or lower on a glacier face produces a perspective that most viewers have never seen, which immediately commands attention.
Leading lines and natural geometry
Crevasses, ash bands, and meltwater streams function as natural leading lines that guide the viewer's eye through the frame. Ash bands, in particular, are visually striking because they record specific volcanic events, giving the image a geological narrative layer that adds depth beyond pure aesthetics. Positioning these lines to lead toward a focal point, whether a distant peak or a calving face, transforms a wide landscape shot into a structured composition.
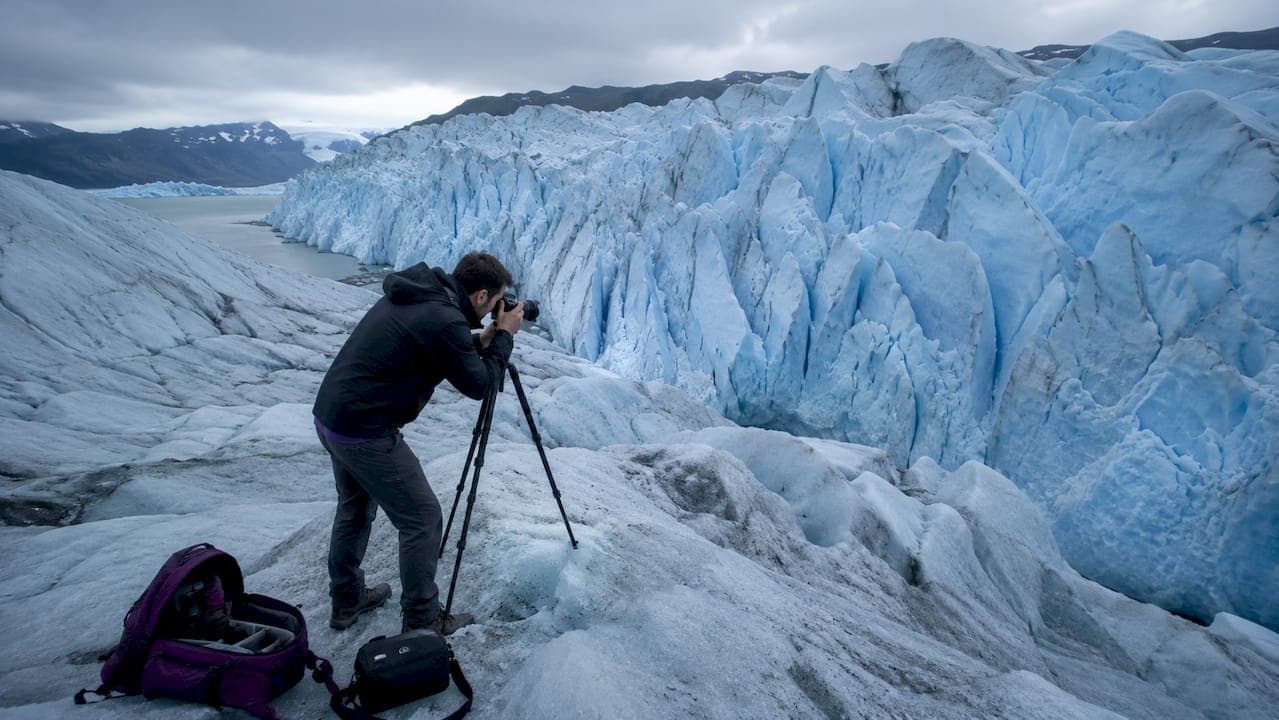
Human scale as a storytelling device
Including a human subject communicates vast glacier scale more effectively than any other single technique. A person standing at the base of a 30-meter ice wall makes the scale undeniable in a way that no caption can replicate. This is one of the most powerful and underused tools in glacier photography.
Pro Tip: Shoot side views of glacier tongues to reveal movement and layered structure. A straight-on shot shows the face; a side view shows the story. The compression layers, the debris bands, and the curve of the terminus all become visible from the side, turning a single image into a record of the glacier's history.
| Technique | Best application |
|---|---|
| Wide-angle low angle | Emphasizing scale and drawing viewers into the scene |
| Leading lines (crevasses, ash bands) | Creating visual depth and geological narrative |
| Human scale reference | Communicating the true size of glacier features |
| Side view perspective | Revealing movement, layers, and structural complexity |
| Aerial or elevated viewpoint | Capturing abstract surface patterns and full glacier extent |
What are the safety and environmental considerations for glacier photographers?
Glaciers are among the most physically demanding and genuinely hazardous environments a photographer will ever work in. Technical skill means nothing if you cannot get yourself safely to and from your shooting position.
- Guided experiences are non-negotiable for glacier access. Safety on glaciers requires guided hikes because crevasses can be hidden under snow bridges, and terrain that looks stable can collapse without warning. No photograph justifies solo glacier travel without proper training and equipment.
- Layer your clothing correctly. Moisture-wicking base layers, insulating mid-layers, and a waterproof shell are the standard system. Cotton kills in cold, wet environments because it retains moisture against the skin. Merino wool and synthetic base layers are the correct choice.
- Manage your batteries actively. Keep spare batteries in an interior jacket pocket against your body. Keeping batteries close to the body preserves charge and extends your shooting window significantly. Batteries left in a camera bag in freezing temperatures will be dead within an hour.
- Respect Leave No Trace principles. Glacial ecosystems are fragile. Stay on established paths where guides direct you, do not disturb ice formations for compositional convenience, and carry out everything you bring in.
- Protect your equipment from moisture. Glaciers produce constant meltwater, spray, and condensation. Waterproof camera covers and sealed bags for lenses are standard practice, not optional extras.
The balance between artistic ambition and personal safety is one of the defining disciplines of glacier photography. The most experienced glacier photographers are also the most safety-conscious. They understand that returning to shoot another day is always the better outcome.
Key takeaways
Glacier landscape photography demands technical precision, deliberate timing, and genuine respect for the environment to produce images that communicate the scale and dynamism of glacial terrain.
| Point | Details |
|---|---|
| Define glaciers as dynamic subjects | Treat crevasses, calving events, and ash bands as storytelling elements, not background features. |
| Prioritize sharp focus above all | Autofocus struggles on bright ice; use manual focus or focus peaking as your primary technique. |
| Plan around lighting windows | Golden hour, blue hour, and overcast conditions each produce distinct and superior ice tones. |
| Use human scale deliberately | A person in frame communicates glacier size more powerfully than any wide-angle lens alone. |
| Manage cold-weather battery life | Carry at least three batteries and store spares in interior pockets against your body. |
Why glaciers are the most honest subjects I've ever photographed
Most landscapes will forgive a mediocre composition. A beautiful forest or a dramatic coastline carries enough inherent visual interest that even a technically average photograph looks appealing. Glaciers do not extend that courtesy. They expose every weakness in your technique and every gap in your preparation.
What I have found, after photographing glaciers in Iceland and Norway, is that the photographers who struggle most are those who arrive with a fixed idea of the shot they want. Glaciers do not cooperate with preconceived compositions. The light changes in minutes, the terrain dictates your position, and the most extraordinary moments, a sudden calving, a shaft of light breaking through cloud onto a crevasse field, happen on the glacier's schedule, not yours.
The reward for surrendering that control is extraordinary. When you stop trying to impose a composition and start responding to what the glacier is actually doing, the images become something genuinely different. They carry a sense of presence and immediacy that planned shots rarely achieve. Studying how seasons change landscape photography helped me understand that glaciers are simply the most extreme version of a principle that applies everywhere: the best images come from deep observation, not from executing a plan.
I also want to be direct about the environmental dimension. Photographing glaciers in 2026 means photographing landscapes that are measurably smaller than they were a decade ago. That reality should inform how you approach the work. These images carry a documentary weight that goes beyond aesthetics. Treat that responsibility seriously.
— Mark
Photograph glaciers with Mark Gray's expert guidance
Mark Gray is an internationally award-winning Australian landscape photographer whose work spans Iceland, Norway, New Zealand, and beyond. His fine art glacier and landscape prints are available as premium limited edition pieces, and his landscape photography workshop tours take photographers directly into the world's most spectacular environments with professional instruction at every step. Whether you want to deepen your technical skills, experience glacier environments firsthand, or bring a stunning glacial print into your home, Mark Gray's photography gallery is the place to start. Explore the full collection and upcoming workshop dates today.
FAQ
What is glacier landscape photography?
Glacier landscape photography is a specialized discipline focused on capturing the scale, texture, and dynamic nature of glacial environments using deliberate timing, composition, and technical equipment. It treats glaciers as living, changing subjects rather than static scenic backgrounds.
What camera settings work best for photographing glaciers?
Use a wide-angle or 24-70mm lens, a polarizing filter to reduce glare, and set your camera to "vivid" or "landscape" mode to enhance color saturation. Manual focus or focus peaking is recommended because autofocus struggles on highly reflective ice surfaces.
When is the best time of day to photograph glaciers?
Golden hour and blue hour produce the most dramatic glacier images, with long shadows revealing texture and cool tones amplifying the natural color of ice. In Iceland during June, golden hour occurs between 11:30 PM and 3 AM, requiring a flexible shooting schedule.
Do I need a guide to photograph glaciers?
Guided glacier access is strongly recommended because crevasses and unstable terrain create serious hazards that are not visible to untrained eyes. No compositional opportunity justifies solo glacier travel without proper training and safety equipment.
How do I keep my camera batteries working in cold glacier environments?
Carry a minimum of three batteries and store all spares in an interior jacket pocket against your body. Lithium-ion batteries lose 20-50% of their charge in cold conditions, and warming them internally is the most reliable way to preserve your shooting time.