
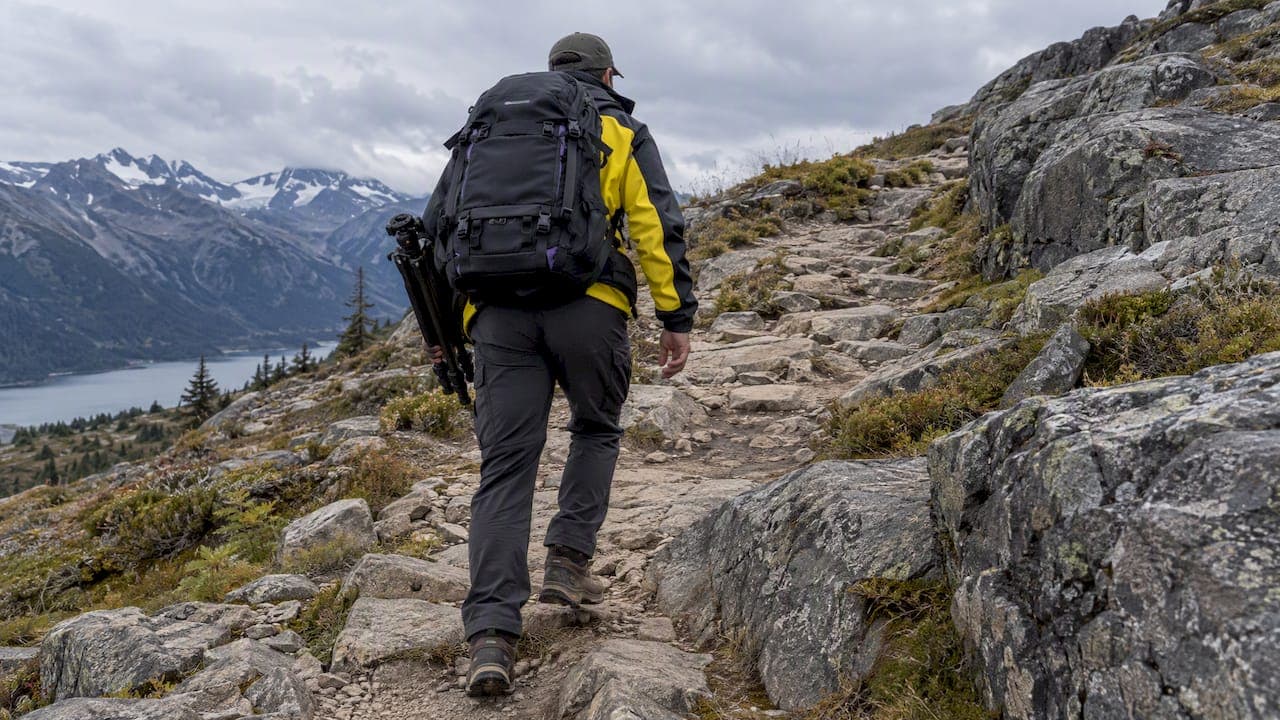
Most guided photography tours ask for a low-to-moderate baseline fitness, nothing more, but the real demand hinges on the tour grade, the daily walking distance and elevation, and the weight of the gear you carry. Before you book, ask the operator for specifics: daily walking time and distance, elevation gain, surface type, and whether rest stops or vehicle support are built into the day.
TL;DR:
- The difficulty of photography tours depends on the highest elevation gain, steepness, and terrain type, not just the overall distance or time.
- Carrying heavy gear or multiple lenses can make a moderate-rated tour feel significantly harder than hiking alone.
- Asking questions about daily walking distances, surface conditions, support options, and worst-case scenarios ensures the tour matches your fitness level.
- Preparing with 6-8 weeks of gradual aerobic, strength, balance, and loaded practice walks helps prevent injury and builds real field endurance.
- Proper gear choices, pacing, hydration, and watching for signs of fatigue or heat exhaustion are essential to avoid common injuries and stay safe during remote or high-altitude trips.
Table of Contents
- What "gentle," "moderate" and "hard" actually mean on tour
- Questions to ask before you book a tour
- A 6 to 8 week plan to get trip-ready
- Gear choices that change how hard the day feels
- Pacing, hydration and reading your own warning signs
- How park rules and seasons change the fitness picture
- How a guided workshop removes the barriers that have nothing to do with fitness
- Eating and drinking well on a multi-day shoot
- Recovering between long shooting days
- Preparing for altitude or remote, hard-to-reach locations
- Common injuries on photography tours and how to avoid them
- What tends to surprise first-time participants
- Booking a workshop that matches your fitness level
- Sources
- FAQ
What "gentle," "moderate" and "hard" actually mean on tour
Operators borrow their grading language from national park systems, and the principle behind it is simple: the hardest single stretch of a walk sets the grade, not the average. A short stroll with one steep staircase can outrank a longer flat walk in difficulty. Parks Australia's walking-track grading system explains that steepness, steps and path quality determine the rating, and recommends matching the walk to your own experience and fitness rather than assuming the label tells the whole story.
In practice, a gentle photography tour usually means short walks on formed paths with frequent stops for setup and plenty of standing time while waiting for light. A moderate tour adds uneven natural ground, longer walks between locations, and standing periods that stretch past an hour during golden hour or wildlife waits. A hard tour introduces real elevation gain, loose or rocky surfaces, and multi-kilometer approaches before the camera even comes out.

Photography adds its own layer on top of any grade. Carrying a loaded bag and tripod, rising before dawn, and repeating the same setup-and-wait cycle for hours all raise perceived exertion well above what the walking distance alone suggests. A tour rated moderate for hikers can feel harder for someone also hauling two lenses and a carbon tripod.
Questions to ask before you book a tour
A tour description rarely tells you everything you need. A short list of questions to the operator clears up the gap between the label and the lived experience.
- What is the daily walking distance and time, and how much elevation gain is involved?
- What is the surface like: formed path, loose gravel, sand, or rock scramble, and are there steps or steep sections?
- How long will you typically stand in one spot while waiting for light or wildlife?
- Is there vehicle support or baggage handling, and what happens if someone needs to slow down or skip a section?
- What is the emergency plan, and is there reliable mobile coverage along the route?
- Are there weather contingencies or seasonal closures that could change the itinerary?
Pro Tip: Ask for the operator's worst-case day, not the average one. A single steep ridge or long sand walk can define the whole trip's physical demand.
A 6 to 8 week plan to get trip-ready
You do not need to train like an athlete, but a structured few weeks beats a last-minute scramble. The World Health Organization recommends at least 150 minutes of moderate aerobic activity weekly plus strength work for major muscle groups on two or more days, and that split works well as the backbone of tour preparation.
- Aerobic base: Walk three to four times a week, building toward 45 to 60 minutes, including hills or stairs at least once a week.
- Strength: Train legs and trunk twice weekly with squats, step-ups and planks to handle uneven ground and long standing.
- Balance and flexibility: Add two short sessions a week of single-leg balance work and gentle stretching for ankles, hips and shoulders.
- Loaded practice: In the final two to three weeks, walk in your actual tour footwear carrying your loaded camera bag and tripod to build real field tolerance.
- Progression: Increase distance or load by small amounts each week rather than jumping straight to tour-length walks.
Healthdirect's walking guidance suggests warming up and cooling down for five minutes each session and recommends short, repeated walks, such as three 10-minute sessions, for anyone starting from a lower base. A beginner guide to starting strength training safely is a useful reference if squats and step-ups are new to you. Anyone managing a joint condition, heart issue or other chronic concern should check with a doctor before ramping up walking or strength work.
Pro Tip: Do at least two practice walks in your tour footwear with a fully loaded bag before departure. Blisters and sore shoulders surface on day one of training, not day one of the trip.
Gear choices that change how hard the day feels
What you carry matters as much as how far you walk. A heavy bag turns a gentle walk into a genuine workout, so a few packing decisions make a real difference.
- Choose a bag with a padded hip belt or chest strap to shift weight off your shoulders.
- Bring one versatile zoom lens rather than three primes when the itinerary involves long walking.
- Pick a lighter travel tripod over a heavier studio model unless the shot genuinely demands it.
- Ask whether the operator offers vehicle support or baggage handling so you are not carrying everything all day.
- Wear broken-in walking shoes or boots, never new footwear, and pack layers for temperature swings between dawn starts and midday heat.
A photography course checklist covers gear decisions for beginners in more depth if you are assembling a kit from scratch.
Pacing, hydration and reading your own warning signs
A simple screening test on tour: if you can hold a conversation while walking, your pace is sustainable. If you cannot, slow down. Short, frequent micro-breaks while shooting, rather than one long rest, keep legs fresher over a full day.
- Drink water steadily through the day rather than waiting until you feel thirsty.
- Carry a small electrolyte or salty snack for hot days or long walks between locations.
- Shift heavier walking to earlier or later in the day when heat is lower.
- Do a 60-second mobility sequence (ankle circles, shoulder rolls, hip swings) between shoots to stop stiffness from setting in.
- Watch for dizziness, nausea, confusion or stopped sweating, which are signs of heat exhaustion that need immediate attention.
Short mobility routines between shooting sessions, often just one to three minutes, can help protect shoulders, back and knees over a multi-day trip. If you feel unwell or notice a joint or muscle problem worsening, tell your guide and ask about the operator's slower-pace or support option rather than pushing through. Our guide to outback photo tour preparation covers pacing and timing specific to hot, remote conditions.
How park rules and seasons change the fitness picture
Park grading systems and seasonal rules can shift a tour's demands without changing its name on the itinerary. Parks Australia closes some extended walks in the Jim Jim region during periods of extreme heat, and similar seasonal closures appear across remote parks worldwide to protect walkers from conditions that would otherwise overwhelm a fit, well-prepared person.
Permits and park passes can also affect which routes a guide can legally access, which in turn shapes how much support is available along the way. In remote areas with limited mobile coverage, Parks Australia recommends carrying a personal locator beacon, carrying sufficient water, wearing suitable footwear and telling someone your planned route. A guide can handle navigation and logistics, but terrain, heat and your own medical history remain your responsibility. Before departure, confirm current weather forecasts, route status and any permit requirements directly with the operator or park authority.
How a guided workshop removes the barriers that have nothing to do with fitness
A well-run workshop strips away the parts of a trip that exhaust people who are otherwise perfectly capable: navigation stress, unfamiliar terrain decisions, and carrying gear with no support. Guides who know the route can shuttle equipment by vehicle, set a pace that suits the group, and step in with on-site help when a tripod or bag becomes a burden partway through the day.
Photography tours are often run as small-group, guided trips led by experienced photographers, which means pacing and logistics are handled by someone who has walked the route before. If your fitness is limited, the most useful step is asking the operator directly about accommodations: a slower group, a shorter variant of a walk, or additional vehicle support. Our explainer on what a landscape photography workshop tour involves breaks down what guided structure typically includes, and the benefits of guided photography tours covers the logistics support angle further.
Eating and drinking well on a multi-day shoot
Long days behind the camera make hydration and food easy to neglect, especially during a sunrise session when the light matters more than breakfast. A steady intake of water through the day, rather than a large volume at once, keeps concentration and leg strength up through the afternoon.
Pack portable, energy-dense snacks such as nuts, dried fruit or a sports bar that you can eat one-handed while waiting for light. A light, carbohydrate-rich breakfast before a sunrise start gives you fuel without the sluggishness of a heavy meal, and a proper lunch with protein helps you recover for an afternoon or evening session. On hot days, add a pinch of salt or an electrolyte tablet to your water if you are sweating heavily, since plain water alone will not replace lost sodium.

Avoid alcohol the night before an early start if you can, since it disrupts the sleep you need for a 4 a.m. wake-up and dawn hike. Coffee is fine in moderation, but pair it with water rather than relying on it to replace hydration. If your tour includes vehicle support, keep a refillable bottle and snacks in the vehicle rather than only in your pack, so you are never caught short between stops.
Recovering between long shooting days
Multi-day tours punish anyone who treats each day in isolation. The fatigue from an early start and a long walk compounds overnight, and a tired body on day three feels very different from the same body on day one.
Prioritize sleep over a late editing session; reviewing images can wait until you are home. A short walk or gentle stretch in the evening, rather than sitting still for hours, helps legs recover faster than complete inactivity. Elevating your feet for ten minutes and doing a few minutes of calf and hamstring stretches before bed reduces next-morning stiffness.
Mentally, long days of concentrated shooting are tiring in their own right. Give yourself permission to skip a shot if your body or focus is fading, since a missed sunrise matters far less than an overuse injury that shortens the rest of your trip. Building in a genuine rest morning, if your itinerary allows it, lets both body and attention reset before the next push.
Preparing for altitude or remote, hard-to-reach locations
Tours that climb to altitude or travel deep into remote country add demands that a flat, sea-level training walk will not prepare you for. Reduced oxygen at altitude makes any given effort feel harder, and it can take a day or two of easier activity before your body adjusts.
If your itinerary includes a significant altitude gain, ask the operator about the itinerary's acclimatization days and whether the first day or two is deliberately lighter. Give yourself time at altitude before attempting the hardest walk on the schedule, and watch for headache, nausea or unusual breathlessness, which are signs to rest rather than push on.
In remote country, the fitness question merges with a logistics one: help may be hours away, and mobile coverage can disappear entirely. Carrying sufficient water, appropriate layers and, where recommended, a personal locator beacon matters as much as leg strength. Tell your guide about any relevant medical history before a remote or high-altitude tour, since the margin for error is smaller when outside help is far away.
Common injuries on photography tours and how to avoid them
The injuries that show up most often on photography tours trace back to repetition, awkward posture and uneven ground rather than any single dramatic incident. Rolled ankles from loose or rocky surfaces are among the most common, usually from watching a viewfinder instead of the ground underfoot.
Shoulder and lower-back strain from carrying a heavy bag or holding a tripod for extended periods builds up gradually over a multi-day trip. Knee discomfort on steep descents is another frequent complaint, especially for anyone unaccustomed to sustained downhill walking with a loaded pack.
Prevention mostly comes down to habits covered earlier in this guide: broken-in footwear, a properly fitted bag, loaded practice walks before the trip, and short mobility breaks during the day. A walking-with-confidence approach to scanning your path and staying aware of footing, rather than keeping eyes locked on a screen, prevents a surprising share of trips and stumbles on uneven trails.
What tends to surprise first-time participants
The detail that catches most participants off guard is the worst-section rule: one rough staircase or loose scree slope can define a day's difficulty far more than the total distance walked. People train for distance and get caught out by a single steep patch.
If you take one piece of advice from this guide, make it the loaded practice walk, done twice, in your actual tour footwear, before you travel. Everything else matters, but that single habit catches the most problems early.
— Mark
Booking a workshop that matches your fitness level
If you would rather have logistics and pacing handled for you, Mark Gray's Photography Tours are run as small-group, guided trips with support built into the itinerary, and our 1 Day Photography Courses are a good way to try a guided day before committing to a multi-day trip.
- Check the stated fitness grade on each tour page before booking.
- Contact our bookings team with specific fitness questions or requests for accommodations.
- Consider a Gift Certificate if you want to lock in a future trip while you build fitness.
Browse current Photography Tours and get in touch to talk through what suits your fitness level.
Sources
- Walking track grading system — Parks Australia
- Walking for exercise — healthdirect
- Physical activity recommendations (WHO)
FAQ
What is the "20/60/20 rule" in photography?
Some tours reference a "20/60/20 rule," but this is not a recognized fitness or safety standard for photography tours. If you encounter it on a tour page, ask the operator directly what it refers to rather than assuming a standard meaning.
How do you become a touring photographer?
Becoming a touring photographer generally means building a strong portfolio, gaining experience leading or co-leading smaller trips, and developing the logistics and people skills needed to guide groups safely through varied terrain. Fitness and route knowledge matter as much as camera skill, since a guide needs to manage pacing and safety for an entire group.
Why are photography tours often priced at a premium?
Guided photography tours often cost more than a self-planned trip because the price covers route knowledge, logistics, vehicle support, and the guide's experience getting groups to the right locations at the right time for light. Small-group and luxury-format tours, such as those with limited participant numbers, typically carry higher per-person costs because fixed expenses are spread across fewer people.
What fitness level do I need for a multi-day photography tour?
Most multi-day tours expect a low-to-moderate baseline fitness, but the real requirement depends on the tour's grade, daily walking distance, elevation gain and how much gear you carry. Ask the operator for the specific daily walking time, terrain and standing periods before you book, since labels like "moderate" can mean different things between operators.