

Schedule your Outback shoot for the April to October window, build a modular kit with redundant power and backups, and learn local permission protocols before you photograph a single face. Those three moves separate a frustrating trip from a productive one. Everything else, from lens choice to river crossings, follows from getting these fundamentals right.
TL;DR:
- Schedule your trip between April and October to avoid extreme heat and benefit from softer light during dawn and dusk.
- Pack a weatherproof camera bag, a three-lens system, spare batteries, power banks, and sealed containers to protect your gear from dust and water.
- Obtain all permits and permissions in advance, build relationships with local landowners, and confirm road conditions regularly for safety and access.
- Use foreground elements, such as rocks or animals, to create depth and scale, and expose for highlights to prevent blown-out skies.
- Prioritize cultural respect and permission when photographing Aboriginal communities, and ask for consent before capturing individuals or sacred sites.
Table of Contents
- What Does Outback Photo Tour Preparation Actually Involve?
- Essential Gear and Packing Checklist for Outback Conditions
- When Is the Best Time to Shoot in the Outback?
- How Do You Photograph People Respectfully in the Outback?
- Field Techniques for Capturing the Scale of the Outback
- Logistics and Safety Planning for Remote Tours
- Building a Reliable Daily Backup Routine in the Field
- A Publisher's Checklist for Outback Photo Preparation
- Photographing Wildlife Safely in the Outback
- Why Preparation Matters More Than Gear in the Outback
- Ready to Shoot the Outback With Local Access Already Sorted?
- Sources
What Does Outback Photo Tour Preparation Actually Involve?
Outback photo tour preparation means matching your gear, timing, and conduct to conditions unlike anywhere else you have photographed. The heat, distance, and cultural context of Central and Western Australia demand more than a packed camera bag. You are planning for isolation, extreme light, unreliable connectivity, and communities whose land and customs deserve genuine respect.
Most photographers treat preparation as a gear question. It is really three questions: when to go, what to carry, and how to behave once you arrive. Skip any one of them and the other two suffer. Bring the perfect lens kit during the wrong season and you will fight harsh light for a week. Time your trip perfectly but ignore cultural protocols and you will come home with photos you cannot ethically use.
Essential Gear and Packing Checklist for Outback Conditions
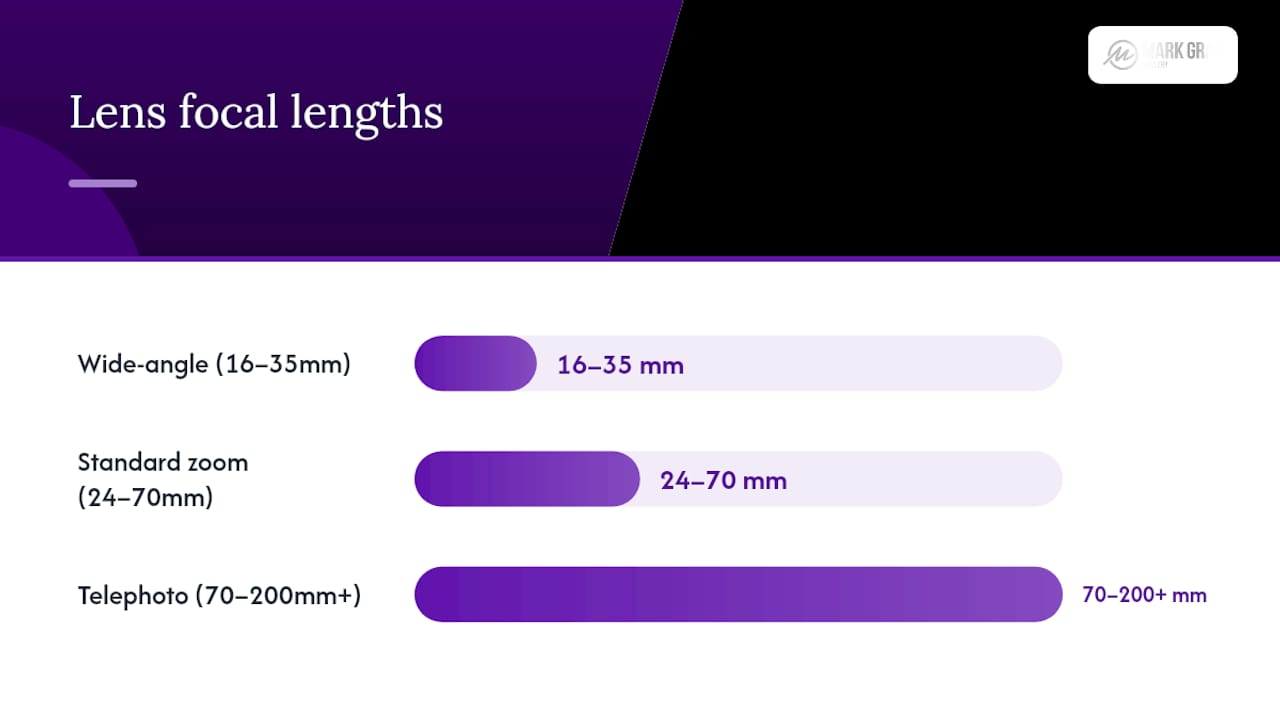
A full-frame or APS-C mirrorless body with weather sealing handles Outback dust better than an unsealed DSLR. Bring a three-lens system: a wide-angle (16 to 35mm) for sweeping red-earth scenes, a standard zoom (24 to 70mm) for versatility, and a telephoto (70 to 200mm or longer) for wildlife and compressed horizon shots. Specialty tilt-shift or macro glass usually stays home unless you have a specific project in mind.
A sturdy tripod with a ball head earns its weight for sunrise and long-exposure work, though a monopod is lighter and faster if you are shooting handheld through the day. Carry a circular polarizer to cut haze and deepen sky color, plus a graduated ND filter for balancing bright sky against dark foreground.
Power planning matters more here than almost anywhere else you will shoot. Bring several spare batteries per body, a high-capacity power bank, and consider a portable solar panel if you are away from mains power for extended periods.
- Weatherproof camera bag with dust flaps
- Sealed containers for batteries, cards, and power banks
- Wide-brim hat, long sleeves, and closed hiking boots
- High-visibility clothing for both safety and contrast against ochre landscapes
Pro Tip: Pack modularly, with batteries, power banks, and memory cards in separate sealed containers. One dust storm or spilled water bottle then compromises a fraction of your kit, not all of it.
When Is the Best Time to Shoot in the Outback?
Australian Photography's guide to shooting remote landscapes points to April through October as the optimal window for Outback photography, thanks to cooler temperatures, drier tracks, and softer light. Summer heat in Central Australia regularly climbs past 40 degrees Celsius, which is dangerous for extended fieldwork and murderous on camera electronics.
Within each day, dawn and dusk remain your two productive windows. Sunrise carries a bonus: fewer tourists at popular lookouts like Kata Tjuta or the Bungle Bungle Range, and softer light that flatters the red earth without blowing out highlights.
Build slack into your itinerary rather than a tight day-by-day script.
- Pick one primary photographic goal and a couple of secondary targets for each leg of the trip
- Leave at least one buffer day per week for weather delays
- Check local event calendars, since rodeos and agricultural shows often deliver striking cultural imagery
- Confirm road and track conditions again the morning you plan to travel, not just before departure
Weather and road access can shift overnight in remote regions, so flexible bookings and refundable accommodation beat rigid, non-changeable plans every time.
How Do You Photograph People Respectfully in the Outback?
Photographing Aboriginal communities and Outback residents calls for a different standard than street photography back home. Ask permission before raising your camera, explain what the image is for, and offer to send a copy. A simple, direct approach works best: introduce yourself, state your intent plainly, and accept a "no" without pushback.
- Check for site-specific photography restrictions before you arrive; some sacred sites and community lands prohibit photography entirely.
- For station stays or community visits, request permission through the property owner or local council well ahead of time.
- Never photograph children without a parent or guardian's clear consent, and confirm whether that consent extends to public display.
- Credit subjects by name when they agree, and consider a small payment or print as thanks when appropriate.
Photographing people in public in Australia carries no blanket legal restriction, but respect for consent and cultural protocol matters far more than what the law technically permits.
Pro Tip: If a community elder or station owner declines a photo request, ask if there is a public event or approved location where photography is welcome instead. That single question often reopens the door.
Field Techniques for Capturing the Scale of the Outback
The Outback's biggest photographic trap is emptiness that reads as nothing on camera. A foreground element, whether a spinifex clump, a fence post, or a person, gives the eye an anchor and turns flat distance into depth. Shoot at f/11 to f/16 when you want everything from foreground to horizon sharp, and focus roughly a third of the way into the frame to maximize hyperfocal distance.
Australian Traveller's guide to Outback photography makes a point worth repeating: people add scale and depth to a frame that empty red dirt cannot provide on its own, and photographers shouldn't worry about faces being identifiable at a distance. Bright clothing helps here twice over, adding visual contrast against ochre earth while making your group easier to spot if anyone strays.
Watch your histogram, not just your LCD preview, which lies in harsh midday sun. Expose for the highlights first; blown-out sky is unrecoverable, while shadow detail can usually be pulled back in post.
- Use a small aperture (f/11 to f/16) for hyperfocal landscape shots
- Shift to long exposures with an ND filter for smooth cloud movement or star trails
- Try torch-based light-painting on foreground rocks or spinifex during blue hour
The same guide recommends torch light-painting on foreground elements during long exposures, a technique that costs nothing but a $20 flashlight and turns a flat night shot into something with genuine texture.
Logistics and Safety Planning for Remote Tours
Human relationships decide Outback access more often than road maps do. Local landholders, station owners, and community hosts control the gates, tracks, and permissions that turn a planned shoot into an actual one, and logistics specialists who work in remote regions consistently point to those relationships as the deciding factor in whether a trip succeeds.
- Verify current road and seasonal access through official state road services before departure, then check again the morning you travel.
- Contact station owners or local operators ahead of time to arrange stays; last-minute requests are often declined outright.
- Plan fuel range conservatively, hire a 4WD suited to unsealed tracks, and keep your group small since smaller groups reduce crowding at key sites and simplify emergency response.
- Carry more water than you think you need, a proper first-aid kit, and a personal locator beacon or satellite messenger for areas without phone coverage.
Building a Reliable Daily Backup Routine in the Field
A four-part written plan keeps remote shoots from turning into data disasters: gear suited to the climate, permits sorted in advance, a repeatable daily backup routine, and a culling process that stops your card count from spiraling.
The routine itself is simple and worth memorizing: ingest your cards each evening, spot-check a handful of images for corruption, then duplicate everything to two separate physical devices before you sleep. Cloud sync is a nice third layer when signal allows, but never rely on it as your only backup in areas with patchy coverage.
- Portable SSDs handle heat and dust better than spinning hard drives
- Rugged, drop-tested cases matter more than raw storage capacity
- Budget charging time for backup drives alongside camera batteries
Pro Tip: Cull aggressively each night rather than waiting until you're home. Delete the obvious misses immediately, and a consistent filename convention (date, location, sequence) saves hours during post-processing later.
A Publisher's Checklist for Outback Photo Preparation
Mark Gray has spent decades photographing Australia's remote landscapes and leads landscape photography workshops across the country, giving him a working understanding of what actually goes wrong on Outback trips and how to prevent it. Find out more about Photography SEO Services | Be Discovered & Book More Shoots to promote your own photography ventures effectively. That experience shapes a simple decision point for anyone weighing independent travel against a guided photography tour.
A well-run workshop typically handles:
- Permits and station access arranged in advance
- Local contacts who know current road and weather conditions
- Small group sizes for better light access at key locations
- Structured instruction on the exact techniques covered above
Choose a guided workshop when your priority is maximizing shooting time and minimizing logistics headaches. Choose independent travel when you already have remote-travel experience and genuinely want the exploration itself. Neither is the wrong answer, but know which one you're signing up for before you book flights.
Photographing Wildlife Safely in the Outback
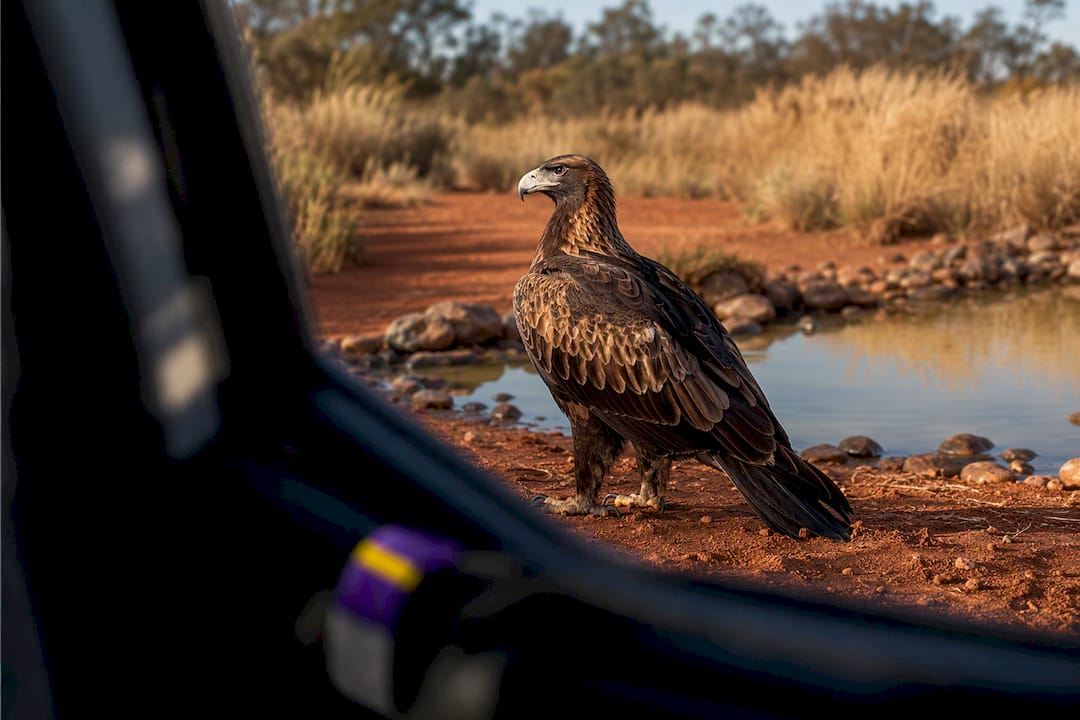
Outback fauna rewards patience but punishes carelessness. Kangaroos, emus, and wedge-tailed eagles are common sights along quiet roads and station tracks, and a 300mm-equivalent telephoto lets you fill the frame without closing distance that stresses the animal or puts you at risk.
Keep a minimum buffer of several meters from any wild animal, more for larger kangaroos during breeding season when they can behave unpredictably. Never approach a snake for a shot, even a photogenic one basking on a warm rock; several of Australia's most dangerous species are common in the exact scrubland where landscape photographers work. Move slowly, stay quiet, and let the animal set the terms of the encounter.
Dawn and dusk again do double duty here: wildlife is most active during those same golden-hour windows that give you the best light, so a single early start often delivers both. Avoid using flash on nocturnal or crepuscular species, since it startles animals and rarely improves the image compared to available light or a bumped ISO.
Water sources near roads and stations attract wildlife reliably, especially in dry months, making them worth scouting even without an animal in sight when you arrive. Photograph from your vehicle where practical; it acts as a natural hide and keeps both you and the animal calmer than an open approach ever will.
Why Preparation Matters More Than Gear in the Outback
The conventional advice on Outback photography spends too much time on camera specs and not enough on judgment. A $5,000 lens does nothing for you if you have not checked road conditions, and the sharpest wide-angle in the world cannot fix a photo taken without consent from someone who clearly did not want their picture snapped.
What gets underestimated is how much the cultural and logistical groundwork shapes the actual images you bring home. Photographers who spend a week arranging station access and community permissions consistently come back with stronger, more honest work than those who show up with better gear and no relationships. The Outback does not reward equipment. It rewards the people who took the time to be welcome there.
If you take one thing from this guide, prioritize the April to October timing and the permission conversations before you obsess over lens choice. Gear failures are recoverable. A community that no longer trusts photographers is not.
— Mark
Ready to Shoot the Outback With Local Access Already Sorted?
Independent Outback travel means you handle every permit request, every station negotiation, and every backup drive yourself. A Mark Gray workshop removes that entire layer of friction, since workshops are built for photographers who want to focus on shooting while someone else handles access, accommodation, and safety planning.

Each Outback workshop is built around small groups, established local contacts, and an itinerary designed for the light rather than around it. Before booking any tour, ask about group size, flexibility around weather delays, what meals and transport are included, and the cancellation policy. Those four questions separate a genuinely useful workshop from one that just adds a guide to your existing logistics headache.
Check current availability and workshop dates for the next Outback season and see whether a guided trip fits the kind of images you are trying to bring home.
Sources
- Photographing the outback (Part one) - Australian Photography
- Ken Duncan's guide to shooting the Outback - Australian Traveller
- How to Prepare for a Photography Workshop | Fstoppers