
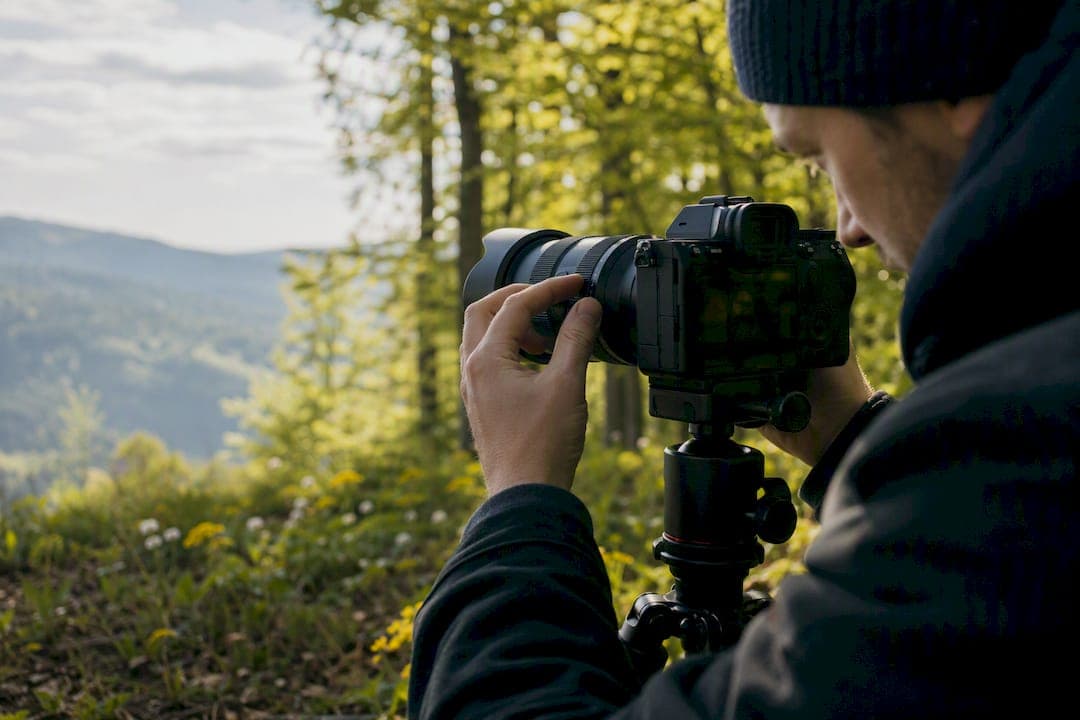
Focus stacking is worth the extra effort when a close foreground and a distant background cannot both be sharp in a single exposure, or when you need maximum sharpness for a large print. If your wide-angle scene has a rock, flower, or driftwood a few feet from the lens and a mountain range behind it, one frame will not hold both in focus without sacrificing quality.
Here's the field checklist before you press the shutter:
- Set the camera on a tripod and switch to manual exposure and manual white balance.
- Choose an aperture between f/5.6 and f/11 to avoid diffraction softening.
- Focus on the nearest element first, then rack focus backward in overlapping steps.
- Shoot each frame with a remote trigger to avoid camera shake.
- Blend the sequence in Photoshop, Helicon Focus, or Zerene Stacker.
One warning up front: movement ruins stacks. Wind on grass, water, or leaves between frames creates ghosting that no software fixes cleanly.
Key Takeaways
Focus stacking landscapes solves a physical limitation of depth of field by combining multiple sharp focus planes shot at diffraction-free apertures into one blended image.
| Point | Details |
|---|---|
| Stack when depth exceeds one frame | Use stacking when a close foreground and distant background can't both be sharp at f/8 to f/11. |
| Lock settings before shooting | Manual exposure, manual white balance, and a tripod prevent the drift that ruins blends. |
| Overlap focus steps generously | Extra frames with smaller focus steps prevent soft bands between slices. |
| Movement is the top failure cause | Stabilize foreground elements or mask a single frozen frame into the stack instead of blending motion. |
| Match software to stack complexity | Photoshop's Auto-Align and Auto-Blend suits most landscapes; Helicon Focus or Zerene Stacker handle denser, more complex stacks. |
| Build the skill through guided practice | A Mark Gray photography workshop puts you through the full field-to-blend workflow with direct feedback. |
Table of Contents
- What Focus Stacking Landscapes Actually Solves
- Is Focus Stacking Worth the Extra Time?
- Gear and Camera Settings That Produce Reliable Stacks
- How Do You Shoot a Focus Stack in the Field?
- In-Camera Focus Bracketing: Setup, Benefits, and Limits
- Photoshop Versus Dedicated Stacking Software for Landscapes
- Fixing Movement, Exposure Drift, and Soft Bands in a Stack
- When Stacking Isn't the Right Tool
- Workshop Habits That Separate Good Stacks From Failed Ones
- Composing for a Stack Before You Shoot One
- How Lighting Conditions Affect Your Stacking Success
- Manual Alignment and Blending for Difficult Scenes
- Fixing Halos and Ghosting After the Blend
- Software Settings That Actually Matter for Landscape Stacks
- How Focus Stacking Changed the Way I Compose
- Learn Focus Stacking Hands-On at a Mark Gray Workshop
- Frequently Asked Questions
- Sources
What Focus Stacking Landscapes Actually Solves
Focus stacking landscapes means shooting a sequence of frames at different focus distances and merging them into one image where everything, from the nearest pebble to the horizon, is sharp. It solves a problem that no single aperture setting can: depth of field is a physical limit, not a preference.
Stopping down to f/16 or f/22 to gain depth of field sounds logical, but it introduces diffraction, a softening effect caused by light bending around the lens's aperture blades. The result is a photo where more is technically "in focus," yet nothing looks as crisp as it should. Focus stacking sidesteps that tradeoff entirely by shooting at your lens's sharpest apertures, typically f/8 to f/11, and letting software combine multiple planes of sharp focus instead of asking one aperture to do all the work.
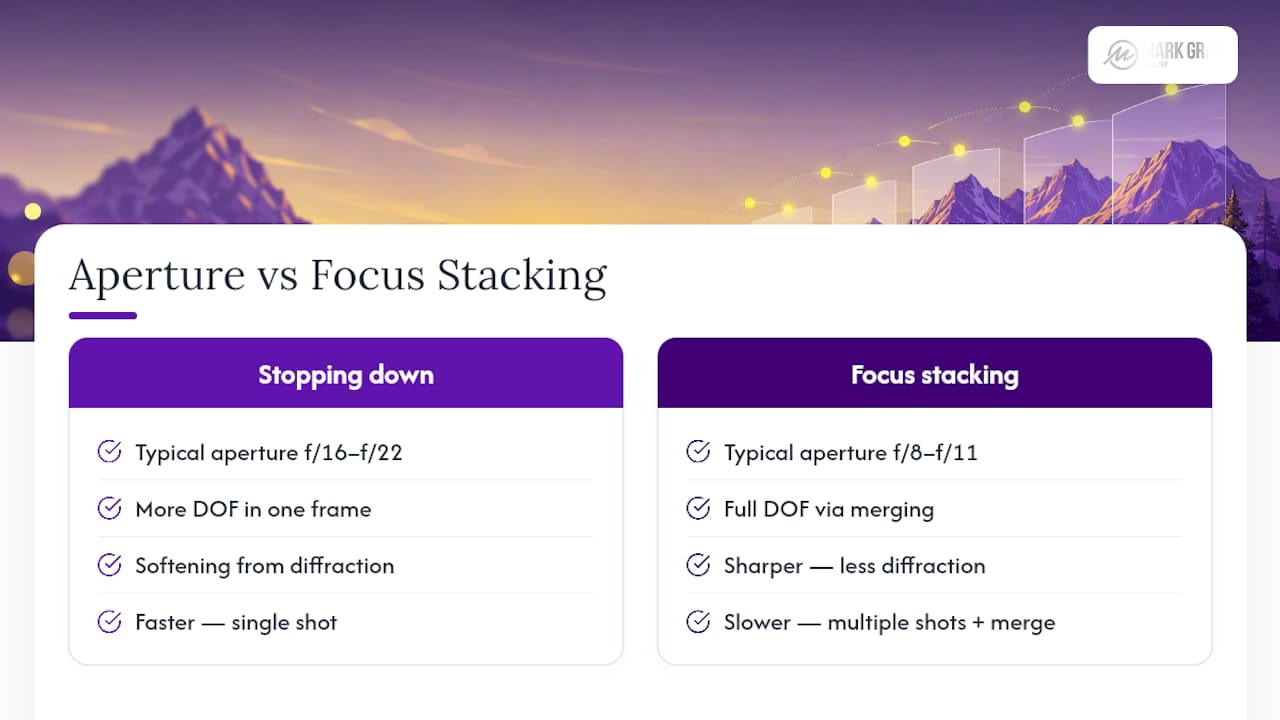
That said, stacking is not always necessary. If your hyperfocal distance calculation shows the whole scene falls within acceptable sharpness at f/11, a single frame is faster and just as effective.
Is Focus Stacking Worth the Extra Time?
The payoff is real: shooting at your lens's sweet spot instead of a diffraction-limited aperture produces noticeably crisper detail, especially once you print larger than 16x20 inches. Stacking also plays well with other landscape photography techniques, letting you combine a sharp near-far composite with graduated exposures for a high dynamic range scene.
The tradeoffs are just as real. Expect more time in the field, more storage on your memory cards, and more editing decisions than a single exposure ever requires. A stack with several frames that goes smoothly might take a few minutes to shoot, while a longer sequence in difficult conditions might take much longer and still fail.
Scenes that reward the effort:
- A wildflower meadow with peaks behind it
- Tide pools or rock pools in the foreground with a coastal horizon
- Any composition using a wide-angle lens closer than three feet to the nearest subject
- Large-format prints where foreground softness would be obvious at viewing distance
Pro Tip: If you're not sure whether a scene needs stacking, take one test frame focused a third of the way into the composition at f/11. Zoom into the corners on your camera's screen. If the nearest and farthest points both look acceptably sharp, skip the stack and save yourself the editing time.
Gear and Camera Settings That Produce Reliable Stacks
A stable platform matters more than any other single factor. Even a tiny shift between frames throws off alignment, so a solid tripod is non-negotiable, along with a remote trigger or intervalometer to eliminate shutter-press vibration. For macro-adjacent foreground work, a focus rail adds precision, though most landscape stacking relies on manual or in-camera focus adjustments rather than physical rail movement.
Dial in these settings before your first frame:
- Aperture between f/5.6 and f/11, favoring the middle of that range on most lenses to balance depth of field with diffraction.
- ISO as low as the light allows, generally 100 or 200 for daylight landscapes.
- Shutter speed set manually once exposure looks correct on your test frame, then locked for the entire sequence.
- RAW capture format, always, so you retain full latitude for why shooting RAW format matters for landscapes during post-processing.
- White balance set manually rather than left on auto, which can shift subtly between frames and create color banding in the final blend.
Use focus peaking or live-view magnification to confirm exactly where each frame lands its focus plane, especially on foreground elements with fine texture like bark, sand ripples, or lichen. Every lens has a sweet spot, usually two to three stops down from wide open, where resolution peaks before diffraction starts eating into it. Learning your specific lens's sweet spot pays off across every stack you shoot afterward.
Pro Tip: Lock your exposure and white balance using manual mode rather than relying on exposure lock buttons. A locked exposure that survives a battery swap or accidental button bump is worth the ten extra seconds it takes to set.
Your landscape photography gear essentials list should already include most of what a stacking session demands.
How Do You Shoot a Focus Stack in the Field?
Follow this sequence once you've found your composition and settled on your aperture:
- Compose the frame slightly wider than you need. Extra margin around the edges gives Photoshop's auto-align room to work without cropping into your subject.
- Take one test exposure in aperture priority to establish correct exposure, then switch to full manual mode and lock those settings in.
- Set focus mode to manual, or use single-point autofocus and recompose without touching the shutter halfway.
- Decide your focus order. Starting at the nearest point and racking backward toward infinity is the most common approach, though starting from the background works just as well if that's more comfortable with your lens's focus throw.
- Shoot each frame with generous overlap between focus planes. Leaving a gap between slices is the classic mistake that produces a soft band in the final image, so when in doubt, add another frame with a smaller focus step rather than skipping ahead.
- Fire each shot with a remote trigger or your camera's two-second timer to avoid vibration.
Frame count depends on scene depth, not a fixed rule. A composition with a close foreground and a distant background, shot at a sharp aperture like f/8, might need several frames. Closer foreground elements require more frames to cover the depth. Shoot more than you think you need; extra overlap gives you a buffer for cleaner blends if one frame turns out slightly soft.
If the light is shifting, such as during the fast few minutes after sunrise, capture a second exposure bracket set at each focus point so you can compensate for brightness changes without abandoning the stack. And always leave breathing room in your composition. Auto-align in Photoshop shifts pixels slightly to match frames, which means your final crop will be tighter than what you originally composed.
In-Camera Focus Bracketing: Setup, Benefits, and Limits
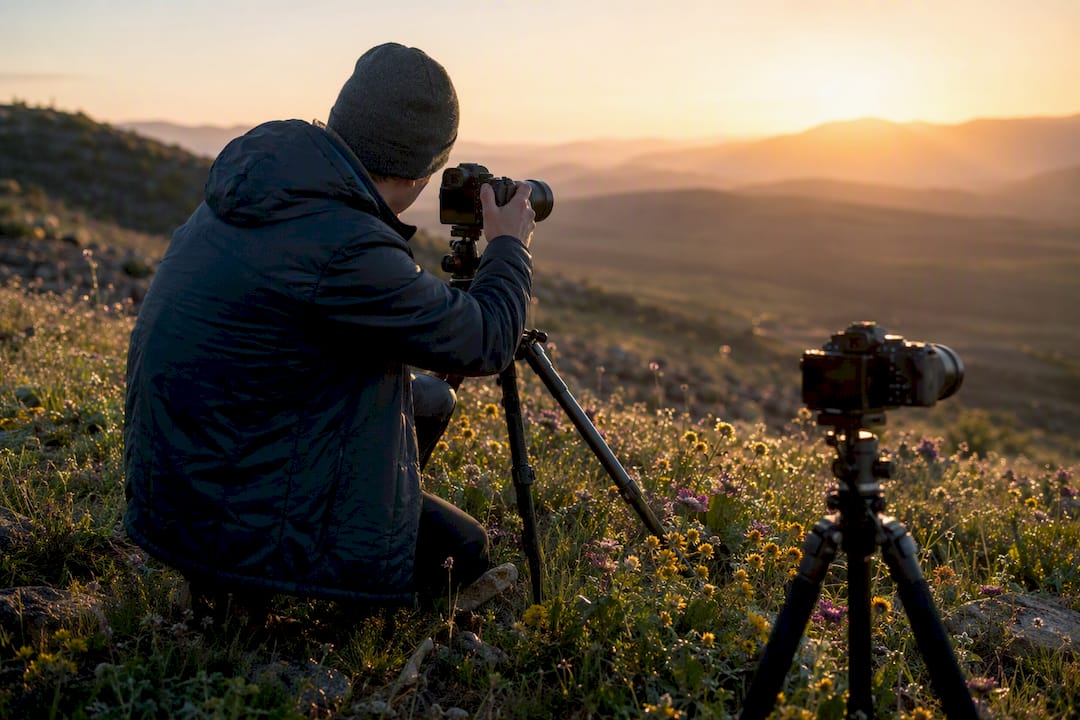
Many mirrorless cameras now include a focus bracketing or focus shift shooting mode that automates the entire capture sequence. You set the number of frames and the step width, and the camera racks focus and fires the shutter for you.
The upside is speed and consistency. In-camera automation removes the guesswork of manual focus racking, and some bodies will even generate a stacked JPEG preview in-camera so you can confirm the sequence worked before you break down your tripod.
That preview is worth checking every time. It saves you from discovering a failed stack after you've already left the location.
The limits matter too:
- Step size is often rounded to the camera's nearest preset increment, which can leave gaps in scenes with unusual depth transitions.
- In-camera stacked previews are frequently JPEG only, meaning you still need to process the RAW frames yourself for full quality.
- Extreme foreground-to-background depth sometimes exceeds what the camera's bracketing feature can handle in one sequence, requiring a manual second pass.
For straightforward scenes, in-camera bracketing is faster than manual racking. For anything unusual, like a foreground three inches from the lens, manual control still wins.
Photoshop Versus Dedicated Stacking Software for Landscapes
Most landscape stacks, especially the five to ten frame sequences typical of near-far compositions, don't need specialized software. Photoshop's Auto-Align Layers and Auto-Blend Layers workflow handles this job well, and if you already own a Creative Cloud subscription, it costs nothing extra.
Adobe Photoshop's process, once your RAW edits are synced across frames, involves loading the images as layers, running Auto-Align Layers, then Auto-Blend Layers set to "Stack Images." Photoshop analyzes sharpness across each layer and builds a mask that reveals the sharpest region from each frame. For most landscapes, this happens in well under two minutes.
Dedicated tools like Helicon Focus and Zerene Stacker exist for a reason, though. Their blending algorithms handle far denser stacks, the kind macro photographers shoot with fifty or more frames, and they include specialized artifact removal that outperforms Photoshop when foreground elements have fine, repeating detail like grass or foliage. If you regularly shoot scenes with intricate near-foreground texture, either program is worth the investment.
Pro Tip: Sync your RAW adjustments across every frame in Lightroom or Camera Raw before you start stacking. A stack blended from frames with mismatched exposure or color will show visible seams no software can fully hide.
A dependable processing order:
- Apply RAW adjustments to one frame, then sync them across the full sequence.
- Load all frames as layers in your chosen software.
- Run the auto-align function first, always before blending.
- Blend using auto-blend or the stacking tool's default algorithm.
- Inspect the resulting mask at 100% zoom, paying close attention to edges where foreground meets background, and fix any halos manually.
Fixing Movement, Exposure Drift, and Soft Bands in a Stack
Movement between frames is the single biggest cause of a failed stack. Wind on grass, waves on a shoreline, or a swaying branch creates ghosting that blending software cannot resolve on its own.
Practical fixes:
- Shoot during low-wind windows, often the first ten minutes after sunrise, before thermal winds pick up.
- Clamp small foreground elements or weigh down grass with a stake if the composition allows it.
- For unavoidable movement, shoot one fast-shutter frame that freezes the moving element and manually mask that single frame into your stacked background afterward.
Exposure drift, common when shooting into changing light, is solved by locking manual exposure from the first frame, or by shooting a bracket set at each focus point so you can correct brightness shifts individually in post.
Pro Tip: Duplicate your aligned layer group before running auto-blend. If the software produces a poor mask on a tricky edge, you'll have an untouched aligned copy to paint from instead of starting the alignment over.
Soft bands between focus slices usually mean you skipped too far between steps. Crop slightly tighter to remove ragged alignment edges, and next time, shoot smaller focus increments through that same depth range.
When Stacking Isn't the Right Tool
Stopping down further, to f/16 or f/22, to try to capture more depth in one frame increases diffraction and actually reduces overall sharpness rather than improving it. That's the exact tradeoff stacking exists to avoid, but it cuts the other way too: not every scene needs the extra steps.
If your foreground element sits eight feet or farther from the lens, a single frame at f/11 using hyperfocal distance often delivers acceptable sharpness front to back. Stacking becomes impractical in a few common situations: fast-moving clouds that change your lighting mid-sequence, moving water where every frame shows a different wave pattern, or dense vegetation shifting in wind that no amount of clamping can fully control. In those cases, a single well-exposed frame beats a failed stack every time.
Workshop Habits That Separate Good Stacks From Failed Ones
Deciding whether to stack or rely on hyperfocal distance comes down to one practical test taught across Mark Gray's landscape workshops: check the nearest element's distance from the lens. Inside three feet with a wide-angle lens, stacking almost always wins. Beyond eight feet, hyperfocal technique usually holds up fine.
A few field habits get repeated on every course:
- Compose noticeably wider than the final crop to leave room for auto-align's inevitable pixel shift.
- Duplicate your aligned layers before blending, so a bad mask never costs you the whole stack.
- Check the in-camera stacked preview before leaving a location. Discovering a gap in your focus sequence at home, hours from the scene, is a lesson every photographer learns once and never repeats.
During golden hour, when light changes by the minute, prioritize speed. Shoot the stack first, refine composition on a backup frame second. The skills built across a hands-on photography course come almost entirely from repeating this sequence under time pressure until it becomes automatic.
Composing for a Stack Before You Shoot One
Good stacking starts with composition, not software. A composition built for a single frame doesn't always translate cleanly into a stack, so a few adjustments at the tripod stage save real editing time later.
Leave wider margins around your frame than you would for a normal shot. Auto-align shifts every frame slightly to match focus points, and that shift eats into your edges. A composition cropped tight in-camera leaves no room for that correction and forces an awkward final crop.
Pick a foreground anchor with a clear, stable edge; a rock, a piece of driftwood, a defined leaf cluster. Fine, feathery elements like tall grass or wildflower stems are harder for blending software to mask cleanly, since their edges shift unpredictably between frames even in still air. If your composition includes both a strong anchor and softer texture nearby, expect to spend more time on manual masking.
Think about your depth transitions before you start shooting. A composition with a gradual slope from foreground to background needs fewer, more evenly spaced focus points than one with an abrupt jump, like a rock four feet away against a mountain a mile off. Abrupt transitions need extra frames concentrated around the jump to avoid the soft band that comes from insufficient overlap.
Finally, consider your final print size while composing. A file destined for a 40 inch print rewards the extra stacking effort far more than one headed for a web gallery, where a single sharp frame at f/11 is often indistinguishable from a stack.
How Lighting Conditions Affect Your Stacking Success
Stable, even light is the easiest condition to stack in, and it's rarer than most photographers expect. Overcast midday light, while flat for other purposes, is genuinely ideal for stacking because exposure stays consistent frame to frame with no risk of drift.
Golden hour, the light most landscape photographers chase, is also the trickiest window for a clean stack. Brightness can shift noticeably in the ninety seconds it takes to shoot a seven-frame sequence, especially near sunrise when the sun is climbing fast relative to the horizon. If you notice exposure creeping between test frames, capture a second bracket set at each focus point so you can correct for the shift during editing rather than discovering mismatched exposures after the fact.
Harsh midday sun creates a different problem: contrast so extreme that shadows in your foreground frames may clip before you've finished racking through your sequence. Locking exposure manually before that first frame prevents your camera from unintentionally compensating for the changing composition as focus shifts.
Blue hour and low-light stacking introduce longer shutter speeds, which raises the odds that any breeze will blur foreground elements across the sequence. In these conditions, boosting ISO slightly to shorten exposure time often produces a cleaner stack than a longer, quieter exposure that risks motion blur in every frame.
Whatever the light, the fix is consistent: lock your settings early, monitor for drift between test frames, and shoot a backup bracket set the moment conditions look unstable.
Manual Alignment and Blending for Difficult Scenes
Automated blending handles most landscape stacks well, but certain scenes push past what auto-align and auto-blend can manage cleanly. Water, foliage in motion, and stacks with more than ten frames are the usual culprits.

Start by running the standard automated pass anyway, even when you expect problems. It gives you a baseline and often correctly resolves eighty percent of the frame, leaving only specific trouble zones to fix by hand.
For those trouble zones, work with layer masks directly rather than trusting the auto-generated mask. Paint the mask manually using the layer that shows the sharpest detail in that specific region, referencing your duplicated aligned layer group as a clean source if the auto-blend result looks torn or doubled.
When a single frame contains a moving element you can't avoid, like a branch swaying at the frame's edge, isolate that region to one frame only and mask everything else from the surrounding stack. This is where understanding post-processing workflows pays off, since masking decisions here often matter more than the initial capture settings.
Work in overlapping passes rather than trying to perfect the whole mask at once: fix the worst zone first, check the result at full resolution, then move to the next.
Fixing Halos and Ghosting After the Blend
Halos show up as a faint bright or dark outline tracing the edge between two focus planes, usually where a foreground subject meets a soft, out-of-focus background element that shifted between frames. They happen because the blending algorithm blends a transition zone rather than a hard edge, and that transition zone doesn't always match the true subject boundary.
The fix starts with the same duplicated aligned layer group you kept in reserve. Select the halo region on your blended layer, then paint in detail from the single frame where that edge sits most cleanly, either fully sharp or fully out of focus, rather than the ambiguous blended version.
Ghosting looks different: a faint double image or transparent overlap, almost always caused by something moving between frames rather than a blending edge problem. A leaf that shifted position between focus points can appear twice, faintly, in the final blend. The reliable fix here isn't more blending. It's picking one frame where that leaf sits in a single clean position and masking that region from that frame alone, ignoring the rest of the stack for that specific area.
Both problems share the same root cause, movement or mismatch between frames, and the same solution philosophy: trust one clean frame over an automated blend for any region where the algorithm clearly guessed wrong.
Software Settings That Actually Matter for Landscape Stacks
Default settings in most stacking programs are tuned for macro photography, where frame counts run high and depth differences are small. Landscape stacks behave differently, so a few adjustments improve results consistently.
In Photoshop, always run Auto-Align Layers before Auto-Blend Layers, never skip straight to blending. Choose "Auto" projection in the align dialog for most landscape scenes; it handles the mild parallax shift of a tripod-mounted sequence better than the "Reposition Only" setting, which assumes zero movement between frames.
When you reach Auto-Blend Layers, select "Stack Images" and leave "Seamless Tones and Colors" checked. That setting smooths minor exposure differences between frames that even a locked manual exposure can't fully eliminate.
In Helicon Focus, the "Depth Map" rendering method generally outperforms "Weighted Average" for landscape scenes with clear near-far separation, since it better preserves crisp edges where foreground meets background. Zerene Stacker's "PMax" method handles similar scenes well, particularly when a stack includes fine texture like sand, bark, or rock detail that softer averaging methods tend to blur slightly.
Whatever software you use, always inspect the result at 100% zoom before exporting. A blend that looks flawless at fit-to-screen zoom can hide a halo or soft band that only becomes visible in a large print, and catching it now costs a few minutes, not a return trip to the location.
How Focus Stacking Changed the Way I Compose
A useful rule of thumb: if you can't decide whether to stack, check whether your nearest element sits inside three feet of the lens. Inside that distance, stack it. Beyond it, hyperfocal technique at f/11 usually holds up fine, especially for anything smaller than a large exhibition print.
Knowing stacking is available changes how you compose in the field. You start noticing foreground textures, rocks, moss, tide pools, that you'd otherwise walk past because a single frame couldn't hold them sharp against a distant subject.
Practice the skill without narrowing your creative range: shoot a stack, then shoot one confident single frame of the same scene before you move on. Comparing the two later teaches you faster than either technique alone.
Learn Focus Stacking Hands-On at a Mark Gray Workshop
Reading about focus stacking gets you halfway there. Shooting it under real golden-hour pressure, with someone checking your settings before the light disappears, gets you the rest of the way faster than any tutorial can. A one-day Mark Gray photography course puts you in exactly that position: composing a near-far scene, dialing in manual exposure, and racking focus through a full sequence before working through the Photoshop blend back at base.

Attendees leave with more than theory. You'll shoot multiple stacks across a single session, review what worked and what didn't in real time, and walk through the align-and-blend workflow on your own files rather than a demo image. That direct feedback loop, catching a soft gap in your focus sequence or an exposure drift issue before you've left the location, is the fastest way to build the judgment this technique demands.
If you're ready to move past reading and start shooting, book a Mark Gray photography workshop and check upcoming dates and locations. Courses run across a range of landscapes, giving you the chance to practice stacking in conditions you can't recreate from a desk.
Frequently Asked Questions
What is the best aperture for focus stacking landscapes? Apertures between f/5.6 and f/11 give you sharp results without the diffraction softening that creeps in past f/16.
How many frames do I need for a landscape focus stack? It depends on how close your foreground element sits to the lens. Five to seven frames often covers a moderate near-far scene, while a foreground within a few feet of the lens can need ten or more.
Can I focus stack handheld? Technically yes, but alignment gets much harder without a tripod. A stable base is one of the few genuinely non-negotiable parts of a reliable stack.
Does in-camera focus bracketing replace manual focus stacking? For straightforward scenes, in-camera bracketing saves time and produces consistent results. Complex depth transitions or JPEG-only previews on some camera bodies still make manual control the safer choice.
What causes ghosting in a focus stack? Movement between frames, usually wind on foliage or water, is the most common cause. Masking a single clean frame into the affected area fixes it more reliably than trying to blend the moving frames.
Sources
- The ultimate focus stacking guide | Capture Landscapes
- Focus Stacking Landscapes: Sharp From Near to Far | Fstoppers
- How to use focus stacking for landscape photography | B&H Explora
- A beginner’s guide to focus stacking | Digital Photography School
- Helicon Focus product page | Heliconsoft