
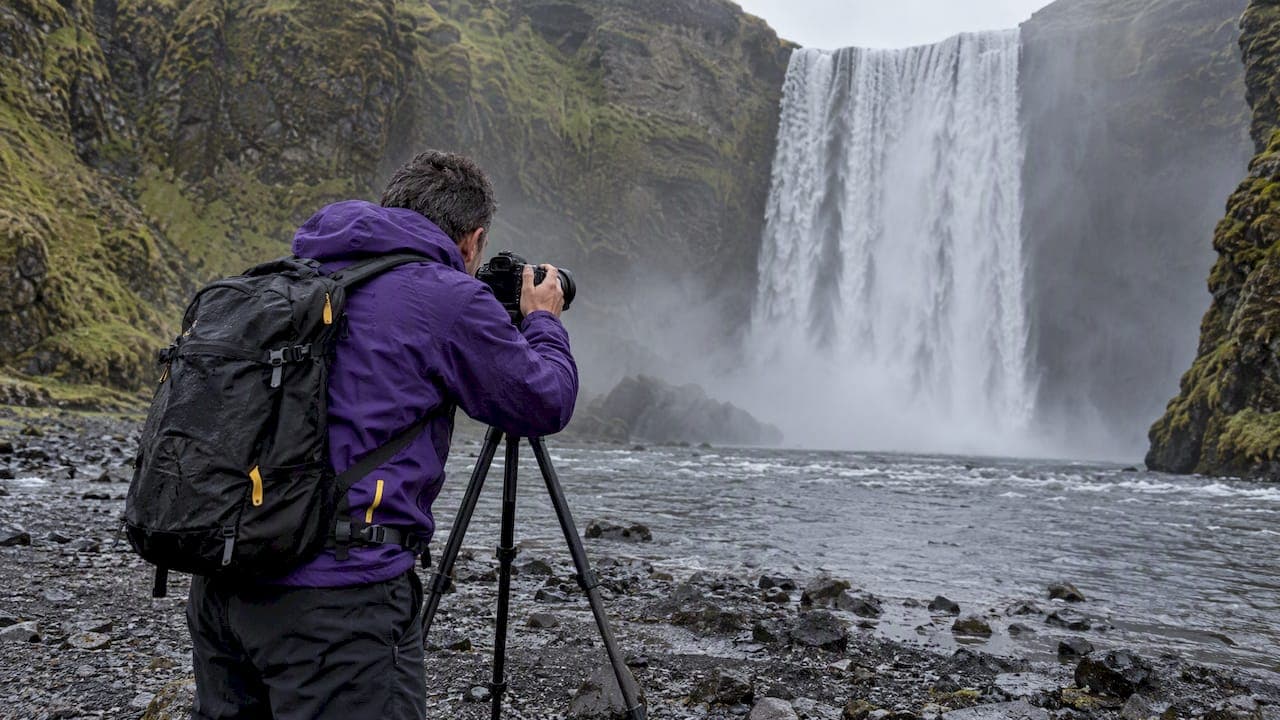
Iceland's Ring Road is an essential circuit for landscape photographers, and 10 to 14 days gives you time to shoot it properly, with buffer days for reshoots. Prioritize the South Coast waterfalls, Jökulsárlón and Diamond Beach, Vestrahorn, Mývatn and the Snæfellsnes Peninsula with Kirkjufell. Summer brings the midnight sun, and winter brings short, dramatic light and aurora.
TL;DR:
- Keep Day 10 free for reshoots, and put any extra days in Vatnajökull or the South Coast, where conditions shift quickly.
- Summer’s midnight sun supports handheld detail work but rules out aurora; winter enables Northern Lights and dramatic low light, with fewer stops daily.
- At Jökulsárlón and Diamond Beach, use 0.5–2 second exposures to blur retreating water while keeping ice sharp, and check the tide.
- At Reynisfjara, obey Safetravel’s warning lights, closures, and viewing boundaries because sneaker waves and falling rocks can endanger photographers without warning.
- Each night, copy files to a portable drive, verify they open before formatting cards, and store the drive separately from the cards.
Table of Contents
- How should you plan a photography-first 10-day Ring Road itinerary?
- What are the best Ring Road photo locations and how do you shoot each one?
- How do the seasons change your light and camera settings?
- What gear do you need, and how do you protect it?
- How do you drive the Ring Road safely and check conditions?
- What field techniques make Ring Road photographs stronger?
- What does a reliable daily backup routine look like on the road?
- Why trust our guidance on this route?
- Why chase light instead of the checklist?
- How can we help you photograph the Ring Road with confidence?
- FAQ
- Sources
How should you plan a photography-first 10-day Ring Road itinerary?
The Ring Road, or Route 1, is a 1,322 km loop around the island. Driving it is the easy part. The hard part is scheduling it so you stand in front of the right subject when the light is right. We build a photographer's itinerary around regions that reward repeat visits, then we hold one day back for the shot the weather denied you.
A photography-first week and a half looks like this:
- Days 1 to 3, Golden Circle and South Coast. Start at Þingvellir, then Geysir and Gullfoss. Push on to Seljalandsfoss, Skógafoss and Reynisfjara. Shoot the waterfalls in soft evening light and keep the black sand beach for a calm morning. This stretch is a dense cluster of subjects, and small detours and repeat visits beat a single pass-through.
- Days 4 to 6, Vatnajökull region. Base yourself near Skaftafell, then give Jökulsárlón and Diamond Beach a full sunrise and a full sunset. Add Vestrahorn at low tide. Wait for the light here. A bank of cloud can break into color, and you cannot predict it, only be present for it.
- Days 7 and 8, East Fjords and the north. The East Fjords are remote and quiet, so use them for moody, layered mountain and fjord frames. Continue north to Mývatn for geothermal color and on to Dettifoss, where spray demands lens cloths and patience.
- Day 9, Snæfellsnes and Kirkjufell. Treat this as a detour you can swap earlier in the loop if your flow or the forecast suggests it. Arrive at Kirkjufell for sunrise rather than midday.
- Day 10, buffer. Use it for reshoots, a second pass at a site that stayed grey, or a final aurora attempt if you travel in the dark season.
The buffer day is the most important line on that list. Top Ring Road images often come from waiting for the right light, and experienced photographers build in reshoot days rather than trying to visit every location once. If your trip runs to 12 or 14 days, add the extra time to Vatnajökull and the South Coast, where conditions change fastest and the subjects are strongest.
Which lenses to carry each day
A wide zoom around 16 to 35 mm covers waterfalls, ice beaches and mountain panoramas. A mid-range lens, roughly 24 to 70 mm, handles general landscape and village scenes. A telephoto between 70 and 200 mm isolates ice fragments at Diamond Beach, compresses the ridgelines at Skógafoss and picks out the steam and color of geothermal fields.

Use a tripod for waterfalls, seascapes, blue-hour frames and every aurora session. Go handheld in summer's long golden light when you are chasing details, wildlife or horses, and when spray or wind makes setting up impractical.
Pace each day around light rather than distance. A typical shooting day starts before sunrise at the main subject, moves to a secondary location during the harsh middle hours (scouting, driving, resting, backing up cards) and returns to the best site for late light. Most of the driving on this route is short, so sunrise and sunset, not mileage, set the schedule. Veteran photographers also advise renting a 4WD and taking your time, since waiting for the right light can take days but yields superior images.
What are the best Ring Road photo locations and how do you shoot each one?
The following stops are worth considering. Each has a specific tactic that separates a snapshot from a keeper.
- Seljalandsfoss: Walk behind the falls for a framing that places the viewer inside the water curtain. Spray soaks the front element within seconds, so carry several microfiber cloths and consider a lens hood. A neutral density filter lets you smooth the water at midday.
- Skógafoss: Use the river leading from the base as a line into the frame. A telephoto compresses the cascade and the rainbow that often forms in the mist, which a wide lens makes small.
- Reynisfjara and Dyrhólaey: Shoot the basalt columns and sea stacks from a safe distance, and use Dyrhólaey's elevated view for the long sweep of coast. The beach is dangerous. Sneaker waves arrive without warning, so follow the official warnings and closures described in the logistics section below.
- Jökulsárlón and Diamond Beach: Isolate single pieces of ice against black sand. Shutter speeds of roughly 0.5 to 2 seconds blur the retreating wash while keeping the ice sharp. Check the tide, because the best moments often follow the water pulling back.
- Vestrahorn: Look for reflections and tide lines in the wet sand in front of the mountain. Position yourself low, and watch the tide so you do not get cut off or soaked.
- Dettifoss and Mývatn: At Dettifoss, spray control is everything, and a telephoto lets you stay back from the wettest zone. At Mývatn, geothermal ground adds orange, yellow and milky blue tones that reward both wide scenes and tight telephoto abstracts.
- Kirkjufell: The classic composition pairs the mountain with Kirkjufellsfoss in the foreground. Mid-day crowds are heavy, so arrive at sunrise. Photographers on 10-day trips recommend sunrise stops to beat the crowds at popular sites like this one.
- Quieter options: Kolugljúfur canyon and the coastal stack Hvítserkur reward a detour when the headline sites are crowded or clouded over. They add variety to a portfolio that might otherwise be all waterfalls.
For more locations beyond the Ring Road's headline stops, our guide to the 12 most breathtaking Iceland photography destinations goes deeper on individual sites.
A thematic approach also helps you finish with a coherent set of images. Shooting waterfalls, geothermal features, coastal details or a portrait series of Icelandic horses gives a portfolio a clear thread instead of a scattering of postcards.
How do the seasons change your light and camera settings?
Summer and winter produce almost two different countries. In summer, the midnight sun stretches golden hours into long, low-angled sessions. You can shoot waterfalls in warm light, and handheld work is easy because the light never collapses. The drawback is that true darkness disappears, so there is no aurora and no real night sky.
Winter reverses that. Days are short and the sun stays low, which gives dramatic side light on mountains and ice, and the Northern Lights become possible. Plan fewer locations per day, since daylight limits you, and treat sunrise and sunset as one long event.
Aurora starting point: ISO 800 to 3200, aperture f/1.4 to f/4, and shutter speeds between 1 and 15 seconds on a sturdy tripod, according to guidetoiceland.is.
Start at the faster end of the aperture and the middle of the ISO range, then adjust. A brighter, faster aurora needs a shorter shutter to keep its structure, while a faint glow needs the longer end. Our aurora photography settings quick-start walks through that adjustment in the field.
For waterfalls and seascapes, a neutral density filter is what lets you slow the shutter in daylight. For flowing water that still shows texture, try shutter speeds between 0.5 and 2 seconds, and go longer on the sea when you want mist. Overdo it and the water turns to featureless fog. For more on how light behaves across the year, see our landscape photography lighting conditions guide.

What gear do you need, and how do you protect it?
Iceland tests equipment. Wind, spray and cold arrive together, and a failed battery can cost you more than any missing lens.
Core kit:
- A sturdy carbon or aluminum tripod rated for wind
- A wide, mid-range and telephoto lens
- Neutral density filters, including a strong one for daylight long exposures
- A remote release or intervalometer
- Several spare batteries, kept warm
- A durable, weather-resistant camera bag
Protection:
- High-quality rain covers for camera and lens
- Plenty of microfiber cloths for spray
- Sealed bags for cards, batteries and anything electronic that rides in your pocket
- A power bank for phones and accessories, charged every night
Protecting gear is essential, and photographers recommend rain covers, microfiber cloths and warm storage for spare batteries because cold drains power faster. Keep spares inside your jacket against your body, and rotate them: swap a cold battery out before it dies, warm it up, and it often recovers some charge.
On power, pack for several days of shooting between reliable outlets, since remote guesthouses and campsites vary. One rugged, water-resistant power bank can be worth carrying, and this guide to keeping devices dry outdoors explains why a single waterproof case rarely covers every risk. For a full checklist built around spare batteries, see our Iceland photography packing list.
Pro Tip: Keep one lens cloth in your pocket and one in the bag, and never wipe a gritty or salty front element dry. Blow off the grit first, or you will scratch the coating.
How do you drive the Ring Road safely and check conditions?
Route 1 is 1,322 km long. Plan 10 to 14 days for a photography-focused trip so detours and weather delays do not force you to skip sites you came for. Many photographers on longer trips stretch even further, up to around 20 days.
- Check live conditions first. The Icelandic Road and Coastal Administration (Vegagerðin) runs live webcams along Route 1, and photographers use them to check road conditions, weather and light before committing to a long drive. Webcams cover South-East Iceland, North-East Iceland and North Iceland.
- Respect Reynisfjara. Safetravel documents sneaker waves and falling rocks there, along with a yellow, orange and red warning-light system. Obey closures and stay in the designated viewing areas. No photograph is worth a wave you did not see coming.
- Choose the right vehicle. A 4WD is advisable for freedom of movement and for chasing light on side roads, and experienced travelers say independent travel with a capable vehicle often produces more original compositions than strict checklist touring.
- Respect winter driving. Roads can change within hours, so check the forecast each morning, allow extra time, and confirm that your insurance covers gravel and weather damage.
What field techniques make Ring Road photographs stronger?
Technique decides the difference between a record of a place and a photograph worth printing. These habits do the most work.
- Wait for light. Resist the checklist. Stay at a site when the sky is changing, and use your buffer day to come back if it was flat. There is, as many photographers say, no real bad weather in Iceland, and dramatic light often follows apparently bad conditions for those who stay put and prepared.
- Build a long-exposure workflow. Mount the camera, compose, focus, then add the filter. Pick a shutter speed for the effect you want, check the histogram and adjust. A graduated ND filter helps balance a bright sky against dark foreground rock.
- Anchor the foreground. Leading lines from rivers, basalt edges or tide marks pull the eye in. A scale object, such as a horse, a chunk of ice or a person, gives the vastness something to measure against.
- Compose aurora with intent. Use a wide lens for the sweep of the lights, and give the sky a foreground: a church, a mountain, a frozen pond. Without one, a green sky is easy to forget.
Pro Tip: Before every long exposure, zoom in on your screen and check focus on the foreground. Cold and wind nudge focus rings more than you would expect.
What does a reliable daily backup routine look like on the road?
A trip's worth of images is only worth something if it survives the trip. Build a nightly habit and never skip it, however tired you are.
- Shoot to two cards when your camera allows it, so every frame exists twice from the start.
- Each night, ingest to a portable drive, then verify the files opened before formatting a card.
- Keep the drive and the cards in separate bags, and ideally in separate places overnight.
- If your connection allows it, add an offsite or cloud backup of at least your best selects.
- Use a simple naming habit: add a short location tag to your folders, such as a day number and site. Minimal metadata now saves hours of culling later.
- Do a quick star-rating pass on the evening of each shoot, while the day is fresh, and leave full RAW processing for home. Batch the heavy edits rather than editing in the car.
Why trust our guidance on this route?
We are the team behind Mark Gray's photography, and that work shapes everything in this guide. Mark's landscape prints are award-winning and have been collected internationally, made with panoramic medium format film for exceptional detail. We also run one-day photography courses and multi-day landscape photography tours led by internationally acclaimed photographers, so the field techniques here are the same ones we teach.
If you want to go deeper, we point you to our Iceland photography packing list, our aurora photography settings guide and our lighting conditions guide. Seasonal weather also shapes your results, and how seasons change landscape photography explains why.
Why chase light instead of the checklist?
The Ring Road tempts you to tick off sites like a shopping list, and the lists are long. We think the better trip is slower. Pick fewer places, return to the ones that matter, and let the weather decide which day belongs to which subject. The best frame of a trip is rarely the first one you take at a famous spot. It is the one you waited for, on the second morning, when the cloud finally broke.
— Mark
How can we help you photograph the Ring Road with confidence?
We teach the skills in this guide in person, in the field, with the light and weather doing what they really do. You can learn composition, exposure and workflow alongside people who share your goals, and bring home work you are proud of.
- Join one of our multi-day landscape photography tours for on-location mentoring in small groups.
- Start with a 1 day photography course to sharpen composition, exposure and workflow before you travel.
- Book private lessons if you want a plan built around your own camera and trip.

Browse our tours and courses, choose the format that suits your trip, and book your place today.
FAQ
How many days do you need for the Iceland Ring Road?
Plan 10 to 14 days if photography is the goal. That pace covers the main sites and leaves room for weather-dependent detours and at least one buffer day for reshoots.
What are the best places to photograph along the Ring Road?
The strongest stops are the South Coast waterfalls, Jökulsárlón and Diamond Beach, Vestrahorn, Mývatn, Dettifoss and Kirkjufell on Snæfellsnes. Together they give you waterfalls, ice, mountains, geothermal color and coast in one trip.
What camera settings work for the Northern Lights?
Start around ISO 800 to 3200, an aperture between f/1.4 and f/4, and a shutter speed of 1 to 15 seconds on a tripod, per guidetoiceland.is. Adjust toward a shorter shutter for fast, bright displays.
How do you check Iceland road conditions before driving?
Use the live webcams from the Icelandic Road and Coastal Administration at road.is. Check them each morning for road, weather and light before a long drive.
Is Reynisfjara safe to photograph?
It can be, if you respect the hazards. Safetravel warns of sneaker waves and falling rocks, so follow its warning lights, closures and viewing areas.