
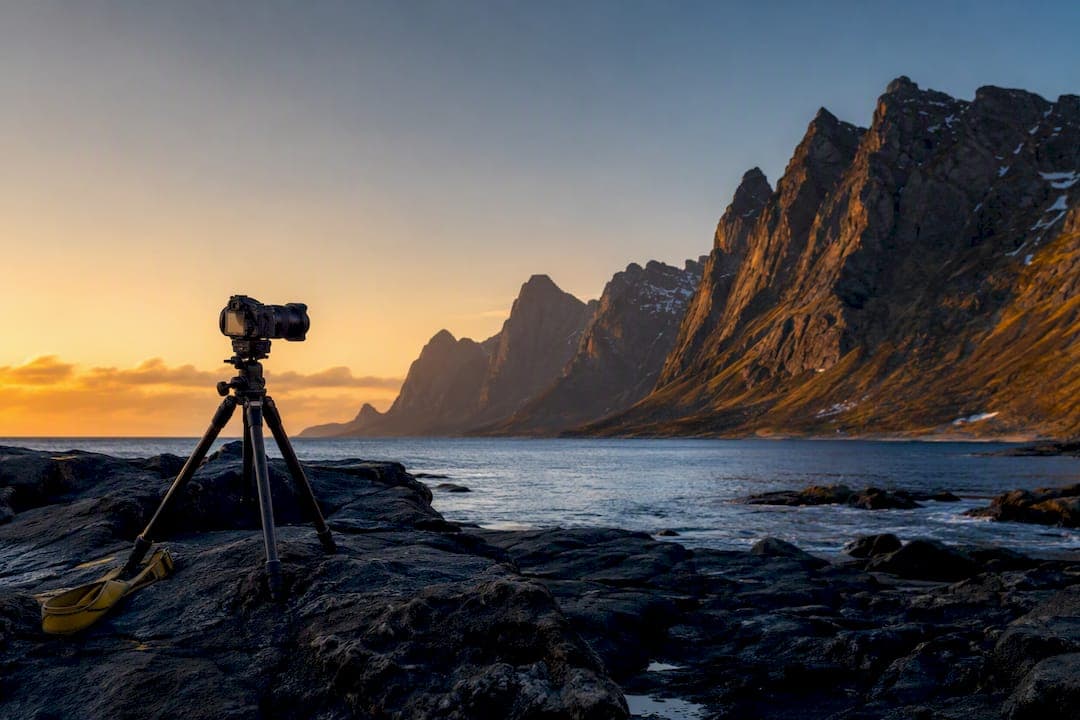
If you can only shoot one place in Lofoten, aim for Reine and Hamnøy at golden hour. Beyond that, prioritize Uttakleiv, Haukland, and Skagsanden for their reflections and sea stacks. Plan a several-day trip during the shoulder months if you want a mix of workable light and a real chance at seeing the aurora. Rent a car the day you land and build your itinerary around sunrise and sunset rather than the clock.
TL;DR:
- Photographers should prioritize Reine and Hamnøy during golden hour, aiming for blue hour at sunrise with limited parking and early arrival.
- The best times for landscape shooting span shoulder months for balanced weather, with winter and midsummer offering unique aurora and light conditions, respectively.
- Renting a car upon arrival is essential to access key locations at optimal times, with most sites within a 40-minute drive along the E10 route.
- Preparing gear such as wide-angle and telephoto lenses, neutral density filters, and warm spare batteries is vital for handling Lofoten's diverse weather and lighting.
- Flexibility and scouting backup locations during daylight help mitigate rapid weather changes and increase the chances of capturing ideal scenes.
Table of Contents
- Best Lofoten Photo Spots for Landscape Photography
- When Is the Best Time for Lofoten Photography?
- How Do You Get to Lofoten and Get Around?
- What Gear Do You Need for Lofoten Landscape Photography?
- Composition Techniques for Shooting Lofoten's Landscapes
- When Is the Best Time to Photograph the Northern Lights in Lofoten?
- How Do You Stay Safe While Photographing in Lofoten?
- Who's Behind This Lofoten Photography Guide?
- A Field Lesson From Chasing Light in Lofoten
- Book a Workshop or Bring Home a Lofoten Print
- Sources
- FAQ
Best Lofoten Photo Spots for Landscape Photography
Lofoten rewards photographers who know exactly where to point the camera before the light shows up. The archipelago is compact, but the good compositions are specific, not general, and showing up at the wrong tide or the wrong hour will cost you the shot even at a famous location.
Here's where to go and what to look for at each stop along the E10, the main artery connecting nearly every well-known viewpoint in the islands.
- Hamnøy and Reine. The red rorbuer (fishermen's cabins) against the jagged Olstinden peak is the single most photographed scene in Lofoten, and for good reason. Shoot from the bridge on the E10 just north of Hamnøy for the classic elevated angle, ideally at blue hour before sunrise when the village lights are still on and the sky holds color. Parking is limited right at the bridge, so arrive early or walk in from the small pullout nearby.
- Sakrisøy. The mustard yellow buildings on this tiny islet give you a color contrast that the red cabins elsewhere don't. Work the small harbor for reflections on calm mornings, and use a longer lens from across the water to compress the buildings against the mountains behind them.
- Uttakleiv. Home to the "Dragon's Eye," a rock formation that fills with water and mirrors the sky. It photographs best at mid to low tide, when the pool holds its shape without being flooded flat. Check a tide table before you go. Parking is roadside and informal; walk down to the beach and scout the tide pools before committing to a composition.
- Haukland. A wide sweep of white sand and turquoise water that looks almost tropical under summer sun. Get low with a wide angle to exaggerate the sand texture in the foreground, and return at different tides since the exposed rock patterns change completely.
- Skagsanden. When the tide pulls out and leaves a thin sheet of water on the sand, the beach turns into a mirror. Sunrise and sunset both work here, and the same seasonal tide behavior that shapes Uttakleiv's rock pool also governs Skagsanden's reflections. Bring rubber boots. Wet sand ruins hiking shoes fast.
- Fredvang bridges. A quieter, less-photographed alternative that connects small islands with a series of low bridges. Shoot from the water level for leading lines, or from a small rise for an aerial-style overview without a drone.
- Nusfjord. One of the oldest preserved fishing villages in Norway, with tighter, more intimate compositions than Reine's wide vistas. Look for detail shots: drying racks, weathered wood, fishing gear stacked against cabin walls.
- Henningsvær. Famous for its football pitch squeezed between rocky islets, best photographed from the hillside above town for the full context shot. The town itself rewards wandering with a standard zoom rather than a wide angle.
- Ryten, Kvalvika, and Bunes. These require actual hiking, not roadside stops. Ryten's summit looks down on Kvalvika Beach in a composition that has become iconic in its own right, but the trail takes two to three hours each way over uneven terrain. Bunes Beach, reached by a short boat trip from Reine, gives you dramatic peaks rising straight from the sand with far fewer people in frame.
- Reinebringen. The steep staircase trail above Reine delivers the postcard view of the entire southern archipelago from above. Recent maintenance work on the steps has made the climb more manageable, though it's still a serious uphill push that takes most photographers 45 minutes to an hour, and the route carries its own access notes worth reading before you commit.
Most of these locations sit within a 40 minute drive of each other, which is the real advantage of basing yourself centrally around Reine or Ramberg rather than jumping between distant towns every night.
When Is the Best Time for Lofoten Photography?
Your answer depends on what you're chasing: aurora, midnight sun, or the long, moody light of the shoulder seasons. Each window delivers a genuinely different Lofoten, and none of them is objectively "best" without knowing your priority first.
- Winter (December through February). Aurora season peaks here, and short days mean you get extended golden and blue hour light stretched across several hours rather than compressed into minutes. Snow-dusted peaks add drama to nearly every composition. The tradeoff is unpredictable weather, icy roads, and the risk of days lost entirely to storms.
- Shoulder months (March, April, September, October). This is the sweet spot for most working photographers. You still get long twilight, a real chance at aurora on clear nights, and roads that are far less risky than deep winter. Crowds thin out compared to summer, and rorbuer rates typically drop from peak pricing.
- Midnight sun (late May through July). The sun barely sets, giving you a soft, extended "golden hour" that can last most of the night. It's a completely different creative challenge: no darkness means no aurora and no true blue hour, but the quality of light on the mountains at 1 a.m. is something most photographers have never experienced anywhere else.
- 2026 carries extra weight for aurora chasers specifically. The solar cycle is near its peak this year, which measurably improves your odds of a strong display on any clear night, a point worth factoring into how you weight winter versus shoulder-season timing.
Golden hour length shifts dramatically by season, running to just 20 or 30 minutes in midsummer versus well over an hour in winter, and that changes how you plan your shooting blocks. In winter you can comfortably work one location through an entire slow sunrise; in summer you need two or three locations lined up back to back because the light window closes fast. For a longer breakdown of how this affects your actual workflow on location, see how seasons change landscape photography.
Plan for at least 5 days regardless of season, and build one or two buffer days into any itinerary. Lofoten's weather changes fast enough that a locked seven-stop schedule will fail; a flexible one with backup locations will not.
How Do You Get to Lofoten and Get Around?
Getting the logistics right determines whether you're standing at Hamnøy for sunrise or still driving.
- Fly into Harstad/Narvik (EVE) or Svolvær (SVJ). Evenes is the larger gateway with more frequent connections from Oslo and Bergen, while Svolvær puts you directly in the islands but with fewer flight options. Either way, budget a connecting flight or a drive of two to four hours depending on your final base.
- Consider the ferry from Bodø. The Bodø to Moskenes ferry crosses roughly four hours and drops you at the southern end of the archipelago, close to Reine and Hamnøy, which suits photographers prioritizing those two locations first.
- Rent a car the moment you arrive. Photographers need a vehicle to reach locations at the right time of day, since sunrise shoots often start well before public transport runs and sunset shoots end long after it stops. Winter rentals should have studded tires; ask specifically when booking.
- Drive the E10 as your spine. Nearly every major spot sits directly on or a short detour from this single road, and drive times between them rarely exceed 40 minutes.
- Expect informal parking at most beaches and viewpoints. Small gravel pullouts serve Uttakleiv, Haukland, and Skagsanden; arrive early during peak months since space is genuinely limited, not just crowded.
Book accommodation well ahead of your trip. Traditional rorbuer sell out months in advance during peak season, and losing your first-choice base near Reine can add an hour of driving to every sunrise shoot for the rest of your trip.
What Gear Do You Need for Lofoten Landscape Photography?
Pack for versatility first, because the same day can throw calm reflections, gale-force wind, and a clear aurora window at you within twelve hours.
- A wide-angle lens in the 16 to 35mm range for the sweeping beach and mountain scenes that define most of Lofoten's iconic shots.
- A telephoto in the 70 to 200mm range for isolating peaks, compressing layers of mountains, and picking out details in villages like Nusfjord, since a longer lens changes how these scenes read compared to a wide shot.
- A polarizing filter to manage glare on wet rock and water, and to punch up color saturation on overcast days when contrast is naturally low.
- Neutral density filters (3 stop and 6 stop are the most useful range) for smoothing moving water at Skagsanden and Haukland during daylight.
- A remote release or intervalometer for long exposures and any aurora timelapse work.
- A carbon fiber tripod with spiked feet. Coastal wind in Lofoten is strong enough to shake a lightweight aluminum tripod, and spikes give you real grip on ice, wet sand, and loose rock where rubber feet slip.
- Spare batteries, kept warm. Cold, damp conditions drain camera batteries fast, and storing spares in an inner jacket pocket rather than a camera bag preserves their charge far better than relying on one battery all night.
For aurora work, start around ISO 1600 to 3200, f/2.8 or your widest aperture, and a shutter speed between 5 and 15 seconds, then adjust based on how much movement you see in the aurora itself. Fast, bright displays need shorter exposures to hold shape; slow, faint glows can tolerate longer ones.
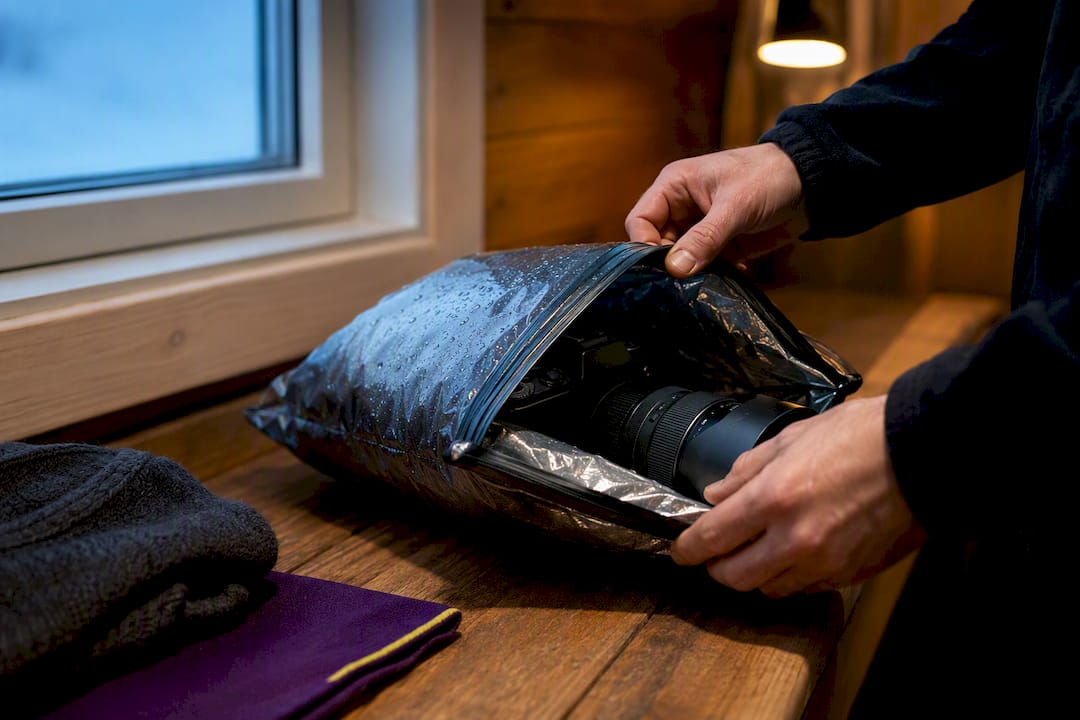
Pro Tip: Let your camera and lenses acclimate inside a sealed bag for 20 minutes before you shoot again indoors. Moving cold gear straight into a warm rorbu causes condensation on the front element and inside the camera body, and that moisture can linger for hours.
For a full packing breakdown including bags, clothing layers, and backup gear, the landscape photography gear essentials list covers what to bring beyond the camera bag itself.
Composition Techniques for Shooting Lofoten's Landscapes
Technique separates a postcard shot from a memorable one, and Lofoten gives you the raw material to do both in the same frame.
- Use tide pools and beach rocks as foreground anchors. At Uttakleiv and Haukland, a rock or shallow pool placed low in the frame gives the eye a place to land before it travels up to the mountains, adding real depth instead of a flat wide shot.
- Match shutter speed to wave energy for long exposures. Somewhere between 1 and 6 seconds usually smooths moving water while keeping foreground texture intact; faster waves need the shorter end, calmer water can go longer. Bracket a few exposures if you're unsure which will work until you review on-screen.
- Watch for distortion at the edges of ultra-wide shots. Keep dominant vertical lines, like the peaks behind Hamnøy, closer to center, and avoid placing tall subjects right at the frame's edge where wide lenses stretch them.
- Use telephoto compression at Reinebringen and Ryten. From elevation, a 70 to 200mm lens stacks the layers of fjords and peaks into a tighter, more dramatic composition than a wide lens ever will from the same spot.
- At Skagsanden and Uttakleiv, shoot low and wide to maximize the reflective surface, then reposition slightly until the sky's color lines up cleanly with its mirror image in the sand or rock pool.
For more on how shifting daylight quality changes which of these techniques work best hour to hour, the lighting conditions guide breaks down golden and blue hour behavior in more depth.
When Is the Best Time to Photograph the Northern Lights in Lofoten?
Aurora photography in Lofoten rewards preparation more than luck, though luck still plays its part.
- Target clear nights between late September and early April, when darkness is deep enough for aurora to show and skies are statistically more stable than deep midwinter storms allow.
- Check the solar cycle context for your trip year. 2026 sits near a solar maximum, which raises the baseline odds of a strong display on any given clear night compared to a solar minimum year.
- Use a dedicated aurora forecast app alongside a cloud cover app, since a strong geomagnetic forecast is worthless if Lofoten's notoriously fast-changing weather has clouded over your location.
- Start with ISO 1600, f/2.8, and a 5 to 15 second exposure, then adjust up or down based on how bright and fast the aurora is moving; a slow green glow tolerates longer exposures than a fast, structured display.
- Keep a spare, body-warmed battery on hand at all times. Aurora shoots often run for hours in freezing temperatures, and a dead battery mid-display is the single most common failure photographers report.
Light pollution is minimal across most of Lofoten outside the larger towns, so you rarely need to drive far to escape it. Plan multiple aurora nights if your schedule allows, since chasing clear skies across two or three different locations beats betting everything on one spot for one night. For a field-ready settings reference you can check on your phone in the dark, see the aurora photography quick-start guide.
How Do You Stay Safe While Photographing in Lofoten?
Lofoten's terrain and weather can turn on you fast, and the islands' popularity has made responsible behavior a genuine concern for locals, not just an abstract rule.
- Stick to marked paths on fragile tundra, especially around Reinebringen and Uttakleiv, where local conservation concerns and landowner requests have increased around off-path foot traffic in recent years.
- Never turn your back on the sea at Skagsanden, Haukland, or Bunes. Rogue waves have injured photographers chasing the perfect wave-wash shot; keep a clear retreat path and watch the water, not just your viewfinder.
- Ask before flying a drone near villages or private property, and check current Norwegian drone regulations before your trip since rules around populated areas have tightened.
- Layer clothing and tell someone your route before hiking to Ryten, Kvalvika, or Reinebringen, particularly outside summer when weather shifts fast and daylight is short.
- Prep your vehicle for winter driving with proper tires and a check of road conditions, since several E10 sections close temporarily during severe storms.
Who's Behind This Lofoten Photography Guide?
Mark Gray has spent decades photographing remote landscapes across the globe, with work collected in many countries and shot largely on panoramic medium format film for high detail. That same field experience shapes how Com approaches a destination like Lofoten: location by location, tide by tide, rather than as a generic travel checklist.
If you want that guidance in person, Com runs small-group photography tours and one-day photography courses built around exactly this kind of field logistics. For those who'd rather own the result than chase it themselves, limited edition prints from Lofoten and other landscapes are available directly through the gallery.

A Field Lesson From Chasing Light in Lofoten
Plans built around a fixed schedule tend to fall apart the moment clouds roll in over a target location. The better approach: hold two or three backup spots within half an hour of your primary one, and be willing to abandon a "sure thing" the moment the light shifts somewhere else. A flat, gray sky over Hamnøy can mean a break in the clouds over Uttakleiv twenty minutes later, and that flexibility has saved more shoots than any single piece of gear.
Two habits worth building early: keep a spare battery warm against your body at all times, and scout your backup locations in daylight before you ever need them in the dark.
— Mark
Book a Workshop or Bring Home a Lofoten Print
Reading about the Dragon's Eye at low tide is one thing. Standing there with someone who already knows the exact window when the light and water align is another, and that's the gap Com's small-group workshops are built to close.

Com's photography tours run as multi-day trips with luxury logistics handled for you, led by an internationally recognized photographer who has already worked out where to be and when. Closer to home, the one-day photography courses teach the same field decision-making on a single day, ideal if a full Lofoten trip isn't on the calendar yet. Groups stay small by design, so spots fill fast once dates open. If a trip north isn't in your plans right now, a limited edition print from the collection brings that same panoramic detail into your own space instead. Check current tour dates and availability, or browse the print gallery, to find the option that fits where you are right now.
Sources
A handful of sources are worth bookmarking before you go, each covering something the others don't.
- Reinebringen hike | Visit Lofoten
- Tripods for landscape photography | Capture Landscapes
- Lofoten Landscape Photography Guide 2026 | Visual Travel Spots
- Best Photo Spots in the Lofoten Islands: A Complete Photography Guide | OnlyRoadtrips
FAQ
What Is the Best Month for Lofoten Photography?
There's no single best month; it depends on your goal. Shoulder months like March, April, September, and October balance manageable weather with a real chance at both long twilight and aurora, while winter offers the strongest aurora odds and midsummer delivers a soft, all-night golden hour instead of darkness.
How Many Days Do You Need for a Lofoten Photography Trip?
Plan for at least 5 days to cover the main locations along the E10 without rushing, plus a buffer day or two for weather. Photographers focused heavily on aurora should lean toward a longer stay to allow for cloudy nights.
Do You Need a Car in Lofoten for Photography?
Yes. Most iconic spots sit along the E10, but reaching them for sunrise or sunset requires driving before or after public transport typically runs, and renting a car is considered essential for photographers chasing specific light windows.
Is the Reinebringen Hike Difficult?
The Reinebringen trail is steep and takes most people 45 minutes to an hour to reach the top, though recent maintenance has improved the stone steps and made footing more secure. It's not a technical climb, but it is a genuine cardio effort in variable weather.
Can Beginners Book a Lofoten Photography Workshop?
Yes. Com's 1 day photography courses and multi-day photography tours are structured for a range of experience levels, with small groups that allow for individual guidance on composition, settings, and location timing.