
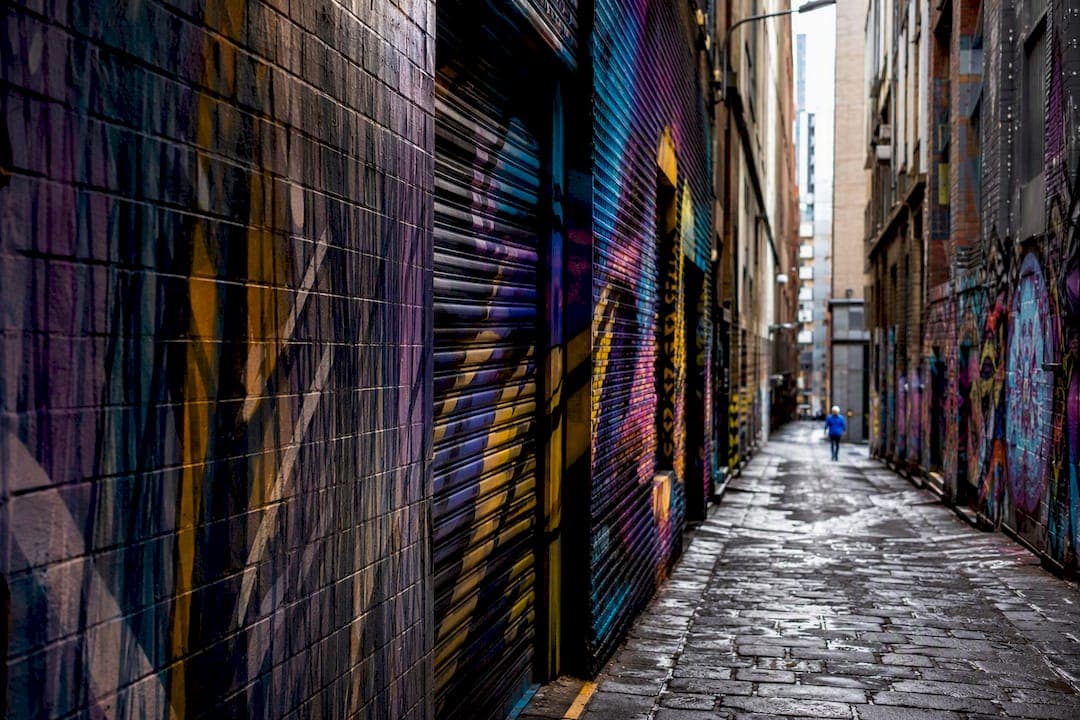
Melbourne rewards photographers who move fast between three worlds: grand city landmarks, hidden laneway art, and quiet coastal light. For a first outing, hit Flinders Street Station at blue hour, walk five minutes to Hosier Lane for street art, then chase sunrise at St Kilda Pier or the Brighton bathing boxes. Every section below breaks down exactly where to stand, what light to chase, and how to get there without wasting your morning.
TL;DR:
- Melbourne's prime photography spots include Flinders Street Station for sunset shots and Southbank for city skyline reflections, best visited an hour before sunset.
- Hosier Lane offers constantly changing street art, with early mornings midweek being the least crowded for capturing murals without tourists.
- Parks like the Royal Botanic Gardens and Albert Park Lake require early visits, with the former best at sunrise and the latter in the late afternoon; a polarizing filter improves water and foliage shots.
- Coastal locations such as St Kilda Pier and Brighton bathing boxes are optimal during sunrise or low tide for colorful and reflective images, with tide charts aiding planning.
- Long-exposure night photography is effective at spots like Bolte Bridge and Webb Bridge, requiring tripods and patience for capturing light trails and reflections.
Table of Contents
- Where Are the Best Melbourne Photography Locations for City Landmarks?
- Which Melbourne Laneways Have the Best Street Art?
- What Are the Best Parks and Gardens for Photography in Melbourne?
- Where Can You Photograph Beaches and Bathing Boxes in Melbourne?
- What Industrial and Waterfront Spots Work for Architecture Photography?
- What Bridges and Rooftops Give the Best Melbourne Skyline Views?
- How Do You Plan the Timing and Logistics of a Melbourne Photo Shoot?
- What Gear and Workflow Tips Does Mark Gray Use in Melbourne?
- How Do You Photograph Wildlife and Nature in Melbourne's City Parks?
- Where Can You Shoot Night Photography and Light Trails in Melbourne?
- Why Melbourne Rewards the Photographer Who Slows Down
- Ready to Photograph Melbourne With Guided Confidence?
- Sources
Where Are the Best Melbourne Photography Locations for City Landmarks?
Flinders Street Station is the single most photographed building in the city, and for good reason. Its ochre facade and clock tower face directly into the sunset, and the intersection outside gives you trams, pedestrians, and the station dome in one frame during blue hour. Shoot from the traffic island on the northeast corner around 20 to 30 minutes after sunset, when the sky still holds color but the station's interior lights have come on, using tried-and-true photo strategies for co-op listings to nail your exposure and timing. A 24 to 35mm lens on a full-frame body handles the scale well, and a six-stop neutral density filter lets you blur passing trams into soft light streaks if you're working a longer exposure.
Southbank, just across the Yarra River, is where you go for the skyline reflection shot everyone wants. The promenade between Princes Bridge and Queens Bridge offers a clean, low vantage point over the water, and on a still evening the CBD towers double themselves in the river. Arrive an hour before sunset to claim a spot on the rail, since the walkway gets crowded with diners and street performers as the evening wears on.
Federation Square sits between these two locations and works as a connector shot rather than a standalone. Its geometric paving and glass panels catch afternoon light well, and shooting toward Princes Bridge from the square's northern edge lines up the bridge arches with the Flinders Street clock tower in the background. A mid-range zoom around 24 to 70mm covers most of what you'll want here.
For elevation, the Eureka Skydeck on Level 88 gives a 360 degree panorama of the city and Port Phillip Bay, though interior glass and reflections can be a nuisance without a rubber lens hood pressed against the window. If you'd rather skip the ticket price, several public multi-story car parks near the CBD offer rooftop access with far fewer restrictions and no crowd to fight for a rail spot, though you should always check posted signage before setting up a tripod.
A few practical notes worth knowing before you head out:
- Trams run through most of this precinct, and the CBD sits inside the free tram zone, so you can hop between Flinders Street, Southbank, and Federation Square without paying a fare.
- Tripods are generally tolerated on public footpaths and bridges but are often restricted inside train stations and on private plazas, so ask a staff member if you're unsure.
- Blue hour in Melbourne shifts with the seasons. In summer it falls close to 8:30 PM, while in winter it can be as early as 5:30 PM, so check a sun calculator the night before.
- The nearest tram stops to Flinders Street Station are directly outside the building on Flinders and Swanston Streets, making it the easiest landmark to reach from almost anywhere in the CBD.
Multiple photography roundups consistently rank Flinders Street Station, Hosier Lane, Southbank, and St Kilda Pier among Melbourne's top spots, and it's worth trusting that consensus for your first visit before branching into quieter finds.
Which Melbourne Laneways Have the Best Street Art?
Hosier Lane is the laneway everyone photographs first, and it earns the reputation. The narrow strip running off Flinders Street changes its murals constantly, which means the shot you take today won't exist in a month. Shoot midweek mornings before 9 AM if you want the lane without a queue of tourists in every frame, since weekends bring heavy foot traffic and tour groups by mid-morning.
Centre Place, tucked between Flinders Lane and Collins Street, is narrower and moodier than Hosier. Its overhead awnings and neon signage make it a strong spot for street-portrait combinations, where you place a subject against layered graffiti and shop signage. A wide aperture around f/2.8 helps separate a subject from the busy background without losing the texture of the art itself.
Rutledge Lane sits just behind Hosier and gets a fraction of the visitors, which makes it the better choice if you want clean compositions without strangers wandering into frame.
A few working notes for laneway shooting:
- A 35mm or 50mm prime lens suits these tight spaces better than a zoom, since you rarely have room to step back.
- Overcast days actually help here. Flat light removes harsh shadows from the brick and metal, letting the color of the murals carry the shot.
- Never touch, move, or deface street art to get a cleaner shot. Much of it is legally sanctioned and treated as public cultural property.
- If you're shooting commercially or with a model, it's good practice to check current signage in the lane and be prepared to move if a business needs access.
Fitzroy, a short tram ride northeast of the CBD, extends this street-art culture into a whole suburb. Brunswick Street and Gertrude Street carry a rougher, more experimental style of mural than the polished CBD laneways, and the cafes and secondhand shops lining both streets give you texture for lifestyle and documentary style shots between mural stops.
What Are the Best Parks and Gardens for Photography in Melbourne?
The Royal Botanic Gardens reward patience more than any other green space in the city. Arrive within the first hour after sunrise, when the paths are close to empty and mist often sits low over the ornamental lake. The Guilfoyle's Volcano formation and the fern gully both offer strong compositions in soft morning light, and the gardens' curated plantings mean there's always something blooming depending on the season, from spring wattle to autumn foliage along the eastern paths.
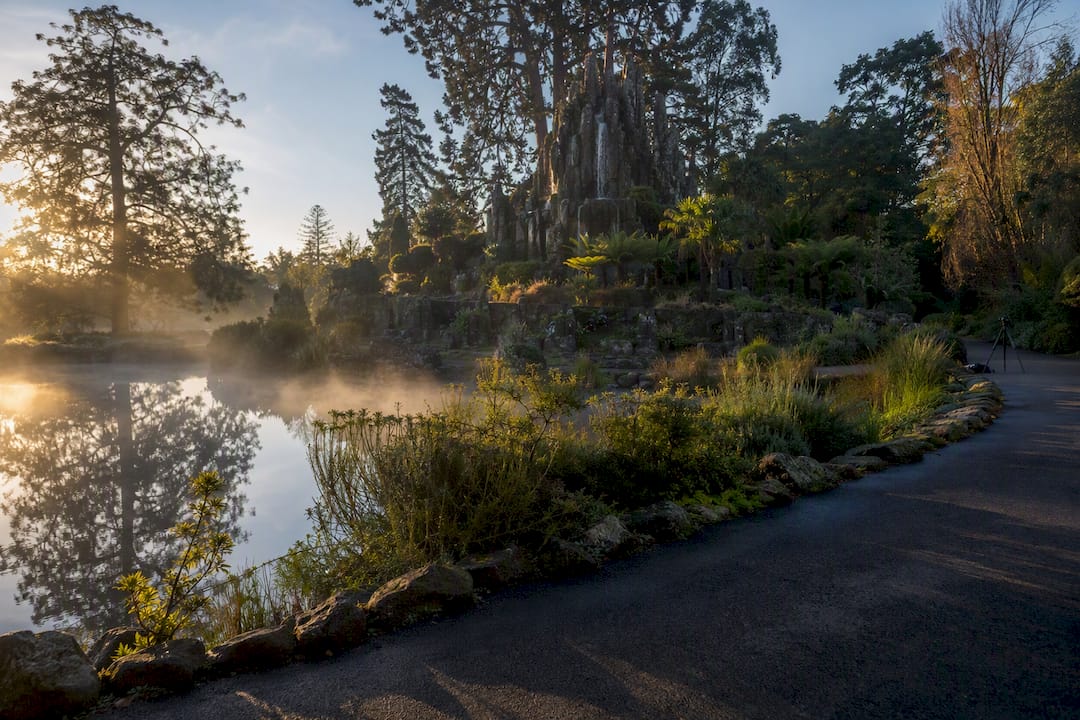
Fitzroy Gardens, closer to the CBD, trade botanical variety for architectural charm. Cook's Cottage and the tree-lined avenues suit anyone chasing a classic European-park aesthetic, and the elm-lined paths create natural leading lines that work well with a standard 50mm lens.
Albert Park Lake gives you a different kind of shot entirely: a wide, flat body of water with the city skyline rising behind it, best captured from the lake's northern edge in the late afternoon when the light rakes across the water. Check the calendar before visiting, since the lake also hosts the Formula 1 Australian Grand Prix circuit each year, and event setup can restrict access for weeks at a time.
Budget your time realistically across these three:
- Royal Botanic Gardens rewards at least 90 minutes if you want to cover the lake, volcano, and fern gully properly.
- Fitzroy Gardens can be shot well in 45 minutes given its smaller footprint.
- Albert Park Lake needs only 30 to 40 minutes unless you're waiting out a specific sunset.
- A polarizing filter is worth carrying at all three locations to cut glare off water and deepen foliage color.
Where Can You Photograph Beaches and Bathing Boxes in Melbourne?
St Kilda Pier is Melbourne's best sunrise location by a wide margin. The long timber pier extends straight into Port Phillip Bay, and shooting from its midpoint at dawn turns the structure into a natural leading line pointing toward the rising sun. Low tide exposes the rock breakwater near the pavilion, adding foreground texture that disappears once the water comes in.
Brighton's bathing boxes, about 20 minutes south of the CBD by car or train, are the most colorful and most photographed subject on this coastline. Each of the roughly 80 boxes is individually painted, and the best light hits them in the late afternoon when the sun sits low and warm across their fronts. Shoot at low tide for reflections in the wet sand, and avoid the middle of the day when flat overhead light drains the color out of the paintwork.
Princes Pier in Port Melbourne is the location most photographers overlook, and it's the one that rewards the most patience. The pier's original decking has partially collapsed, leaving rows of timber pylons standing alone in the water, which makes for haunting long-exposure work on an overcast or drizzly morning. Bring a lens cloth, since sea spray on the pier can fog your front element quickly, and bracket your exposures to protect highlight detail on the wet timber while a neutral density filter smooths the water into a soft blur.
- St Kilda Pier and Brighton's bathing boxes are both listed among Victoria's most photogenic heritage attractions, which reflects how consistently they draw photographers year round.
- Parking near St Kilda Pier fills quickly on weekends, so arrive at least 30 minutes before your planned shoot time.
- Princes Pier is reachable by tram and a short walk, which beats fighting for parking near the working port precinct.
- Check the tide chart the night before any of these three, since low tide adds foreground interest at all of them.
What Industrial and Waterfront Spots Work for Architecture Photography?
Docklands, on the western edge of the CBD, gives you Melbourne's most modern skyline. Shooting from Waterfront City toward the harbor puts glass towers and the NewQuay marina in the same frame, and the open water here means you get clean reflections on calm evenings that the narrower Yarra can't match.
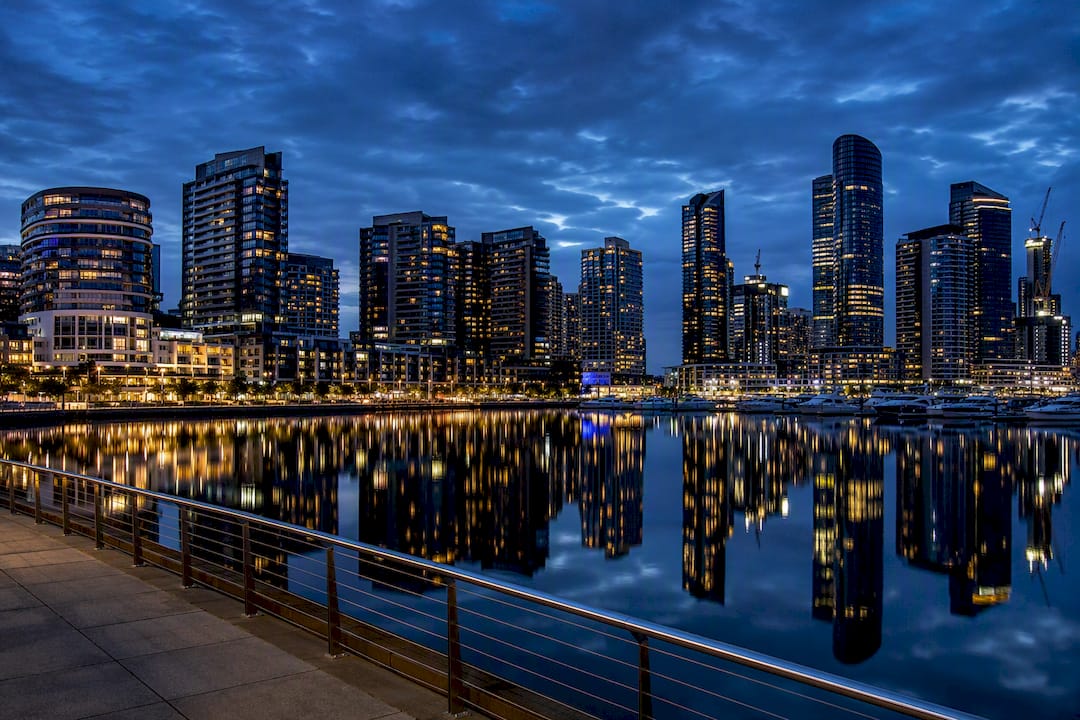
The decaying pylons at Princes Pier double as an architecture subject as much as a coastal one. Their rusted bolts and weathered grain make strong minimalist studies when you isolate a single row against open sky, and a longer lens in the 70 to 200mm range compresses the repeating pylons into a graphic pattern.
Webb Bridge, a short walk from Docklands, is a sculptural steel structure shaped like a woven fish trap, and its ribbed frame creates natural symmetry when shot straight on from the walking path beneath it. Bolte Bridge, further along the Yarra toward the western suburbs, is less accessible on foot but rewards drivers willing to find a roadside pullout, particularly at night when its span lights up over passing traffic for a strong light-trail composition.
- Docklands and the surrounding harbor are still an active commercial port, so stay behind marked barriers near loading areas.
- Early evening on a weekday avoids both crowds and the wind that regularly picks up over the open water later at night.
- A sturdy tripod matters more here than almost anywhere else in the city, since harbor breezes can shake a lightweight setup during a long exposure.
- Always get explicit permission before setting up gear on private marina property near Waterfront City.
What Bridges and Rooftops Give the Best Melbourne Skyline Views?
The William Barak Bridge, connecting Birrarung Marr to the MCG precinct, frames the CBD skyline through its distinctive angled steel columns, and shooting from its midpoint at dusk lines up the city towers behind the bridge's own silhouette. Nearby, Princes Bridge and the historic Sandridge Bridge both give a lower, river-level view of the same skyline, with Sandridge adding sculptural pylons from its original rail crossing days as extra foreground interest.
Rooftop bars scattered through the CBD offer some of the highest vantage points in the city, but most restrict tripods and get crowded fast after 6 PM, so a monopod and an early booking work better than showing up cold on a Friday night. Several public parking structures near Southbank and the Docklands precinct offer rooftop access with far looser rules, and a quick scout during daylight tells you whether the view is worth returning for after dark.
- Weeknight visits to rooftop venues almost always beat weekends for both crowd size and staff willingness to let you set up a tripod.
- If you want access to a private rooftop, email the venue's management directly a few days ahead and mention you're shooting for personal or portfolio use rather than arriving with gear unannounced.
- Car-park rooftops are best scouted in daylight first, since not every level has an unobstructed rail or safe barrier height.
- Birrarung Marr itself, right at the base of the Barak Bridge, adds riverside public art and open lawns that work well as a foreground for skyline shots.
How Do You Plan the Timing and Logistics of a Melbourne Photo Shoot?
Melbourne's light shifts dramatically by season, and planning around it saves you from wasted trips. Here's how to structure a shoot day that actually works:
- Check golden hour and blue hour times the night before, since summer sunsets near 8:30 PM run roughly three hours later than winter's 5:30 PM sunsets, which changes your entire evening schedule.
- Budget 45 to 60 minutes per location if you're combining two or three stops in one golden-hour window, since travel time between the CBD and the coast eats into shooting time fast.
- Base yourself in or near the CBD if possible. Staying centrally cuts transit time to laneways, the river, and Southbank, a point photographer travel guides consistently make about the city's layout.
- Use the free tram zone to hop between city landmarks without paying a fare, then switch to a train or rideshare for coastal spots like St Kilda or Brighton.
- Respect posted tripod restrictions at train stations, private plazas, and rooftop venues. A monopod is a smart backup when a full tripod isn't welcome.
- For commercial shoots involving models, crews, or paid work, contact the City of Melbourne well ahead of time to check permit requirements for public land. Processing time and fees vary by location and shoot scale, so build in a buffer of at least a few weeks before a planned commercial session.
What Gear and Workflow Tips Does Mark Gray Use in Melbourne?
Different locations call for different kits, and matching your gear to the scene saves you from missing a shot while fumbling through a bag. Wide laneways and tight street scenes favor a 24 to 35mm prime, while coastal piers and bridge symmetry shots reward a 70 to 200mm for compression. A sturdy tripod and a six-stop neutral density filter earn their weight at Princes Pier and Southbank alike.
Pro Tip: Scout your route the day before a golden-hour shoot and plan a sequence, not a single stop. Move from inner-CBD laneways in the pre-dawn dark toward the river and Southbank for sunrise reflections, then finish at a coastal spot once the sun is fully up. It keeps you moving with the light instead of chasing it.
A few habits worth building into every outing:
- Bracket your exposures in mixed light, especially where a bright sky meets a dark laneway or shadowed bridge underpass.
- Arrive 30 to 45 minutes before golden hour to test compositions and check for trip hazards, particularly on wet piers or uneven pylons.
- Carry a lens cloth for coastal spray and a rain cover for unpredictable Melbourne weather.
Mark Gray's regional photography workshops build this exact scouting and sequencing discipline into guided sessions, which is often the fastest way to internalize it.
How Do You Photograph Wildlife and Nature in Melbourne's City Parks?
Melbourne's parks hold more wildlife than most visitors expect, and city birds and possums make surprisingly cooperative subjects if you approach the right way. The Royal Botanic Gardens are home to flying foxes, cockatoos, and a resident population of eastern water dragons around the lake, all most active in the cooler hours of early morning and late afternoon.
A telephoto lens in the 200 to 400mm range lets you keep a respectful distance from birds and reptiles without disturbing them, which matters both for the animal's welfare and for getting a natural, unbothered pose. Fitzroy Gardens and Albert Park Lake both attract waterbirds, including native ducks and the occasional heron working the lake edges at dawn.
Move slowly and avoid sudden gestures, since most park wildlife has grown used to foot traffic but still spooks at fast movement or loud noise. Shooting from a low angle, close to the ground or water's edge, generally produces a more intimate result than shooting down from standing height.
Early morning, before the parks fill with joggers and dog walkers, remains the best window for both light and undisturbed animal behavior. Overcast mornings are actually a bonus here, since flat light reduces harsh shadows on feathers and fur that a bright midday sun tends to create.
Where Can You Shoot Night Photography and Light Trails in Melbourne?
Beyond the obvious skyline shots, Melbourne offers several strong spots for light trails and long-exposure night work. Bolte Bridge, on the western edge of the CBD, carries a steady stream of traffic after dark, and a roadside pullout with a clear sightline to the bridge deck lets you capture sweeping red and white light trails against its illuminated span.
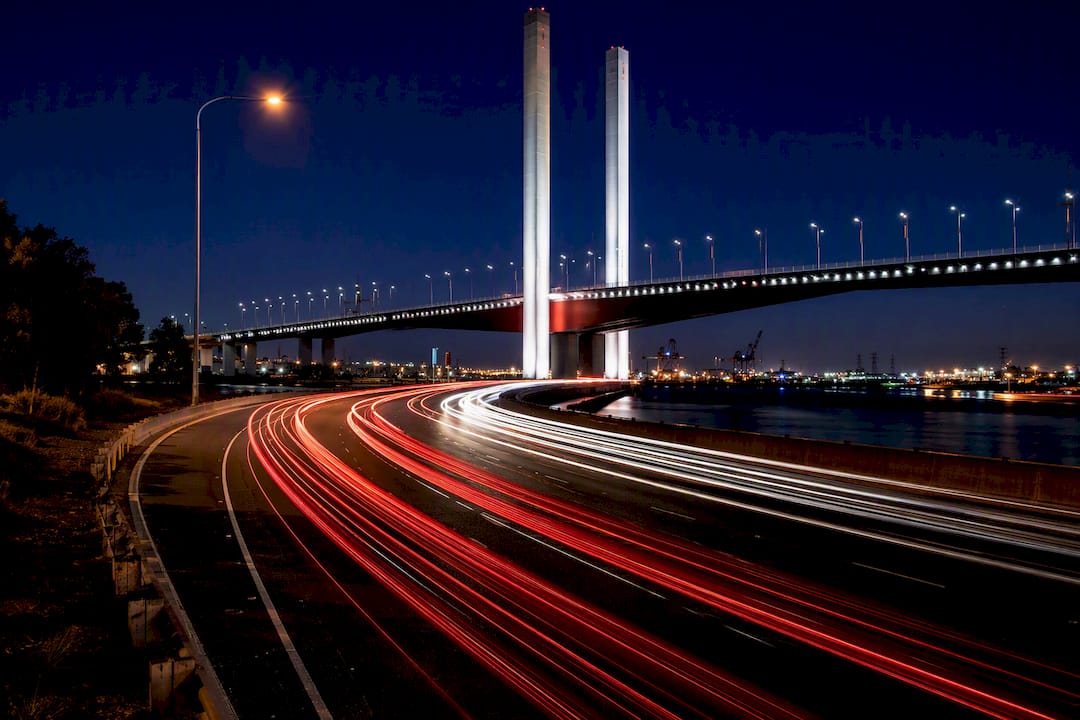
Flinders Street's tram intersection works just as well after full dark as it does at blue hour, especially if you frame trams pulling through the junction against the station's lit facade. A shutter speed of two to four seconds on a stable tripod usually captures a clean light trail without blowing out the highlights.
Webb Bridge and the wider Docklands harbor front light up at night with a mix of building facades and marina lights reflecting on calm water, making it a strong choice for reflection-based long exposures when the wind drops.
For something quieter, Birrarung Marr's riverside path picks up ambient light spill from the CBD skyline across the water, giving a softer, moodier night composition than the harder-edged Docklands shots. A cable release or the camera's built-in timer helps avoid any shake during exposures longer than a second, and it's worth carrying a small flashlight to check your settings without disturbing other photographers working the same spot.
Why Melbourne Rewards the Photographer Who Slows Down
Most visitors treat Melbourne as a checklist: station, laneway, pier, done. That misses what makes the city genuinely rewarding to shoot. Within a single morning you can move from the tight, layered chaos of Hosier Lane to the open horizon of St Kilda Pier, and few cities in Australia offer that range without a long drive between stops.
The temptation is to rush the shortlist. Resist it. A guided workshop sequence, moving from laneway to river to coast as the light changes, teaches you to read Melbourne's shifting conditions rather than just collect its famous frames. Once you understand that rhythm, the city keeps giving you new compositions long after the obvious shots are done.
Don't just repeat what you've seen in other people's galleries. Find your own angle on a familiar spot, and share what you come back with.
— Mark
Ready to Photograph Melbourne With Guided Confidence?
If you'd rather learn Melbourne's golden-hour rhythm hands-on than piece it together alone, a guided workshop can compress months of trial and error into a single well-planned day. Participants scout locations in sequence, from CBD laneways through to coastal piers, and walk away with both the shots and the workflow to repeat it anywhere.

Mark Gray's Australian photography workshops run in small groups and cover exactly this kind of location sequencing, exposure strategy, and timing discipline, whether you're shooting Melbourne's laneways or the coastline further afield. If you'd rather bring the city home without picking up a camera, the limited edition print collection offers gallery-quality landscape work ready for your wall. Check current workshop dates and print availability on the Mark Gray site, and book the option that fits where you are in your own photography.
Sources
- Whatson
- Melbourne from Waterfront City, Docklands Pano 21.08.22.jpg (Wikimedia Commons)
- Sandridge Bridge — Wikipedia
- Transport
- Mel365