
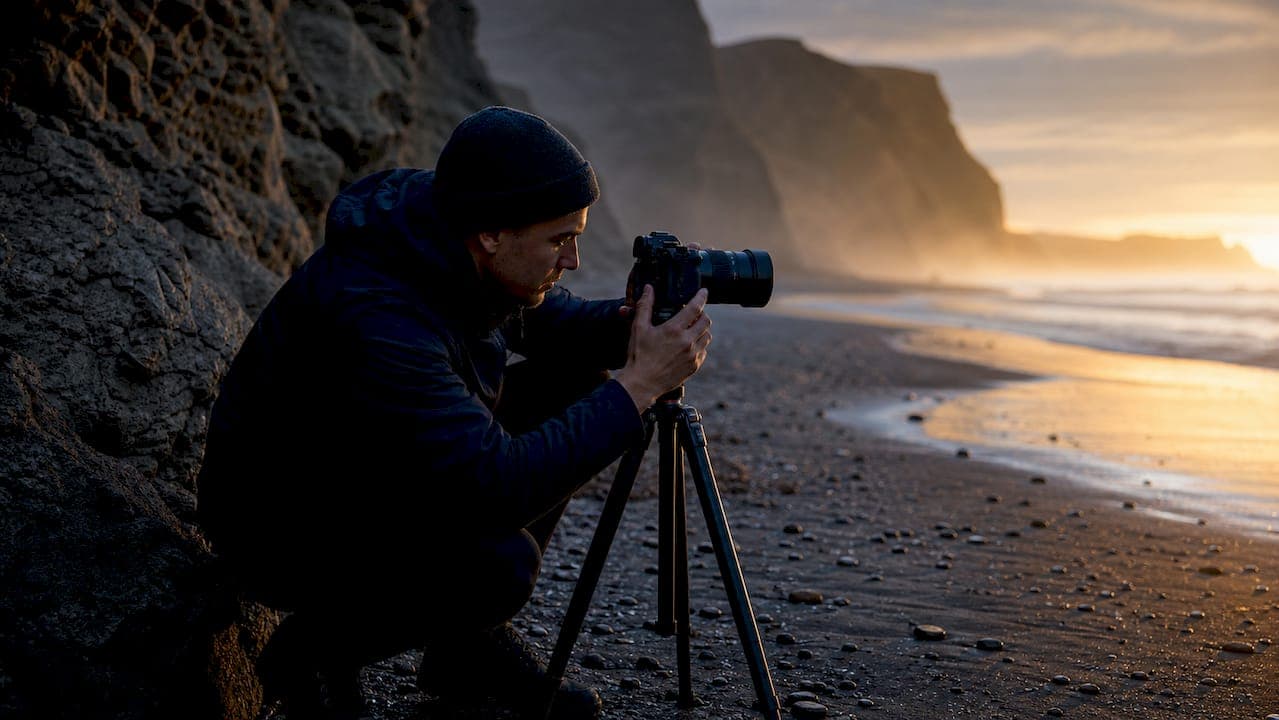
Photography with lines is the deliberate use of real or implied lines to guide the viewer, shape mood, and create depth in any image. Master this single compositional principle and your images shift from snapshots to gallery-worthy work.
Three actions you can take right now:
- Spot the dominant line in your scene before you raise the camera. Roads, fences, shadows, a model's gaze — all qualify.
- Decide how that line behaves: will it lead the eye to your subject, divide the frame, create a sense of depth, or form a visual boundary?
- Make one camera or lens change to strengthen it: lower your position to start the line at the frame's bottom edge, or switch to a wider focal length to exaggerate its reach.
Pro Tip: Before you shoot, check that your horizon is parallel to the frame edge. And unless you want the viewer's eye to exit the image, avoid letting strong lines run directly into a corner.
Key Takeaways
Intentional line composition is the single most transferable skill in photography: identify the dominant line type, decide its behavior, and make one technical adjustment to reinforce it before you shoot.
| Point | Details |
|---|---|
| Spot lines before shooting | Identify actual and implied lines in the scene before raising the camera. |
| Choose line behavior | Decide whether each line will lead, divide, frame, or create depth. |
| Match focal length to intent | Wide angles exaggerate converging lines; telephotos compress and simplify them. |
| Terminate lines inside the frame | Adjust position or focal length so strong lines don't exit at corners. |
| Mark Gray workshops | Hands-on courses across Australia and worldwide offer guided line-composition practice with portfolio review. |
Table of Contents
- What are lines in photography, and how does the eye read them?
- Why lines are one of the most powerful tools in your compositional kit
- What are the main line types and how do you use each one?
- How do you find and create lines on location?
- Which camera and lens settings change how lines read?
- How do you place lines within classic compositional systems?
- What are the most common mistakes with lines, and how do you fix them?
- Three shooting assignments to build your line instincts
- A working photographer's perspective on lines in landscape work
- Ready to practice lines with expert guidance in the field?
- Sources
What are lines in photography, and how does the eye read them?
A line in photography is any element that creates a visual path across the frame, as seen in architectural and human-made compositions like those captured by Asylum Chapel & The Sail Loft Wedding Photography | London. Lines can be physical or psychological connections that serve to connect elements, divide space, or lead the eye — functioning as a core compositional element in every genre.
Actual lines are tangible: a road cutting through a desert, railway tracks converging toward the horizon, a row of cypress trees, or the clean edge of a glass building. They exist in the scene regardless of where you stand.
Implied lines are invisible but equally powerful. A portrait subject looking off-frame creates a directional vector the viewer's eye follows instinctively. Arrange three people in a diagonal and the eye connects them as a line even though no physical line exists. Implied lines produced by a subject's gaze or pointing gesture function as strong emotional vectors, often more effective than physical lines for making portraits feel connected.
How the eye reads a line follows a simple logic: it enters at the start point, travels the line's direction, and arrives at a termination point. That journey is the compositional payoff. A line that starts at the frame's lower edge and terminates at your subject delivers the viewer exactly where you want them. A line that exits the frame at a corner takes the viewer with it, out of the image entirely.
Scan any frame and you can label each line's primary behavior: lead (directs toward a subject), divide (separates sky from land, background from foreground), frame (borders the subject on one or more sides), or create depth (recedes into the distance). Naming the behavior before you shoot is what separates deliberate composition from guesswork.
Why lines are one of the most powerful tools in your compositional kit
Lines do three things simultaneously: they direct the viewer's attention, set the emotional tone of the image, and build the illusion of three-dimensional depth on a flat surface. Leading lines are natural or man-made lines that guide the viewer's eye through an image toward the subject and work across portrait, landscape, and architectural photography.
The mood each line direction carries is consistent and learnable:
- Horizontal lines (a calm ocean horizon, a flat prairie) communicate stability, rest, and tranquility. They are the natural choice for serene landscape work.
- Vertical lines (tall trees, skyscrapers, a standing figure) suggest strength, authority, and upward aspiration. Portrait photographers use vertical framing and vertical lines together to project confidence.
- Diagonal lines inject energy, tension, and movement. A road cutting across the frame at 45 degrees feels dynamic in a way a perfectly horizontal road never will.
- Curved and S-curve lines slow the viewer's pace and create a sense of ease and flow. Rivers, winding paths, and coastlines are natural S-curves that invite the eye to linger.
- Converging lines (rail tracks, corridor walls) create dramatic depth and draw the eye toward a single focal point.
Experts advise identifying lines before pressing the shutter and deciding whether to emphasize, remove, or reframe them. That deliberate choice is what separates a considered composition from an accidental one. A landscape with a strong diagonal ridge line reads very differently depending on whether you position yourself to use it as a leading line or let it cut the frame in half.
What are the main line types and how do you use each one?
The standard taxonomy for lines in composition includes seven types: vertical, horizontal, diagonal, leading, implied, converging, and curved. Each carries a distinct visual effect and suits different genres and subjects.
Vertical lines
Tall structures, trees, and standing figures. They convey strength and permanence. In architecture and forest photography, align verticals with the frame edge to avoid a leaning effect. Place your subject between two verticals to frame them naturally.
Horizontal lines
The horizon, a still waterline, a long wall. They ground the image and communicate calm. Placing the horizon in the lower third emphasizes sky; placing it in the upper third emphasizes foreground, and the horizon should always be parallel to the frame edge to avoid instability. For horizontal lines in photography, even a one-degree tilt reads as careless rather than creative.
Diagonal lines
Roads, staircases, shadows at golden hour. They create energy and movement. Position your subject at the end of the diagonal so the line delivers the viewer there. Shoot from a low angle to steepen the diagonal and increase its drama.

Converging lines and vanishing points
Multiple diagonal lines that converge produce a strong vanishing point and perceived depth. Rail tracks, avenue trees, and corridor walls are classic examples. Place your subject at or just off the vanishing point — the eye travels the full depth of the frame before landing on them, creating a hold-and-release effect that feels satisfying.
Curved lines and S-curves
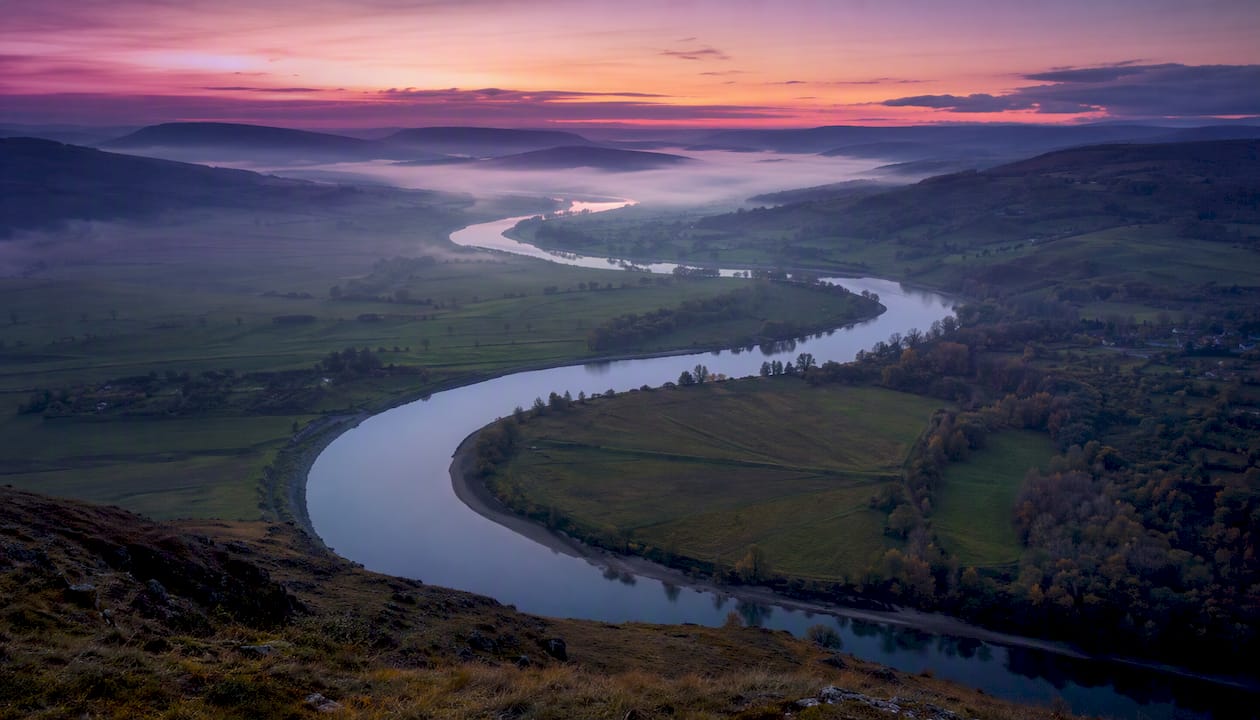
S-curves slow the viewer's progress and create a relaxed pace, while diagonal lines create faster, more energetic movement. A river bend, a winding mountain road, or a curved shoreline all work beautifully as S-curves in landscape photography. Position yourself so the curve enters from the lower frame edge and sweeps toward your subject.
Leading lines
A subset of the above, but worth naming separately because the intent is explicit: the line's sole job is to guide the eye to the subject. Fences, jetties, pathways, and light trails all serve this role. The line can be subtle or bold — what matters is that it starts near the viewer's natural entry point (usually lower left or lower right) and terminates at the subject.
Implied lines
A model's gaze, a pointing hand, the trajectory of a thrown object. These are invisible but the viewer reads them instinctively. In portraits, direct your subject's gaze toward open space in the frame to create a natural implied line that gives the composition room to breathe.
Pro Tip: Watch where strong lines terminate. Lines exiting at corners can force the eye out of the frame — adjust your position or focal length so lines guide toward interest rather than toward an exit.
| Line type | Mood / effect | Best genre | High-impact tip |
|---|---|---|---|
| Vertical | Strength, permanence | Architecture, portraits | Align with frame edge; avoid keystoning |
| Horizontal | Calm, stability | Landscape, seascape | Use rule of thirds for horizon placement |
| Diagonal | Energy, movement | Street, sport, landscape | Shoot low to steepen the angle |
| Converging | Depth, drama | Architecture, landscape | Place subject at or near the vanishing point |
| Curved / S-curve | Flow, relaxed pace | Landscape, nature | Enter from lower frame edge; sweep to subject |
| Leading | Direction, focus | All genres | Start near frame entry; terminate at subject |
| Implied | Emotion, connection | Portraits, editorial | Use gaze or gesture to create the vector |
How do you find and create lines on location?
Scouting for lines is a skill that sharpens quickly with practice. The key is to look before you lift the camera.
- Roads, paths, and tracks are the most obvious leading lines. Even a dirt trail through tall grass works.
- Fences, walls, and handrails create strong parallel or converging lines depending on your angle.
- Shadows at golden hour or blue hour cast long, dramatic diagonals across almost any surface.
- Reflections in water double your lines and add symmetry. A still lake can mirror a tree line perfectly.
- Architectural seams — window frames, tile grids, staircase edges — are everywhere in urban environments.
- Tree rows and crop rows in rural settings create natural converging lines that recede beautifully into the distance.
- Seasonal elements like snowbanks, autumn leaf paths, and spring wildflower rows shift the lines available in any location throughout the year.
Vantage point changes everything. Squatting low forces foreground lines to start at the bottom of the frame, giving them maximum visual weight. Moving left or right can align a fence with a distant mountain peak. Stepping back widens the convergence angle of parallel lines. Explore travel destinations with strong natural lines — coastlines, canyons, and forests consistently offer the most dramatic compositional options.
When lines don't exist naturally, create them. Arrange a row of subjects at slightly different distances to imply a diagonal. Ask a portrait subject to extend an arm or tilt their chin to generate an implied vector. Use a long scarf or fabric thrown into the air to form a temporary curve. Even the placement of a single prop on a flat surface can establish a line that anchors the whole composition.
Which camera and lens settings change how lines read?
Technical choices either reinforce or undermine the lines you've identified. Getting this right is what separates a strong composition from one that almost worked.
Aperture controls how much of the line stays sharp. A wide aperture (f/1.8–f/2.8) throws background lines into soft blur, isolating your subject from them. That works well when the line is implied or when you want the subject to feel separate from the environment. A narrow aperture (f/8–f/16) keeps lines sharp throughout the frame, which is ideal when the line itself is the compositional hero — a fence receding into a sharp mountain backdrop, for example.
Focal length is the most powerful tool for manipulating lines. Wide-angle lenses (16mm–35mm) exaggerate converging lines and foreground interest dramatically. Stand at the start of a jetty with a 16mm lens and the planks will seem to rush toward the horizon. Telephoto lenses (100mm–400mm) compress the scene, simplifying lines and stacking elements closer together. A 200mm shot of a winding road makes the curves feel tighter and more rhythmic than a wide-angle view of the same road. For landscape photography techniques that rely on strong leading lines, a wide-angle lens is usually the first choice.
Long exposures smooth moving lines into silky continuity. Water flowing over rocks becomes a soft, directional blur that reads as a curved line. Light trails from cars at night create bold, glowing diagonals. ND filters make long exposures possible in daylight, letting you smooth a fast-moving river into a clean compositional line even at midday.
Grid overlays in the viewfinder are underused by beginners. Activate the grid on any mirrorless or DSLR camera and align your horizon to it before you shoot. Professionals use grid overlays and gentle Transform corrections in post — tools like Lightroom's Transform panel — to align horizons, correcting partially rather than forcing extreme straightening that introduces distortion.
Pro Tip: Shooting RAW preserves the detail you need for perspective corrections in post. A JPEG that's been heavily transformed will show compression artifacts at the edges; a RAW file handles the same correction cleanly.
How do you place lines within classic compositional systems?
Lines don't work in isolation. They interact with every other compositional decision you make, and knowing how to combine them with established systems produces consistently stronger images.
Rule of thirds and horizon placement: The NYIP guidance on horizon placement is clear — a lower-third horizon emphasizes sky and clouds, while an upper-third horizon emphasizes foreground texture and leading lines. Centering the horizon is rarely the strongest choice unless you're shooting a perfect reflection for symmetry. Use the landscape composition checklist to pre-visualize where your horizon and leading lines will intersect before you set up the tripod.
Vanishing point placement: Place your subject at or slightly off the vanishing point, not dead center. The slight offset creates visual tension that holds the viewer's attention longer. Radiating diagonals from corners create a visual vortex that focuses attention on a central point — a technique that works powerfully in dramatic landscape and architectural shots.
Foreground interest: Pair a strong foreground line (rocks, flowers, a path) with a distant subject to increase perceived depth. The foreground line acts as the entry point; the distant subject is the destination. Without the foreground line, the viewer has no clear starting point and the depth reads as flat.
Dos and don'ts for line placement:
- Place the horizon on a third, not the center, unless shooting for symmetry.
- Let leading lines enter from the lower frame edge for maximum visual weight.
- Avoid lines that bisect the frame exactly in half — they divide rather than lead.
- Never let a strong leading line exit through a corner unless the exit is intentional.
- Check that vertical lines in architecture are truly vertical unless a deliberate tilt is the creative choice.
What are the most common mistakes with lines, and how do you fix them?
Most line-based composition errors come down to three problems: a crooked horizon, a line that exits the frame at the wrong point, and distracting intersecting lines that compete for attention.
Crooked horizon. The fix is simple in the field: activate your camera's electronic level or grid overlay and align before you shoot. In post, Lightroom's Transform panel handles minor corrections cleanly. The caution is over-straightening: rotating a frame more than two or three degrees crops the corners and can introduce a subtle barrel distortion. Correct partially if needed rather than forcing a perfectly level result that looks unnatural.
Lines leading off-frame at corners. This is the most common beginner error in photography using lines. A fence that exits at the lower-right corner pulls the viewer's eye out of the image. The fix: change your position slightly so the line terminates inside the frame, or adjust your focal length to shift where the line ends. Sometimes stepping two feet to the left is all it takes.
Distracting intersecting lines. When two strong lines cross near the subject, they create visual noise that competes with the subject for attention. Reframe to separate them, or change your height so one line drops below the frame edge.
Pro Tip: Before you call a shot, trace every strong line in the frame with your eye. Ask: where does it start, where does it go, and where does it end? If the answer to any of those is "out of the frame at a corner," recompose.
Three shooting assignments to build your line instincts
These exercises are repeatable and work at any skill level. Run through all three in a single afternoon and you'll develop a feel for line behavior that no amount of reading can replace.
-
The S-curve slow-pace assignment. Scout a river bend, winding path, or curved shoreline. Position yourself so the curve enters from the lower frame edge and sweeps toward a distant subject or point of interest. S-curves slow the viewer's progress and create a relaxed pace, making them ideal for landscape prints where dwell time matters. Shoot the same scene from three heights and compare how the curve's entry point changes the feeling of each frame.
-
The visual vortex assignment. Find a location with multiple converging diagonals — a long corridor, a forest of tall trees, or a road flanked by fences. Position yourself so the diagonals radiate from two or more corners toward a central point. Multiple diagonal lines that converge produce a strong vanishing point and perceived depth; when they radiate from the edges, they create a visual vortex that rivets attention to the center. Place a subject at that center point and shoot at f/8 to keep the full depth sharp.
-
The implied-line portrait assignment. Work with a single subject in a simple environment. Direct their gaze toward open space in the frame rather than at the camera. Then ask them to point or reach toward something outside the frame. Photograph both versions. The gaze creates a calm, directional implied line; the gesture creates a more energetic one. Review both images and identify which implied line feels more connected to the subject's expression.
Review checklist after each shoot:
- Did the primary line start where you intended?
- Where does it lead, and does it arrive at the subject?
- Does it terminate inside the frame?
- Does the line support the subject's mood, or does it compete with it?
A working photographer's perspective on lines in landscape work
The moment I started treating lines as the first decision rather than the last adjustment was when my landscape work genuinely changed. Most photographers arrive at a scene and react to the light. The stronger habit is to arrive and ask: what is the dominant line here, and what do I want it to do?
At a coastal location I scouted in Iceland, I had two clear options: a straight basalt column formation that would read as a bold vertical series, or a curved black sand shoreline that swept from the foreground into the mist. The vertical columns would have produced a powerful, almost confrontational image. The S-curve shoreline invited the viewer in slowly, with a sense of mystery. I chose the S-curve because the light was soft and the mood called for patience rather than drama. That decision was made before I touched the camera.
The personal habit I'd recommend to anyone: before you set up your tripod, take a quick phone snap from three heights — eye level, chest height, and crouching low. It takes thirty seconds and shows you immediately how the lines start and terminate at each position. The low shot almost always produces the strongest foreground line entry. It's a simple preview technique that saves significant time in the field, and it's one of the first habits taught in hands-on workshop settings.
On the question of tilted horizons in post: I rarely correct to 100% level unless the tilt is clearly an error. A horizon that sits one degree off level in a dramatic seascape can add subtle tension. Two degrees starts to read as a mistake. The rule I use is this — if the tilt feels intentional when you look at it, keep it. If it makes you want to straighten it, straighten it. Lightroom's Transform panel handles corrections up to about two degrees without any visible distortion in a RAW file. Beyond that, crop carefully.
Ready to practice lines with expert guidance in the field?
Photography with lines rewards hands-on practice more than almost any other compositional skill. Reading about S-curves and vanishing points is useful; standing in a landscape and choosing between them in real light is where the instinct actually forms.

Mark Gray's one-day photography courses and multi-day landscape workshop tours are built around exactly this kind of deliberate, guided practice. Small groups, real locations, and live compositional feedback mean you're not just learning theory — you're building a portfolio while you learn.
- Live scouting and feedback: work through line identification, vantage decisions, and camera settings with Mark on location, not in a classroom.
- Portfolio review: every workshop includes image review so you can see precisely where your line compositions succeeded and where to refine them.
Courses run across Australia, with multi-day tours extending to New Zealand, Iceland, Norway, French Polynesia, Spain, and the United Kingdom. View course dates and book your place at the Mark Gray Gallery website, or contact the team directly to ask about upcoming tours. The skills developed in a landscape photography course extend well beyond lines — but lines are always where the best sessions begin.
Sources
These vetted resources cover the full range of line composition theory and technique. Each suits a different depth of study.
- Move the horizon line for better photos | NYIP
- Leading lines photography | Adobe Creative Cloud
- How to use lines in photo composition - Corel Discovery Center
- How to Use Leading Lines to Create Compelling Landscape Photos | Outdoor Photography Guide
- Using horizontal lines in photography | Digital Photography School
- 7 types of lines in photography composition and how to use them | The Lens Lounge
- Composition: Horizontal and vertical lines | Mark Galer
- The 10 Elements of Composition in Photography | Photography Life