
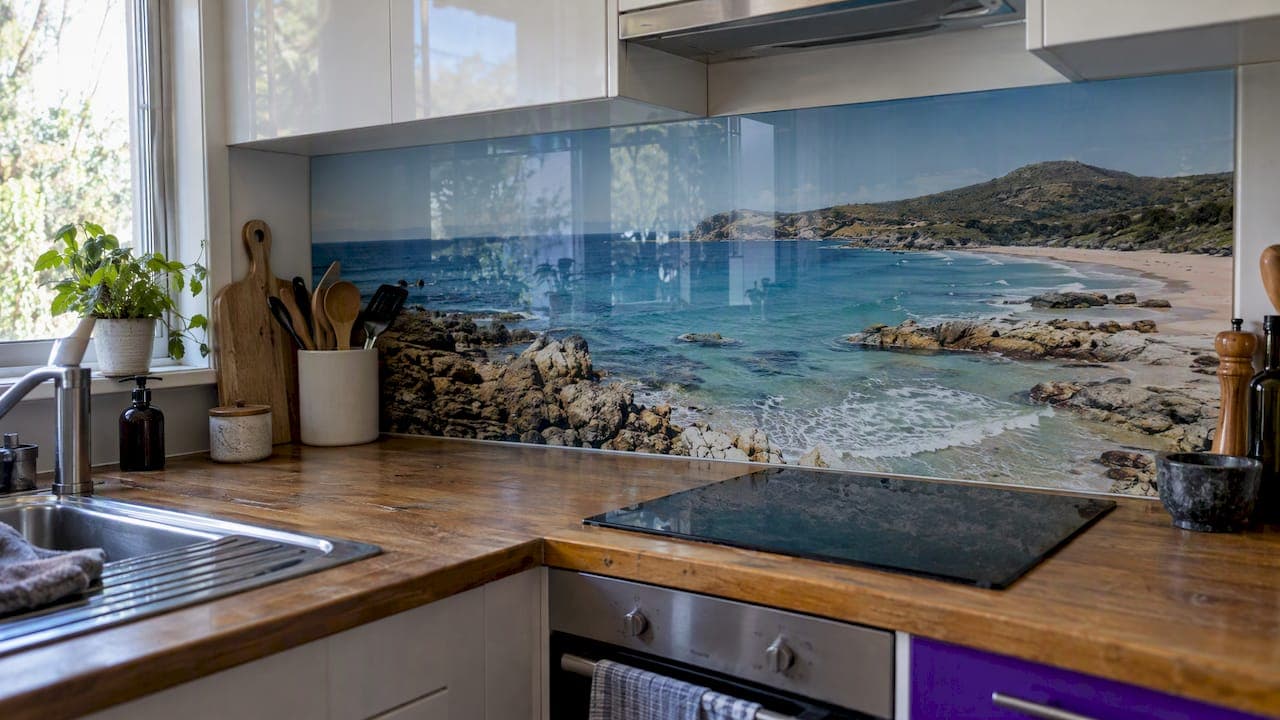
For a crisp, pixelated splashback, aim for a higher PPI at final print size when fine detail matters, and treat a moderate PPI as the acceptable floor for simpler patterns viewed from a short distance. What matters most is the image's actual pixel dimensions, not the DPI number stamped in its metadata. Before you commit to print, ask your supplier for a pre-press file review.
TL;DR:
- Calculate required pixels by converting each panel dimension from millimeters to inches, then multiplying by the target PPI; check both image width and height.
- Send a TIFF, high quality PNG, or JPEG with an ICC color profile, and avoid repeated compression that can degrade fine detail.
- Ask the printer for a scaled proof before production, and confirm its required file format, pixel dimensions, color mode, and safe margins around cutouts.
- If resizing is unavoidable, use professional resampling and apply sharpening for the final print size; preview a detailed crop at 100 percent zoom.
Table of Contents
- Why DPI, PPI and pixel dimensions matter for splashbacks
- How to calculate the pixel dimensions your splashback needs
- File formats, color profiles and bleed details that protect clarity
- What to ask your supplier before you commit to print
- How professional photographers prepare images for glass printing
- Balancing a bold composition with technical print limits
- License a splashback-ready image through Mark Gray
- FAQ
- Sources
Why DPI, PPI and pixel dimensions matter for splashbacks
PPI (pixels per inch) describes how densely an image file's pixels are packed, while DPI (dots per inch) describes how a printer lays down ink or toner on the final surface. These terms get used interchangeably in casual conversation, but for splashback printing, neither one matters as much as the simplest figure of all: the total pixel dimensions of your file. A printer can only work with the pixels you give it, and no amount of relabeling changes that supply.
This is the trap many homeowners fall into. Opening an image and changing its "DPI" setting in software feels like an upgrade, but it does nothing to the pixel count, according to PrintWiki. Only resampling, which invents or discards pixel data, or re-exporting from a higher-resolution master file actually changes what the printer has to work with.
The practical consequence shows up as fuzziness, soft edges and blocky detail once an image is stretched past what its pixels can support. A photo that looks sharp on a phone screen can fall apart badly when it is enlarged to cover a 900 millimeter panel.
- PPI measures pixel density in the file itself.
- DPI measures the printer's output resolution.
- Pixel dimensions, not the DPI tag, set the real ceiling on print size and sharpness.
How to calculate the pixel dimensions your splashback needs
The math is straightforward once you have two numbers: your panel's final size in inches and your target PPI. Convert millimeters to inches by dividing by 25.4, then multiply that figure by your target PPI to get the minimum pixel dimension required.
- Convert panel size to inches. A 600 millimeter wide panel equals roughly 23.6 inches; a 900 millimeter panel equals about 35.4 inches; a 1,200 millimeter panel equals about 47.2 inches.
- Multiply by target PPI. At a moderate PPI, those panels need thousands of pixels of width respectively. At a higher PPI, the same panels need significantly more pixels per dimension.
- Check your file against that number. Open the image's properties and compare its actual pixel width to the figure you calculated, since that comparison tells you more than any DPI label ever will, a point PrintWiki makes clearly.
A 150 PPI target tends to hold up fine for splashbacks with soft patterns, abstract textures or scenes that will sit behind a stove where no one presses their nose to the glass. Reach for 300 PPI or higher when the image carries fine detail such as foliage, water texture or text, or when the splashback sits in a spot people view up close, like a butler's pantry backsplash at eye level. Supplier guidance on splashback printing generally recommends a range of 150 to 300 DPI, with the right end of that range depending on your final size and the supplier's own equipment, according to REGAL Shower Screens.
File formats, color profiles and bleed details that protect clarity
Getting the pixel count right is half the job. The file format and color handling you choose also shape how faithfully your image reaches the glass.
- Supply TIFF files where possible, or high-quality PNG and JPEG exports, and avoid saving through multiple rounds of lossy compression, which is standard designer guidance for splashback files, per REGAL Shower Screens.
- Include an ICC color profile with your file, or ask your supplier directly whether they want RGB or a converted CMYK file, since glass printing can shift color differently than paper printing.
- Add extra pixels around any cutout areas, such as power points or tap holes, and confirm the safe area with your supplier so nothing critical sits too close to a cut edge.
- When resizing is unavoidable, resample with a professional tool rather than a basic drag-to-resize, and apply output sharpening calibrated to the final print size rather than relying on naive upscaling.
Pro Tip: Export a full-resolution test crop of your most detailed area and view it at 100 percent zoom before sending the whole file, since that is exactly where pixelation shows first.
What to ask your supplier before you commit to print
A good supplier will walk you through a pre-press check rather than simply accepting whatever file you upload. Reputable print providers typically offer this kind of file assessment and recommend customers request one before paying for a full print run, according to REGAL Shower Screens.
- Ask what pixel dimensions and file format they need for your exact panel size.
- Request a scaled proof or low-resolution mockup so you can see cropping and color before final production.
- Ask which PPI threshold they consider acceptable for their equipment, and whether they offer upscaling or retouching if your file falls short.
- Confirm whether they check for compression artifacts, noise and soft edges during their assessment, since those are the usual flags a print professional looks for at large sizes.
A supplier who answers these questions clearly and offers to test a proof is generally one worth trusting with a large glass panel, especially when considering how to commission media wall photos that fit your space perfectly.
How professional photographers prepare images for glass printing
Shooting with large-format output in mind starts well before the export stage. We shoot at the camera's highest native resolution and capture RAW files whenever possible, since RAW preserves far more detail to work with later than a compressed JPEG straight from the camera.
Composing with the final crop already in mind matters just as much. A wide, panoramic framing that matches your splashback's proportions means less cropping later, which means less upscaling and sharper results. The export workflow follows a consistent order: crop to the final aspect ratio first, export at the exact pixel dimensions the panel requires, then apply output sharpening calibrated to that size. If you are sourcing an image rather than shooting your own, confirm the licence terms for splashbacks cover commercial reproduction and wall or print usage, since not every stock license extends to permanent installations.

Balancing a bold composition with technical print limits
A striking image sometimes justifies accepting softer detail, especially behind a stove where no one studies the glass closely. The rule we hold to: talk to your printer before you fall in love with a crop, not after.
— Mark
License a splashback-ready image through Mark Gray
We license landscape and travel photography for commercial use, including splashback installations. If your own photos fall short on pixel dimensions, licensing a professionally prepared frame removes the guesswork around resolution entirely.

- Browse the image licensing catalog for splashback-suitable landscapes.
- Ask about file specifications before your supplier begins pre-press.
- Consider a 1 Day Photography Course if you would rather capture your own high-resolution source image.
Reach out through our image licensing page to request a quote for your panel size.
FAQ
What resolution do I need for a splashback image?
Aim for 300 PPI at your final print size for detailed images, with 150 PPI as an acceptable floor for simpler patterns or images viewed from a short distance, following supplier guidance from REGAL Shower Screens. The determining factor is your file's actual pixel dimensions, not its DPI label.
What is the difference between DPI and PPI for printing?
PPI describes the pixel density packed into your image file, while DPI describes how densely a printer places dots of ink or toner on the finished surface, as explained by PrintWiki. Total pixel count, rather than either label, is what actually limits how large and sharp an image can print.
How do I check if my photo is high enough resolution for a splashback?
Compare your image's pixel width and height to the pixel dimensions your panel size requires at your target PPI, calculated by converting the panel's inches by that PPI figure. Checking pixel dimensions directly is more reliable than trusting the DPI number saved in the file's metadata.
Can I upscale a low-resolution photo for a splashback?
Basic upscaling tends to introduce blur and blocky artifacts rather than real detail, so professional workflows favor careful resampling followed by output sharpening calibrated to the final size. A supplier's pre-press assessment will usually flag an image that has been stretched too far before it reaches full production.
What file format should I send my supplier for splashback printing?
Non-destructive formats like TIFF or high-quality PNG are generally preferred, with high-quality JPEG as an acceptable alternative, along with an ICC color profile where possible, per REGAL Shower Screens. Avoid saving a file through multiple rounds of compression, since each pass can degrade fine detail further.
Sources
- How to Design a Personalised Splashback with Images - REGAL Shower Screens
- DPI vs PPI - PrintWiki - Print Safari