
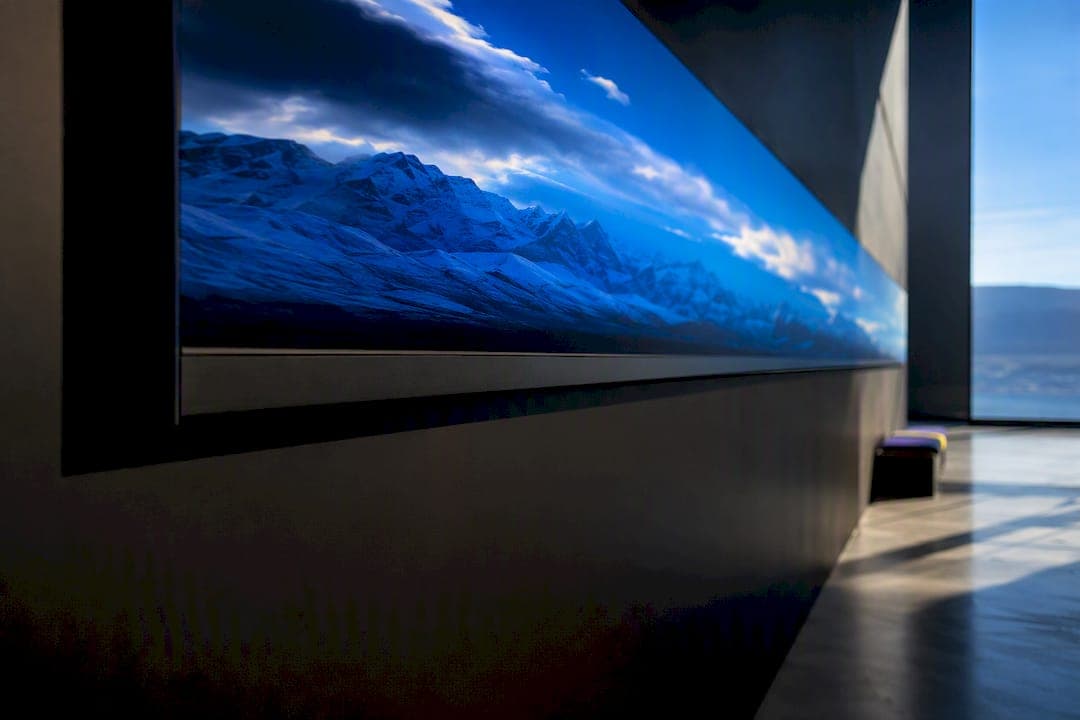
A panoramic print is generally defined as an image with an aspect ratio of at least 2:1, meaning it's at least twice as wide as it is tall. The most common ratios are 2:1, 3:1, and 4:1, with typical sizes running 8×20 inches (20×50 cm), 12×36 inches (30×90 cm), and 20×60 inches (50×150 cm). Resolution, finish, and framing decisions all follow from that starting ratio, and we'll walk through each one below.
TL;DR:
- Choosing a 2:1 ratio provides flexibility for framing and works well for interior, architectural, and tight landscape shots.
- The most popular size for initial panoramic prints is 12×36 inches, suitable for above a sofa or sideboard, often in a 3:1 ratio.
- For large displays, resolution must match viewing distance: 300 DPI for close-up viewing, and 150-200 DPI for panoramic scenes viewed from afar.
- Material options like canvas, acrylic, and aluminium influence the appearance and durability of the print, with canvas being more practical for very large sizes.
- Offset cropping risks, such as placing the horizon centrally or clipping key subjects, are common and should be carefully checked before printing.
Table of Contents
- What Are the Most Common Panoramic Aspect Ratios?
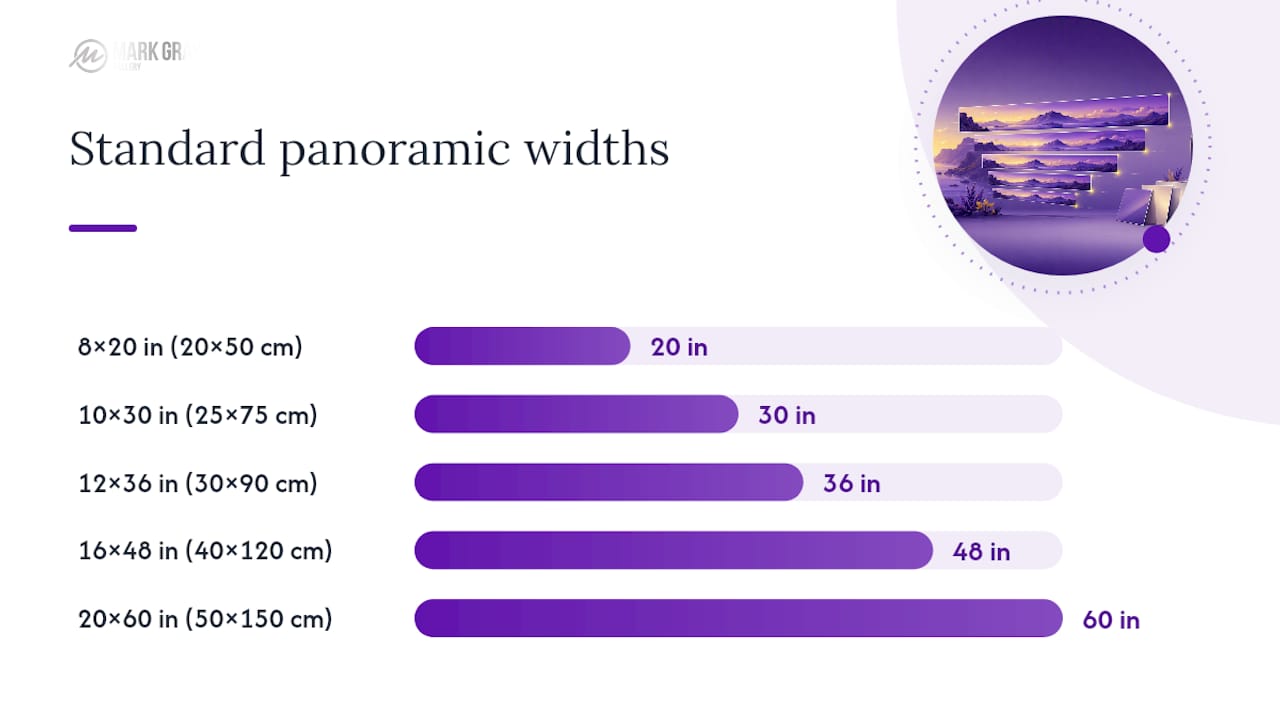
- What Are Standard Panoramic Print Sizes in Inches and Centimeters?
- How Do You Choose the Right Panoramic Size for Your Wall?
- What Resolution and DPI Do You Need for Panoramic Prints?
- Which Materials and Finishes Work Best for Panoramic Prints?
- How Should You Frame and Mount a Panoramic Print?
- Why Trust Mark Gray for Panoramic Print Guidance?
- What Are the Best Uses for Different Panoramic Sizes?
- What Should You Prioritize When Choosing a Panoramic Print Size?
- How Can You Commission a Panoramic Print From Mark Gray Gallery?
- Where Can You Learn More About Panoramic Print Standards?
- Sources
What Are the Most Common Panoramic Aspect Ratios?
Choosing a ratio isn't just a technical decision. It changes how a room reads a piece of art, and it determines whether your image survives the crop or gets butchered by it.
The 2:1 ratio is the entry point into panoramic territory, and it's the most forgiving of the bunch. A 2:1 print, say 10×20 inches or 25×50 cm, sits at the subtle end of the spectrum. It fits standard framing far more easily than wider formats, and it works well for compositions that don't need a lot of sweeping horizon. Interior shots, tighter landscape crops, and architectural details all suit this ratio because it doesn't demand a huge, unbroken wall to feel proportionate.
The 3:1 ratio is the one most photographers picture when they hear the word "panoramic." It's the classic panoramic format widely used for printed landscapes, and there's a reason it has staying power: it delivers that sweeping, cinematic sense of scale without becoming an unmanageable strip on the wall. Coastlines, mountain ranges, and cityscapes with a strong horizontal rhythm come alive at 3:1. A 12×36 inch print (30×90 cm) is the workhorse example here.
4:1 and wider ratios move into statement territory. At this width, you're not just showing a scene, you're recreating the feeling of standing in front of it and turning your head to take it all in. These ultra-wide formats suit dramatic, uninterrupted subjects: a Norwegian fjord, a French Polynesian lagoon, a desert horizon with almost nothing breaking the line. They also demand more wall and more thoughtful placement, since a 4:1 or 5:1 print can look awkward crammed into a narrow hallway.
A few composition habits separate a panoramic print that reads as intentional from one that reads as a badly cropped photo:
- Keep the horizon off dead center. Placing it at roughly one third or two thirds up the frame gives the eye somewhere to rest.
- Leave negative space at the edges rather than cropping tight against your main subject, since panoramic crops are unforgiving of anything close to the border.
- Avoid ratios wider than your composition can support. A 5:1 crop of an image with a busy, cluttered frame usually looks like a mistake, not a design choice.
- Check your foreground and sky balance. Wide ratios tend to exaggerate whichever one dominates, so a heavy sky can overwhelm a thin strip of land.
Resist the temptation to pick the widest ratio just because it looks impressive on a screen. A 5:1 print of an image that was really shot for a 2:1 crop will feel stretched and empty, no matter how good the original photo was.
What Are Standard Panoramic Print Sizes in Inches and Centimeters?
Print labs and galleries tend to work from a handful of tried-and-tested sizes rather than a limitless range, largely because these dimensions map cleanly onto the common ratios and fit standard frame stock. Here's how the most requested sizes break down by role in a room:
- 8×20 inches (20×50 cm) — a narrow-space size at roughly 2.5:1, ideal for hallways, above a doorway, or tucked between windows where a wider print simply won't fit.
- 10×30 inches (25×75 cm) — a small focal piece at 3:1, well suited to a desk, a reading nook, or a bedroom wall that needs presence without dominating the room.
- 12×36 inches (30×90 cm) — the classic 3:1 size, and the one most buyers land on for a first panoramic purchase above a sofa or sideboard.
- 16×48 inches (40×120 cm) — a large format still at 3:1, built for rooms with real wall real estate: dining rooms, open-plan living areas, or an office reception wall.
- 20×60 inches (50×150 cm) — a feature-wall size, often the largest single panel most labs will produce before recommending a multi-panel approach.
Metric equivalents aren't always exact conversions. A 12×36 inch print is technically 30.48×91.44 cm, but most labs round to 30×90 cm for simplicity, and that half-centimeter of rounding almost never matters visually. Where it does matter is with custom framing, so always confirm final dimensions with your framer before ordering a frame in advance of the print itself.
Custom sizing has real limits. Most consumer and professional printers cap single-panel width somewhere between about 40 and 60 inches, depending on the machine and paper roll, and going wider usually means one of two things: checking pixel dimensions against a calculator to confirm the file can support the enlargement, or splitting the image across panels. Tiling, where one continuous image is printed in sections with visible seams, works for large, budget-conscious installations but rarely suits fine art display. A diptych or triptych, by contrast, deliberately breaks the composition into two or three panels with intentional gaps between them, and that approach can look striking on a feature wall if the image has a strong enough structure to survive the split. If your local print provider hits its width ceiling, ask specifically whether they offer a panoramic versus an "ultra panoramic" product category, since some specialist labs price and produce these differently.
How Do You Choose the Right Panoramic Size for Your Wall?
Start with the wall, not the image. For a standalone feature wall with no furniture beneath it, you have more freedom, and a wider print, sometimes spanning most of the wall, can look intentional rather than crowded.
Viewing distance changes the math too. A print you'll walk past closely in a hallway needs sharper resolution and can afford to be slightly smaller, since flaws are easier to spot up close. A large panoramic hung across a living room, viewed from ten feet away or more, tolerates a lower pixel density and can go bigger without looking soft.
Before you commit to an order, test the scale physically. Tape sheets of masking paper or newspaper to the wall in the exact dimensions you're considering and live with it for a day or two. This single step catches more sizing mistakes than any amount of measuring on paper, because a number on a spec sheet rarely matches what your eye tells you once it's actually on the wall.
One more thing worth checking before you finalize a crop: make sure your main subject, whether that's a mountain peak, a lighthouse, or a city skyline, sits comfortably inside the frame with room to breathe. Panoramic crops are aggressive by nature, and it's easy to accidentally shave off the top of a subject you didn't realize was close to the edge.
- Measure the wall and target furniture, then apply the 60 to 75% rule for above-furniture placement.
- Match resolution needs to viewing distance: closer viewing calls for higher DPI, distant viewing tolerates lower DPI at larger sizes.
- Mock up the size with taped paper before ordering.
- Double-check your crop protects the subject from the aggressive edges panoramic ratios create.
Pro Tip: Photograph your mocked-up paper template from across the room on your phone. Seeing it flattened into a photo, the same way you'll glance at the finished print day to day, often reveals sizing issues that staring at the wall in person doesn't.
What Resolution and DPI Do You Need for Panoramic Prints?
Resolution requirements for panoramic prints follow the same logic as any large-format print, just stretched across a much longer dimension. For close viewing, 300 DPI is the benchmark that keeps detail crisp when someone's standing a few feet from the print. For large panoramas meant to be viewed from across a room, 150 to 200 DPI is generally acceptable, since the eye can't resolve the same level of detail from a distance.
The math is straightforward: required pixel width equals the print width in inches multiplied by your target DPI, and the same formula applies to height. A 12×36 inch print at 300 DPI needs roughly 3,600 by 10,800 pixels, while the same print at 150 DPI only needs 1,800 by 5,400 pixels.
A single-frame smartphone photo rarely has enough native resolution to fill these pixel counts at large sizes, which is exactly why most panoramic prints come from stitched multi-frame captures rather than one shot.
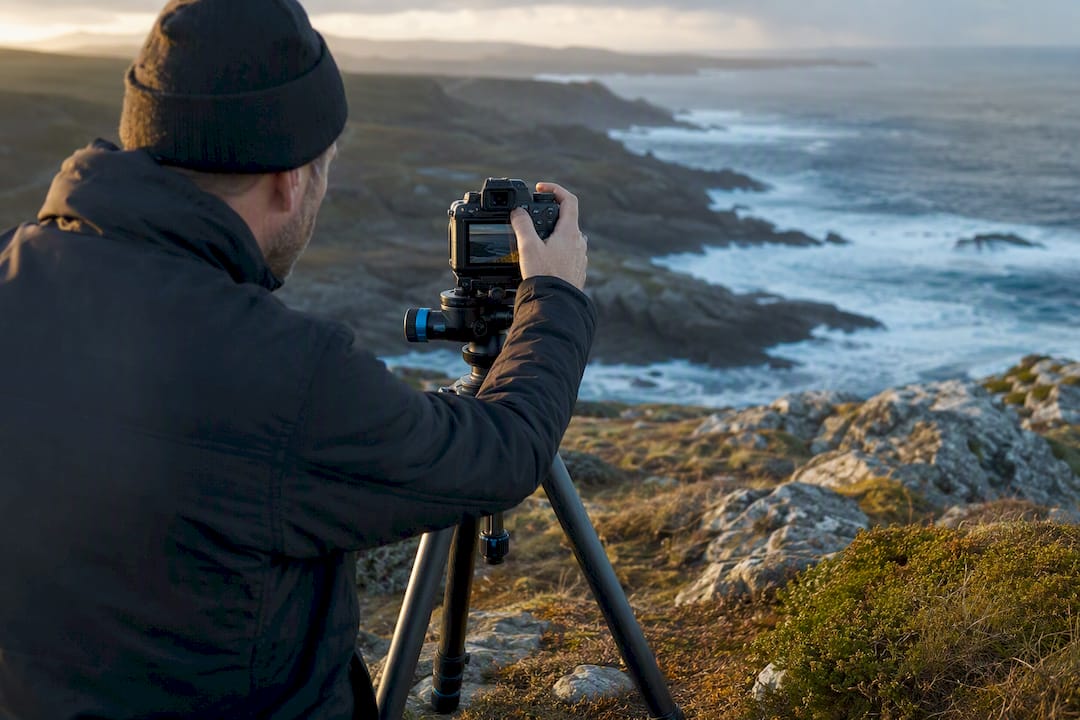
If you're stitching your own panorama, shoot in RAW, mount the camera on a tripod, and overlap each frame by roughly 30%. That overlap gives stitching software enough shared detail to align frames cleanly, and RAW files preserve the dynamic range you'll need if you're printing large enough for any exposure inconsistency between frames to show. Our own stitching guide walks through the capture settings in more detail, and our DPI guide for large prints covers how to check your file's pixel dimensions before you order.
Which Materials and Finishes Work Best for Panoramic Prints?
Material choice affects how a panoramic image reads on the wall almost as much as size does, and the wrong finish can flatten a photo that looked striking on screen.
- Canvas adds texture and warmth, especially with edge-wrap options that remove the need for frames.
- Acrylic face-mounting provides glossy depth and is ideal for high-contrast, detailed images.
- Aluminium (Dibond) finishes offer low glare and durability, suited for bright or high-traffic environments.
Print width limits vary by lab and material, but most panoramic-capable printers cap out somewhere between 40 and 60 inches on one panel. Beyond that, you're looking at tiling or a deliberate multi-panel split, and the finish you choose should factor into that decision. Acrylic and aluminium panels, in particular, get heavy and expensive fast once you're multiplying multiple large panels, so canvas is often the more practical route for very large, single-piece feature walls.
How Should You Frame and Mount a Panoramic Print?
Long, narrow formats put unusual stress on hanging hardware, so the mounting method matters more than it does for a standard rectangular print.
- For framed panoramics, use two or three evenly spaced hanging points rather than a single central hook, since a long frame hung from one point tends to twist or tilt over time.
- Heavier finishes like acrylic or aluminium generally need D-rings and a French cleat rather than sawtooth hangers, especially past 16×48 inches.
- Anything over 20×60 inches or particularly heavy is worth having a professional installer hang, both for safety and for a level, secure result.
- UV-protective glazing or laminate reduces fading, particularly for prints near windows.
- Keep panoramic prints out of direct sunlight and high-humidity rooms, and dust canvas gently rather than using cleaning sprays, which can degrade the surface over time.
Our framing options guide covers edge treatments and hardware choices in more depth if you're deciding between finishes.
Why Trust Mark Gray for Panoramic Print Guidance?
The author is an internationally recognized Australian landscape photographer whose limited-edition panoramic prints feature scenes from various countries around the world. That background, shooting and printing wide-format landscapes at gallery scale, informs every sizing recommendation above.
Beyond prints, the photographer offers commissioned large-format work, licensing for commercial stock use, and photography workshops for those wanting to capture their own panoramic images. For deeper technical detail, see our guides on displaying large format prints and archival print longevity.
What Are the Best Uses for Different Panoramic Sizes?
Landscape photography is the natural home for panoramic formats, and for good reason: a wide ratio mirrors how the eye actually scans a horizon, sweeping left to right rather than settling on a single point. A 3:1 or 4:1 print of a mountain range or coastline captures that scanning motion in a way a square or standard rectangular crop simply can't.
Cityscapes lean toward slightly narrower ratios, often 2:1 or 3:1, because skylines tend to have more vertical interest, buildings, towers, bridges, that gets lost if the ratio stretches too wide. A tightly composed 12×36 city skyline holds detail better than the same scene forced into a 5:1 crop.
Interior and architectural shots do well at the subtler 2:1 end, especially for spaces like open-plan living areas or hallways where a very wide print would overwhelm the room's proportions. Office and hospitality spaces frequently favor the 16×48 and 20×60 sizes for reception areas and boardrooms, where a large feature piece sets the tone for the whole room without competing with furniture or signage.
What Should You Prioritize When Choosing a Panoramic Print Size?
Most buyers overthink the ratio and underthink the file. The conventional advice fixates on 2:1 versus 3:1 versus 4:1 as if the choice were purely aesthetic, but the real constraint is almost always resolution. A gorgeous 5:1 composition is worthless at 20×60 inches if the source file can't hit the pixel counts that size demands.
Here's what the research actually supports: decide your size and viewing distance first, then work backward to confirm your file has enough resolution to support it, and only after that debate which ratio suits the wall. Skipping that order is how people end up disappointed with an enlargement that looked sharp on a laptop screen and soft on a living room wall.
The other overlooked factor is composition discipline. A panoramic ratio is unforgiving of clutter, and the temptation to go wider than the image supports is strong. If you take one thing from this guide, let it be this: choose the narrowest ratio that still tells the story. A well-composed 2:1 will always outperform an overstretched 4:1.
— Mark
How Can You Commission a Panoramic Print From Mark Gray Gallery?
For readers who want a print that's been sized, matched to finish, and framed properly the first time, Mark Gray Gallery is the more direct route than trial-and-error ordering through a generic online print shop. The gallery offers limited-edition and open-edition panoramic prints across landscapes from Australia, New Zealand, Norway, Iceland, French Polynesia, Spain, and the United Kingdom, along with custom commissioning for buyers who want a specific size, ratio, or finish matched to their wall.

Commissioning typically follows a simple path: you get in touch with your wall dimensions and image or subject preference, discuss material and size options (canvas, acrylic, or aluminium), review a proof, and then the piece moves to print and delivery. It's a more personal process than uploading a file to an anonymous print queue, and it means someone with actual large-format printing experience is checking your sizing and file quality before anything gets committed to canvas or aluminium.
If you've read this far and have a panorama sitting in your camera roll wondering where it belongs, visit the Mark Gray Gallery to browse available prints or send an inquiry about a custom commission.
Where Can You Learn More About Panoramic Print Standards?
- Panoramic photography overview — Wikipedia
- DPI and print-quality guidance — Printkeg
- Panoramic sizing guide — Print Panoramics
- 360-degree media formatting — Google Developers
- DPI guide for large prints — Mark Gray
Sources
- Panoramic photography — Wikipedia
- How to Print Panoramic Photos Without Losing Quality (DPI & Tips) — Printkeg
- Panoramic Photo Sizes | A Helpful Guide | Print Panoramics
- Discover 360-degree media — Google Developers