
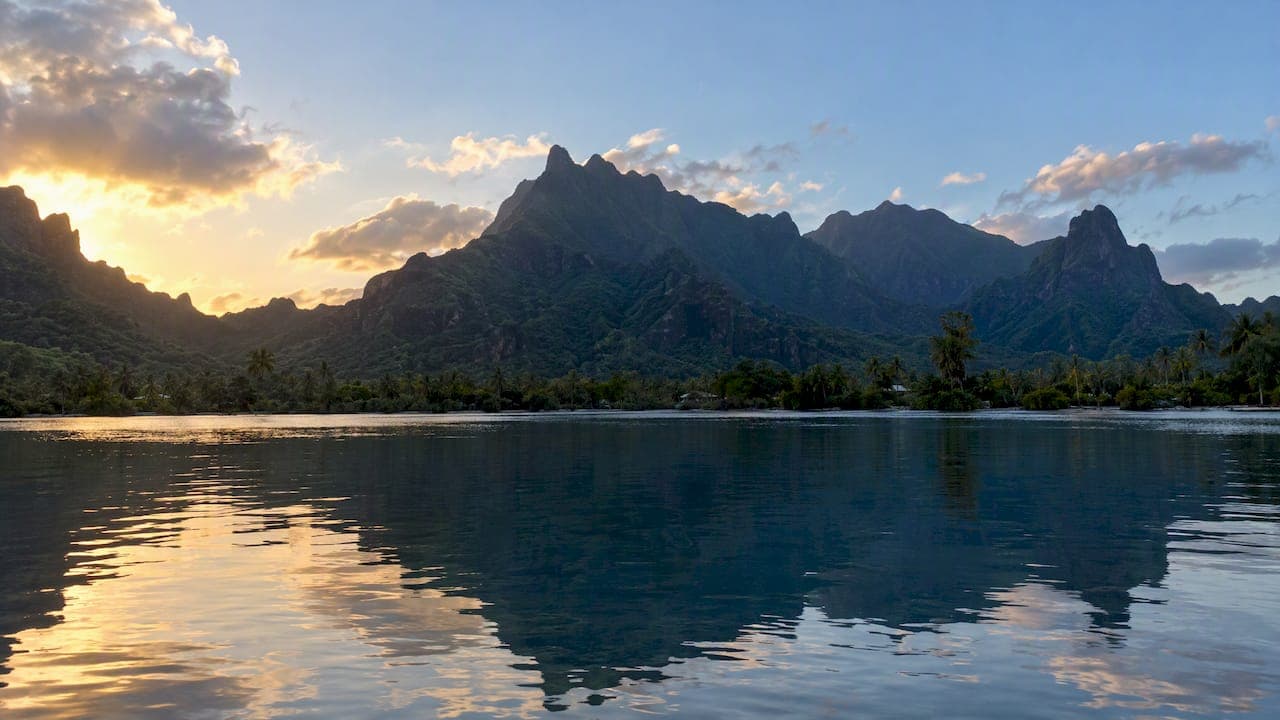
The surest way to bring home strong images is to plan around light and location. Pair sunrise viewpoints on Moorea, Bora Bora and Tahiti with midday lagoon sessions, carry a wide-angle, a standard zoom, a telephoto and an underwater housing, and book a licensed guide for whale encounters.
TL;DR:
- Stay several days at each base and add a buffer day between flights, since changing light, weather, and wildlife can make repeat visits worthwhile.
- Small interisland planes have tight baggage limits, so weigh bags before each hop and carry your camera body and two lenses in cabin luggage.
- Book a licensed whale guide early because operators receive seasonal approval; commercial or marketing use of whale images also requires a formal filming request.
- Check marine forecasts before boat trips, since sea conditions can change quickly; short tropical showers often clear, leaving strong evening light.
Table of Contents
- Where to shoot in French Polynesia and what to photograph on each island
- Camera gear and packing checklist for land and water
- The best time of day and season to photograph French Polynesia
- Underwater technique, ethics, and working with guides
- Practical logistics: transport, bases, and in-field workflow
- Respectful photography: people, sacred sites, and protected species
- About the author's experience
- Post-processing tips for lagoon color and high-contrast scenes
- Camera settings and composition for landscapes and seascapes
- Photographing local cultural events and people respectfully
- How to plan a multi-island photography itinerary
- Safety tips for outdoor and underwater photography in remote islands
- Our editorial take: plan the light, not the checklist
- Join us and put this guide into practice
- FAQ
- Sources
Where to shoot in French Polynesia and what to photograph on each island
Each island rewards a different kind of photographer, so choose by subject first and logistics second. Tahiti Tourisme names Bora Bora, Moorea, Tetiaroa, Rangiroa, Huahine and the Marquesas among the strongest photo destinations, each with its own lagoons, motu, viewpoints or passes. Here is how we would match shot types to places.
- Bora Bora: The classic lagoon image. Shoot the peak of Mount Otemanu from the water's edge with a small motu in the foreground, and place a person on the sand for scale. Many motu are reachable only by boat, so arrange a skipper the day before.
- Moorea: Our pick for mountains and reflections. The Belvedere viewpoint above the Opunohu valley gives you the layered ridgelines at first light, and the lagoon edges below hold glassy reflections when the wind drops. The Society Islands guide also singles out the Haapiti sandbank as photographer-friendly.
- Tahiti: The largest island offers waterfalls such as Faarumai, black sand beaches and the sweep of the Papeete waterfront at dusk. Use a telephoto to compress the volcanic ridgelines behind the coast into flat, graphic layers.
- Rangiroa: An atoll built for divers. Concentrate on the passes, where current and marine life gather, and on the pale, shifting colors of the lagoon from a low boat.
- Tetiaroa: Known for its bird and turtle habitats. Some bird islets may be off-limits for landing, so plan to shoot from the water with a long lens.
- Huahine: A quieter lagoon with archaeological sites. It suits slow, detail-oriented work: stone platforms, traditional fish traps and calm reflections.
- Marquesas: Rugged volcanic spires and dramatic cloud. Treat these as a separate trip, not a quick add-on, because the scale rewards patience and wide framing.
Composition ideas that work across the islands
Landscape shooting often needs separate timing for different elements. As one photography guide puts it, low sun reveals texture while high sun saturates lagoon color, and placing a person in frame gives the eye a sense of scale. In French Polynesia, that translates into a few reliable habits:
- Anchor the foreground with a motu, a driftwood branch or a palm trunk so the lagoon has depth.
- Shoot reflections from the lagoon edge with your lens close to the water.
- Use a longer focal length to stack ridgelines and flatten volcanic peaks into patterns.
- Keep one frame wide and one tight at every stop. The wide frame sets the scene, and the tight frame tells the story.
Those habits only pay off if your kit can handle salt, heat and humidity, which brings us to what to pack.
Camera gear and packing checklist for land and water
Island-hopping punishes heavy, fragile kits. Build one lean system that covers landscape, travel and underwater work, then protect it from salt and moisture. For a broader checklist, our photography workshop packing list covers spare batteries and permit reminders in detail.
Core kit and why
A mirrorless or DSLR body with strong weather sealing beats a heavier, more fragile option when you are changing lenses beside a lagoon. Three focal ranges cover almost everything:
- A wide-angle lens: Sweeping lagoons, motu and sunsets.
- A standard zoom: The everyday walkaround for villages, markets and portraits.
- A telephoto lens: Compressing volcanic peaks and picking out distant motu and wildlife.
Underwater essentials
A proper housing for your body, a dome port for wide scenes, strobes with sync cables, and a focus light for dim reef corners. Add a well-fitted mask and snorkel so you can hold your breath calmly and stay steady.
Your checklist, in packing order
- Camera body plus a spare or compact backup.
- Lenses covering wide, standard and telephoto views.
- Underwater housing, dome port, strobes and focus light.
- A compact travel tripod and a circular polarizer.
- Spare batteries, because heat drains them quickly.
- Multiple memory cards, kept in a small hard case.
- Sealed dry bags, silica packets and microfiber cloths.
- A rugged power bank for long days away from an outlet.
For that last item, outdoor-focused guidance on waterproof gear explains why a single waterproof case is rarely enough and how to think about portable power on multi-day trips.
Pro Tip: Carry your camera body and two lenses in your cabin bag on small inter-island planes, and pack the tripod and strobes in checked luggage wrapped in clothing.
Moving gear between islands
Small planes have strict baggage limits, so weigh your bag before every hop. A padded backpack is easier to squeeze under a seat than a hard case, but a hard case protects strobes and housings better in the hold. Change lenses indoors or in a shaded, dry spot, never over open water. At night, wipe everything with a microfiber cloth and let it air-dry before sealing it in a bag with silica.
The best time of day and season to photograph French Polynesia
Think of the day in three windows. Sunrise and golden hour suit mountains, silhouettes and layered ridgelines. Midday is when lagoon color is most saturated, so save your boat and reflection work for then. Blue hour after sunset gives still water a deep, even glow, ideal for reflections of lit-up bungalows and peaks.
For a deeper look at how light changes through the day, see our landscape photography lighting conditions guide.
Season and weather
French Polynesia has a tropical maritime climate with warm temperatures all year and significant humidity. Météo-France Polynésie française notes a cooler season with steadier trade winds, although sea conditions can change quickly, so check marine forecasts before heading out. Tropical showers tend to be short, which means a wet afternoon often clears into good evening light.
- Cooler, drier months: more stable skies and reliable wind, ideal for clean landscapes.
- Warmer, wetter months: dramatic cloud, rain squalls and rainbows, but more changeable conditions.
- Whale encounters: use regulated, licensed guides for water entries.
- Season of Abundance: Tahiti Tourisme describes this period, which begins around November 20 with the rising of the Pleiades, bringing lush vegetation, cultural celebrations and warm, intermittent showers.
Whale season rule: Tahiti Tourisme states that licensed operators are approved seasonally, so book a guide early rather than turning up and hoping for a spot.
Underwater technique, ethics, and working with guides
Underwater photography here is part craft and part restraint. The best images come from calm, patient behavior and an understanding of how the animals move.
Technique for clarity and color
- Get close, then closer. Water absorbs color and sharpness over distance, so fill the frame.
- Shoot upward at your subject when you can. Silhouettes against bright water give depth.
- Use natural light in shallow, sunlit water and add strobes to restore red and yellow at depth.
- Use a dome port for wide reef and whale scenes, and consider a color-correction filter for blue-heavy water.
- For moving subjects, choose a fast shutter speed and continuous autofocus so you can track without chasing.
Pro Tip: Set your strobes slightly wider than the lens angle and aim them away from the subject to reduce backscatter from particles in the water.
Working with licensed guides
Humpback whales are protected, and the rules exist to prevent disturbance. Expert guidance on photographing humpbacks emphasizes observing respectfully and using authorized guides for swimming-with-whale experiences. A good guide manages approach distance, limits observation time and tells you exactly when to enter the water. If you plan any professional commercial or marketing use of whale images, a formal filming request to the French Polynesia Department of the Environment is required, as Tahiti Tourisme explains.
- Never chase or surround an animal.
- Let the whale decide whether to approach.
- Keep movements slow and avoid sudden fin kicks.
- Follow your guide's signals without exception.
Practical logistics: transport, bases, and in-field workflow
Convert your plan into steps. Small planes serve most islands, and baggage allowances are tight, so check weight limits before you book. For remote atolls and motu, a skipper-led boat is often the only practical option. Hire a local skipper who knows the passes, tides and landing rules, and ask for a safety briefing before you leave the dock.
Where to base yourself
Choose your base by project. Bora Bora suits lagoons and over-water scenes. Moorea suits mountains and reflections, and it is a short ferry or flight from Tahiti. Rangiroa is the choice if diving is your priority. Extended time in one place pays off: DPReview's Tahiti guide notes that experienced travel photographers find multiple days on location yield better images because light, weather and wildlife encounters vary.

Day boats and overnight boats
A day boat is flexible and cheaper, but timing is rigid. An overnight boat gets you to sunrise locations without a pre-dawn transfer. Either way, ask your skipper which motu require permits or are closed to landing.
A nightly workflow
- Rotate batteries so you always start the day with full charge.
- Copy cards to two separate drives before formatting anything.
- Wipe and dry every lens and housing seal.
- Store gear in a dry bag with fresh silica.
- Check tomorrow's marine forecast and tide times.
Respectful photography: people, sacred sites, and protected species
A few simple habits protect you, local communities and wildlife.
- Ask permission before photographing people, dancers or village life. Accept a refusal with a smile, and offer a print or a thank-you when appropriate.
- Treat protected marine species as off-limits to disturbance, and use licensed operators for regulated encounters.
- Do not land on islets or enter sites where signs prohibit access, including protected bird islets and UNESCO-listed places.
- At cultural events and sacred sites, keep your distance, silence your shutter where possible and never use flash on performers.
- For any commercial use of whale images, submit a formal filming request to the Department of the Environment.
About the author's experience
Mark Gray is an internationally awarded landscape photographer whose limited edition prints are collected worldwide, and our workshops are led by acclaimed photographers in small groups. A guided workshop or one-day course gives you the opportunity to develop your photography skills. For more detail on kit and preparation, read our packing list and browse our workshop pages.
Post-processing tips for lagoon color and high-contrast scenes
Lagoon water can look unreal straight out of the camera, but it can also drift too blue or too green. Start with white balance. Set it for the sand or a neutral object, not the sky, so the turquoise stays honest. Then adjust the HSL controls, pulling back saturation in the blues slightly and lifting luminance in the aquas so the lagoon glows rather than burns.
High-contrast scenes are common here: bright sky, dark volcanic slopes and reflective water in one frame. Shoot in raw and expose for the highlights, then lift shadows in post. A graduated filter in your editing software can balance a bright sky against a dark foreground, and a subtle dehaze brings back clarity in humid air. Use a polarizer on the day, since it cuts glare on water and deepens the sky in ways no slider fully matches.
Keep skin tones and local textures natural. If you edit a portrait or cultural scene, resist heavy filters that change the color of clothing, flowers or skin. Aim for an image that feels like the place, not like a preset.
Camera settings and composition for landscapes and seascapes
Begin with a low ISO and a mid-range aperture, for sharp landscapes with depth. Use a tripod and a timer or remote release for long exposures at dawn and dusk. For moving water, try a slow shutter speed to smooth waves around a motu.
For seascapes, expose for the brightest part of the sky and check your histogram, because bright sand and water can fool the meter. Underwater, use a wider aperture and higher ISO as depth increases, and lean on strobes for color.
Composition does most of the work:
- Use leading lines such as jetties, reef edges and shorelines.
- Place the horizon on the upper or lower third, depending on whether sky or lagoon is stronger.
- Frame with palm fronds or rocks for foreground depth.
- Keep the peak of a mountain off-center for a more natural balance.
Review your images on location, and reshoot before the light changes.
Photographing local cultural events and people respectfully
Cultural events are some of the richest photographic moments in French Polynesia, and they deserve care. Arrive early, observe first and photograph second. Many events carry spiritual meaning, so read the room before raising a camera.
Ask permission with a smile and a few words, even a simple greeting in the local language. Let people see the image on your screen when they ask, and offer to send a copy by e-mail if you can. Never pay for or stage a pose in a way that turns a ceremony into a performance. During the Season of Abundance, celebrations may be held across the islands, so check local calendars and ask hosts about etiquette.
Use a longer lens to keep distance and avoid disturbing performers. Silence your shutter if you can, skip flash and never block a spectator's view. When in doubt, step back and ask a local host or guide.

How to plan a multi-island photography itinerary
Build your itinerary around light and logistics, not a checklist of islands. Choose a small number of bases and give yourself enough time at each to wait out weather and return to the best spots at the best hour. Start with the island that matches your priority subject, and keep the most weather-sensitive shoots, such as underwater work, for the middle of your stay.
A sample structure is Moorea for mountains and reflections, Bora Bora for lagoon scenes, and Rangiroa for diving. Add a buffer day between flights, because small planes and boats can be delayed by weather. Book guides and whale trips early, especially during whale season.
For more ideas on destinations and expedition planning, see our guide to top travel destinations for landscape photography fans. Finally, keep each day simple: one sunrise session, one midday lagoon session and one evening shoot, with rest in between.
Safety tips for outdoor and underwater photography in remote islands
Remote islands mean help can be far away, so prepare accordingly. Tell someone your plan before every boat trip and carry a charged phone in a waterproof case. Météo-France warns that sea conditions can change quickly, so check forecasts before going out.
On land, wear reef shoes on coral and rocky shorelines, use reef-safe sunscreen and carry plenty of water. Watch for slippery rocks near waterfalls and avoid standing close to wet cliff edges while composing. At sunrise and sunset, bring a headlamp for the walk back.
Underwater, never dive or snorkel alone, and stay within your skill level. Watch for current in passes, and keep your camera strap short so it does not snag on coral. Do not touch marine life, and keep a safe distance from large animals. A calm, unhurried approach is safer for you and better for your photos.
Our editorial take: plan the light, not the checklist
Most travel advice treats French Polynesia as a list of famous spots to tick off. We think that approach produces a lot of similar postcards. The islands reward patience far more than coverage. Stay longer in fewer places, return to the same viewpoint in different light, and let weather become part of the story.
The overrated habit is carrying every lens and filter you own. A simple kit you know well will beat a bag full of untested gear, especially on small planes and wet boat decks. What readers should do first is secure the hard-to-book items: a licensed guide for whale season, a skipper for remote motu, and a base on each island that matches your subject.
Then slow down. The best images tend to arrive after you have had time to learn where the sun rises and how the lagoon behaves.
— Mark
Join us and put this guide into practice
If you would rather have the logistics handled, our workshops turn this guide into a plan you can follow with an expert beside you. Our photography tours run in small groups with luxury arrangements, so you spend your time on light and composition instead of transfers and permits. If you want to sharpen your skills first, our photography courses offer an opportunity to develop your photography skills.

Your next steps:
- View current photography tours and check available dates.
- Book a photography course to build confidence before you travel.
- Give a gift certificate, available from 50 AUD, to a fellow photographer.
FAQ
What is the 20 60 20 rule in photography?
It is a simple guide to how a scene's light and exposure are distributed, often used to remind you to balance highlights, midtones and shadows. Treat it as a starting point, then check your histogram on location. It works well for high-contrast tropical scenes.
What should I be careful of in Tahiti?
Watch for fast-changing sea conditions, strong sun and slippery rocks near waterfalls. Météo-France advises checking marine forecasts before any boat outing. Protect your gear from salt and humidity, and follow guide instructions around wildlife.
What are the basic tips for taking good photographs in French Polynesia?
Plan around light, shoot early and late for mountains, and use midday for lagoon color. Add a foreground element for depth, use a polarizer on water, and keep your kit simple. Take your time, since patience produces better images than rushing between spots.
How do you say "hi" in Tahiti?
The common greeting is "ia ora na", which is a warm hello in Tahitian. Using it before asking to photograph someone shows respect and often leads to a friendlier response.
Do I need a permit to photograph whales?
Swimming with whales requires a licensed guide. Any professional commercial or marketing use of images of protected species needs a formal filming request to the Department of the Environment, as Tahiti Tourisme explains.