
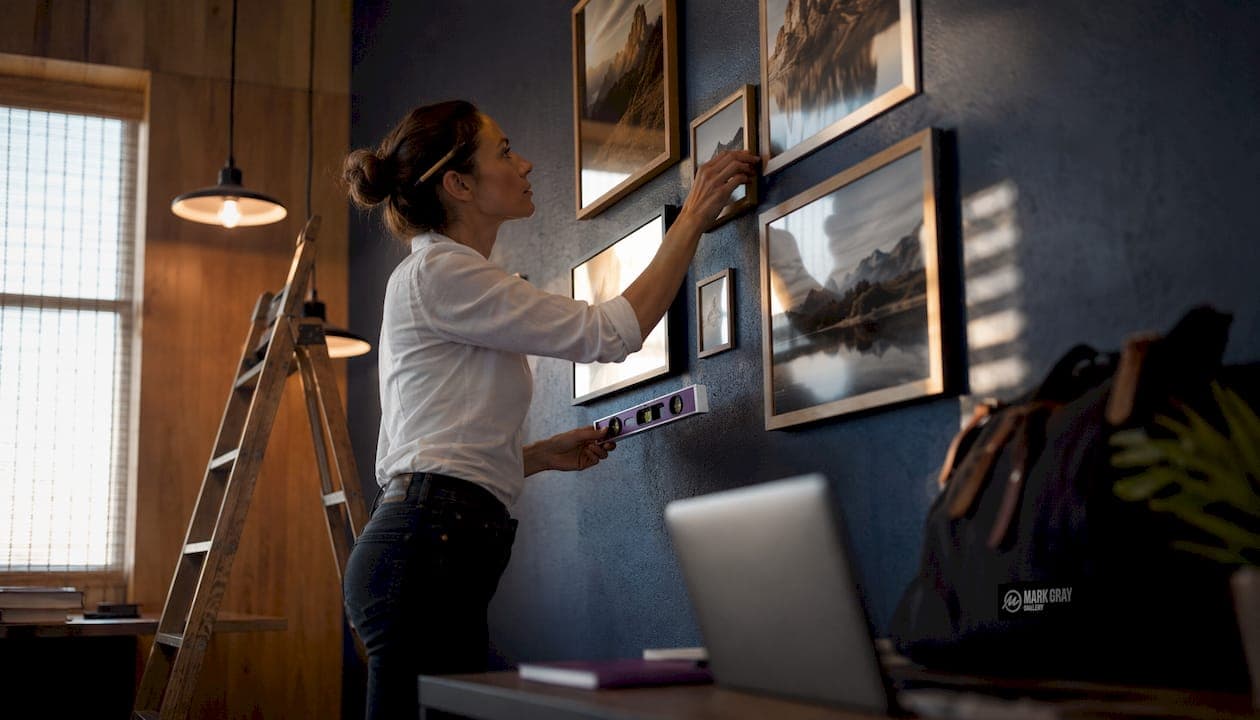
Curate a landscape photography wall gallery by choosing a single visual thread, sizing the entire group to roughly two-thirds to three-quarters of the furniture width beneath it, and selecting limited-edition giclée prints with a certificate of authenticity before you buy a single frame or drill a single hole. Center your arrangement at eye level, approximately 57 inches from the floor, to suit standing viewers, and a mockup-first workflow using full-scale paper templates prevents the costly mistakes that come from guessing. Mark Gray Gallery's limited-edition prints are built for exactly this kind of considered, permanent display.
TL;DR — Your first three actions:
- Measure and mock up: Map your wall and furniture, then tape kraft-paper templates at true scale before ordering anything.
- Pick your edition and verify the COA: Confirm edition number, certificate of authenticity, and artist signature before committing to a purchase.
- Choose framing and your hang plan: Select museum-grade glazing and archival mats, then finalize spacing and hardware for your wall type.
Table of Contents
- How do you choose the right gallery wall layout for landscape prints?
- How to select limited-edition prints that hold together as a collection
- What framing and glazing choices protect a limited-edition print?
- Where should you place and light a landscape photography gallery wall?
- How do you hang a gallery wall without costly mistakes?
- What should you confirm before buying a limited-edition landscape print?
- How do you care for limited-edition prints over time?
- Key Takeaways
- Why collectors get gallery walls wrong, and what actually matters
- Mark Gray Gallery: limited editions, framing, and full collector support
- Useful sources and further reading
How do you choose the right gallery wall layout for landscape prints?
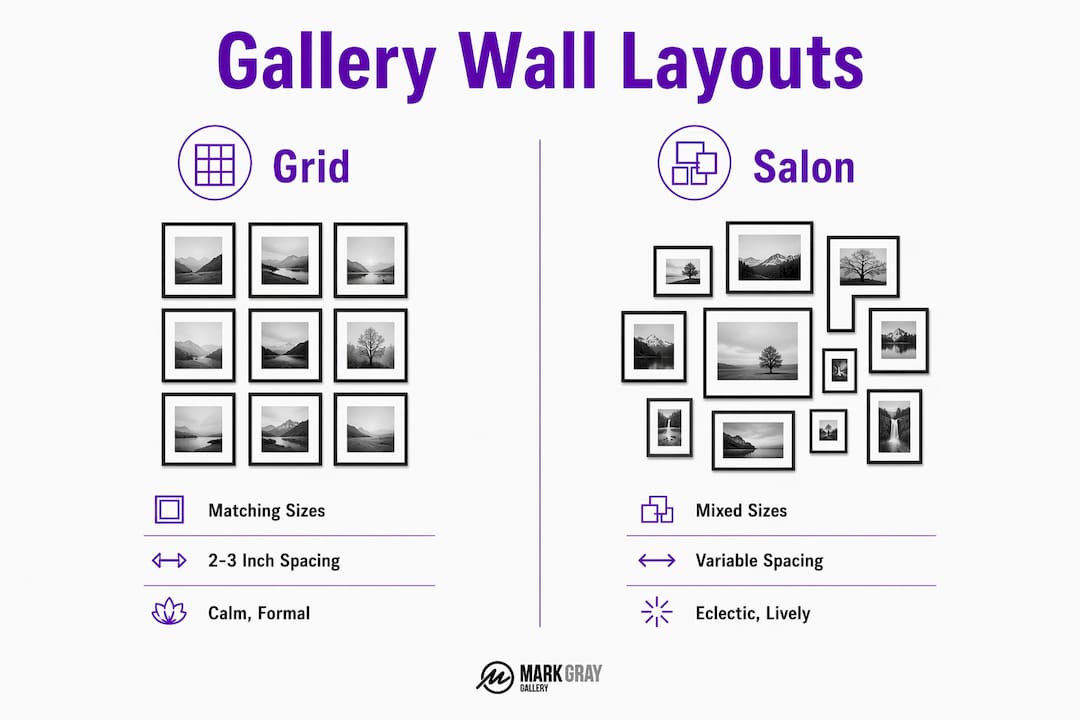
Gallery wall layouts fall into three core patterns, and picking one before you buy frames or touch a drill is the single most consequential planning decision you will make.
| Layout | Best for | Spacing | Notes |
|---|---|---|---|
| Grid | Same-size or serialized editions | 2–3 inches | Calm, intentional; math is simple |
| Salon | Mixed sizes, collected look | 2–3 inches | Needs one anchor piece + a repeated element |
| Linear/Horizontal | Panoramas, hallways, above furniture | 2–3 inches | Suits wide landscape crops perfectly |
Grid works beautifully for a serialized set of landscape prints, say, four matching coastal images from the same edition run. The equal sizing creates a calm, intentional feel. Salon suits collectors who have acquired pieces over time in different sizes; it carries high visual energy but requires one dominant anchor print and a repeated element, such as a consistent frame finish or mat color, to hold it together. Linear is the natural choice for wide panoramic landscapes hung above a sofa or along a hallway.
Sizing the whole arrangement matters as much as the pattern. Treat the group as a single artwork and target a span of 60%–75% of the furniture width below it. Center the group's visual midpoint at approximately 57 inches from the floor, or 6–10 inches above the furniture's top edge. A gap of 2–3 inches between frames keeps the group reading as one composition rather than a scatter of individual pieces.
Pro Tip: Before ordering a single frame, use a digital room mockup tool or the paper-template method to test your chosen layout at true scale. Tape kraft-paper cutouts to the wall and live with them for at least a day. What looks balanced on a sketch often reads too small or too low in the actual room.
How to select limited-edition prints that hold together as a collection
A gallery wall succeeds or fails on its visual thread. Designers describe a unifying element as what separates an intentional collection from a random accumulation. For landscape photography, that thread might be a shared atmospheric mood (golden-hour warmth across all pieces), a subject family (coastal, alpine, or desert), a consistent crop ratio, or a dominant palette that recurs across different locations.
Choosing pieces that share a dominant color or mood rather than identical subjects creates cohesion without repetition. A Mark Gray Gallery coastal print from New Zealand and an Icelandic lava-field image can sit side by side convincingly if both carry the same cool, luminous palette.
Limited-edition purchase checklist:
- Edition size and your print's number within it (e.g., 12/50)
- Certificate of authenticity with the artist's signature or embossed stamp
- Provenance documentation: purchase invoice, gallery receipt, and image licensing notes
- Material specification: giclée on archival, acid-free paper vs. open-edition stock
- Framing options and glazing available at point of purchase
Print quality separates collectible work from decorative reproduction. Limited-edition giclée prints use archival pigment inks on acid-free rag paper, delivering color fidelity and longevity that open-edition prints on standard stock cannot match. For landscape photography, where tonal gradations in sky and water are the whole story, that difference is visible at three feet.
Numbered buying steps before you commit:
- Request a photograph of the COA and confirm the edition number matches the print.
- Ask the gallery to confirm archival paper and pigment-ink specifications in writing.
- Verify framing options, glazing type, and whether the gallery offers professional mounting.
- Confirm the return policy, shipping insurance, and estimated transit timeline.
- Check whether the image carries any reproduction restrictions relevant to your intended display.
Scale affects perceived detail. A 24×36-inch landscape print rewards a viewer standing 6–8 feet away; a 12×18-inch print is best appreciated at 3–4 feet. Plan your wall's viewing distance before settling on print dimensions, and explore the landscape photography composition checklist to evaluate visual strength before buying.
What framing and glazing choices protect a limited-edition print?
Professional framing for collectible landscape photography means archival materials throughout: acid-free mat board, archival foamcore or ragboard backing, and UV-filtering glazing. The glazing choice is where most collectors face a genuine trade-off.
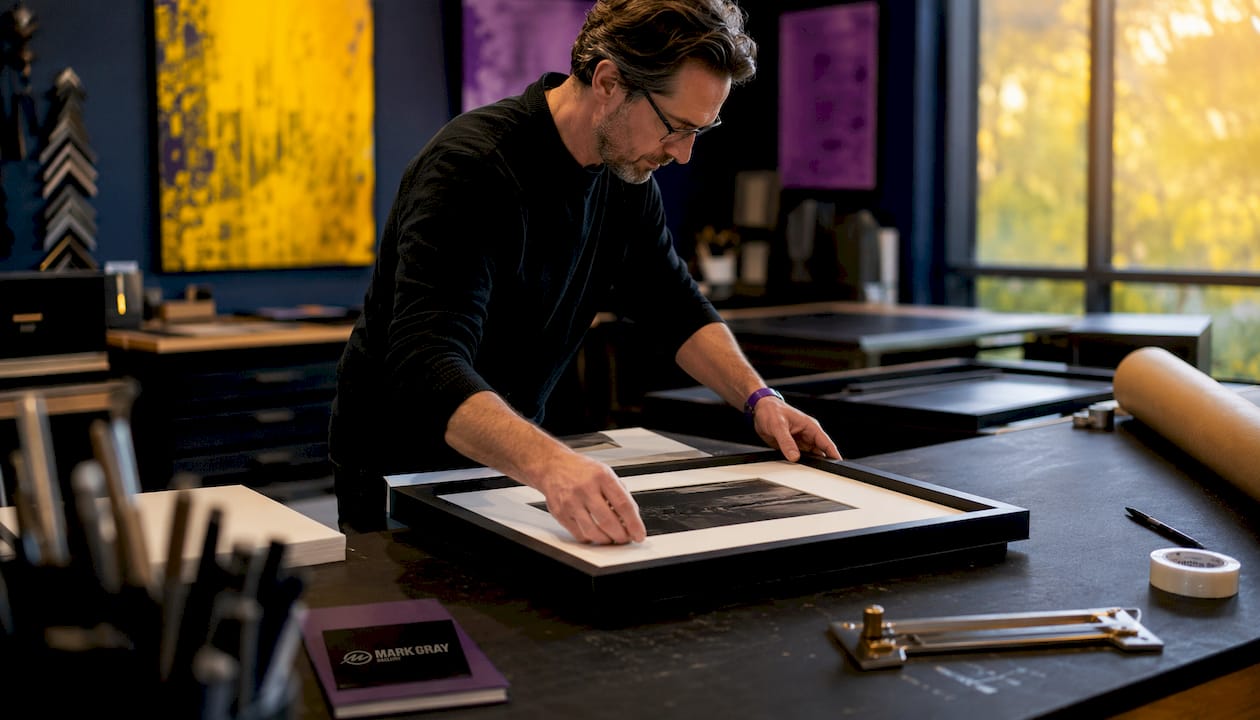
Museum acrylic (such as Tru Vue Optium) is lighter than glass, shatter-resistant, and blocks over 99% of UV radiation while offering anti-reflective clarity. It is the preferred choice for large-format prints and for walls where the frame may be bumped. Museum glass offers slightly superior optical clarity and is preferred by galleries for smaller, high-value works where weight is not a concern. Both are dramatically better than standard picture glass, which blocks almost no UV.
Key framing considerations for collectors:
- Use reversible dry mounting or conservation corners, never permanent adhesives, to preserve resale value.
- Match mat color to the print's dominant neutral tone; a warm white mat suits golden-hour landscapes, a cool white suits coastal or arctic work.
- Consistent mat width across a mixed-size group creates visual unity even when print dimensions vary.
- Float mounting on thick rag paper or canvas preserves the paper's texture and suits prints where the full image edge is part of the composition.
- Signs of professional framing: acid-free backing tape, dust cover on the reverse, and a framer's label with materials listed.
Pro Tip: Keep mat widths consistent across every piece in a salon or grid arrangement. Even when print sizes differ by several inches, uniform matting makes the group read as a curated set rather than a collection of mismatched acquisitions. A 3-inch mat on every piece is a simple rule that pays off visually.
For displaying large-format prints, professional framing is not optional. A large giclée on rag paper can weigh 15–25 pounds once framed; improper backing will bow the print within months.
Where should you place and light a landscape photography gallery wall?
Direct sunlight is the primary enemy of archival prints. Even with UV-filtering glazing, prolonged direct sun exposure accelerates fading in pigment inks. Place your gallery wall on a north-facing or interior wall where sunlight never falls directly on the glazing surface.
Museum-style lighting angles fixtures at approximately 30 degrees from vertical to reduce reflection and deliver even illumination across the print surface. LED fixtures are strongly preferred because they produce minimal UV and almost no heat, both of which degrade paper and inks over time. Aim for a warm-white LED (2700–3000K) for golden-hour and warm-toned landscapes, or a neutral white (3500–4000K) for cooler coastal and arctic images.
Placement rules by room context:
- Above a sofa: Center the group at eye level; keep the bottom frame a modest distance above the sofa back.
- Hallway: Hang at 57 inches center height; use a linear arrangement that follows the corridor's direction.
- Staircase: Step each piece to follow the stair pitch, maintaining consistent spacing between frames.
- Avoid: Walls adjacent to HVAC vents, fireplaces, or exterior walls with condensation risk.
The two-thirds to three-quarters furniture-span rule applies above sofas and sideboards alike. A gallery that spans substantially less than the furniture width looks isolated; one that spans significantly more can overwhelm the furniture below it.
How do you hang a gallery wall without costly mistakes?
The full-scale paper-template method is the gold standard for installation. Cut kraft paper to each frame's exact dimensions, label each piece, and tape them to the wall with painter's tape. Live with the arrangement for at least a day before drilling. What looks balanced on a floor layout frequently reveals sightline or scale problems once it is vertical and at eye level.
Nail-height math for wire-hung frames: Measure from the top of the frame to the wire at full tension, then subtract that distance from the frame's center height (57 inches). That gives you the nail position. For a frame whose wire sits 3 inches below the top edge, the nail goes at 54 inches.
| Situation | Hardware | Notes |
|---|---|---|
| Drywall, lightweight | Standard picture hook | Single nail, angled 45° |
| Drywall, medium weight | Drywall anchor or molly bolt | Pre-drill required |
| Masonry/brick | Masonry anchor + screw | Hammer drill needed |
| Over 50 lbs | Professional installer | Wall stud or structural anchor |
| Spacing between frames | a narrow, consistent gap | Consistent gap throughout |
| Bottom frame above furniture | 6–10 inches | Measured from furniture top |
For detailed hardware guidance and step-by-step installation, the hanging landscape prints guide covers every wall type and frame weight scenario.
What should you confirm before buying a limited-edition landscape print?
Authenticity verification is non-negotiable for any limited-edition purchase. A print without a COA and a matching edition number is not a limited edition by any standard definition, regardless of what the listing claims.
Numbered pre-purchase steps:
- Request a clear photograph of the COA showing the edition number, artist signature, and print title.
- Confirm the number on the COA matches the number hand-written or embossed on the print itself.
- Ask for material specifications in writing: paper type, ink type, and print dimensions.
- Verify framing options, glazing specifications, and whether professional mounting is available.
- Confirm shipping costs, packing standards (double-boxing, corner protection), and transit insurance coverage.
- Read the return policy in full, including the timeline and condition requirements for returns.
- Ask about customs and import considerations if purchasing from an international gallery.
Red flags to watch for:
- No COA offered, or a COA with no edition number
- "Open edition" prints marketed as "limited" without a defined print run
- No archival material specifications provided on request
- Shipping quoted without insurance or with no damage-claim process stated
- No clear return window or a "all sales final" policy with no exceptions
Pricing for limited editions reflects edition size and artist reputation. Smaller editions (under 25 prints) from an established gallery typically command a premium over larger runs, and that premium tends to hold on the secondary market when provenance documentation is complete. For gift purchases, the landscape print gift guide covers selection and presentation considerations.
How do you care for limited-edition prints over time?
Environmental stability is the foundation of print preservation. Target a relative humidity of 45%–55% and a temperature of 65°–70°F for paper-based art. Rapid fluctuations, not just extremes, accelerate deterioration by causing paper fibers to expand and contract repeatedly.
Care and handling best practices:
- Always handle framed prints with clean nitrile gloves; skin oils transfer to glazing and mat surfaces.
- Dust glazing with a soft, dry microfiber cloth; never spray any cleaner directly onto the glazing surface.
- Inspect hanging hardware annually; wire and D-rings fatigue over time, especially on heavier frames.
- Keep prints away from exterior walls in cold climates where condensation can form behind frames.
- Store unframed prints flat in acid-free sleeves inside a rigid archival box, never rolled.
Record-keeping for collectors:
Maintain a simple inventory spreadsheet with each print's title, edition number, COA reference, purchase date, purchase price, frame and glazing specifications, and a high-resolution photograph of the COA. Store physical COAs and purchase invoices in an archival sleeve separate from the print itself.
Pro Tip: Before insuring your collection, photograph each print and its COA together in a single image, then store those files in cloud backup. Most homeowners' policies offer a fine-art rider that covers declared value; your insurer will ask for exactly this documentation when you add a rider or file a claim. Simmons Interior Supply's gallery framing resources include guidance on professional condition reporting that insurers accept.
Key Takeaways
A well-curated landscape photography gallery wall starts with a verified limited-edition giclée print, a mockup-first layout plan, and archival framing with UV-protective glazing throughout.
| Point | Details |
|---|---|
| Mock up before drilling | Tape full-scale kraft-paper templates and live with them for at least a day before committing to holes. |
| Size to furniture | The group should span roughly two-thirds to three-quarters of the furniture width below it, centered at eye level. |
| Verify COA and edition | Confirm the edition number, artist signature, and certificate of authenticity before any purchase. |
| Choose archival giclée prints | Limited-edition giclée on acid-free rag paper preserves color fidelity and collector value over time. |
| Mark Gray Gallery | Offers limited-edition giclée prints with full provenance documentation, professional framing options, and insured shipping. |
Why collectors get gallery walls wrong, and what actually matters
Most collectors focus on the individual print and treat the wall as an afterthought. The arrangement is the work. A single extraordinary print hung incorrectly, at the wrong height, under the wrong light, in a frame that fights the image, loses half its power. The visual thread is not a design nicety; it is what makes a group of prints feel like a collection rather than a storage decision.
The COA question is where I see the most avoidable mistakes. Collectors sometimes accept a verbal assurance of authenticity or a printed sheet with no edition number. That document has no value on the secondary market. The COA must carry the edition number, the artist's signature, and the print title, and it must match the number on the print itself. Anything less is decorative paperwork.
The mockup-first workflow is the single habit that separates collectors who are happy with their walls from those who are not. Spending an afternoon with kraft-paper templates costs nothing and prevents the kind of regret that comes from drilling 14 holes in the wrong positions. The paper does not lie about scale the way a floor layout does.
Mark Gray Gallery: limited editions, framing, and full collector support
Mark Gray Gallery offers one of the most considered collections of limited-edition landscape photography prints available to collectors in the United States, with images spanning Australia, New Zealand, Norway, Iceland, French Polynesia, Spain, and the United Kingdom. Every print ships with full provenance documentation, and the gallery's edition sizes are strictly controlled so your COA carries genuine secondary-market weight.

For collectors building a gallery wall, the gallery provides professional framing options with museum-grade glazing, insured shipping with full transit coverage, and direct access to Mark for framing and display advice. The buying process is straightforward: you select your print, confirm your edition number and COA, choose your framing finish, and the gallery handles the rest.
Services available to collectors:
- Limited-edition giclée prints with certificate of authenticity and artist signature
- Professional framing with UV-filtering museum acrylic or glass
- Insured international shipping with damage-claim support
- Framing and display consultation for gallery wall planning
Browse the limited-edition collection and request your COA documentation today.
Useful sources and further reading
The resources below are the most useful references for collectors planning a landscape photography gallery wall, from layout planning through to long-term care.
External references:
- How to Plan a Gallery Wall Layout (With Mockups) — the most thorough publicly available guide to layout patterns, sizing rules, and the paper-template method.
- Gallery Wall Art: How to Hang It Right — The New York Times design perspective on visual threads and the salon approach.
- Gallery Wall Layout Ideas — practical breakdown of grid vs. salon approaches with anchor-piece guidance.
Mark Gray Gallery resources:
- Landscape photography display options — gallery-specific display arrangements for landscape prints.
- Photography portfolio curation guide — selection frameworks and visual-thread principles used by the gallery.
- Post-processing and color fidelity — how printing choices interact with color grading decisions.
On room mockup tools: Free browser-based tools such as Canva's room mockup feature and dedicated gallery-wall planners let you upload your wall photo and test frame arrangements at approximate scale. They are most useful for testing frame finish and mat color; for true scale and spacing verification, the paper-template method remains the more reliable standard.