
Short answer: if you're buying your first camera brand new in 2026, mirrorless is the smarter purchase because that's where lens development and long-term support are headed. If you're on a tight budget and mostly shooting stills, a used DSLR remains one of the best-value ways to learn photography, and everything you learn transfers directly to a mirrorless body later.
Two solid starting points if you want a quick answer right now:
- Nikon D3500 — a 24.2-megapixel body with exceptional battery life and a genuinely simple control layout, which is why it still shows up on so many beginner recommendations.
- Canon EOS 250D / Rebel SL3 — lighter than most DSLRs in its class, with 4K video and an approachable menu system for anyone stepping up from a phone.
Pro Tip: Don't stress over "wasting time" on a DSLR before switching to mirrorless. The exposure triangle, focus habits, and composition skills you build now work identically on any camera you pick up next.
Key Takeaways
A beginner's fastest path to real skill in 2026 combines a budget-friendly used DSLR, disciplined practice in Aperture Priority, and structured feedback from an in-person course.
| Point | Details |
|---|---|
| New buyers should lean mirrorless | Manufacturers now concentrate lens and firmware development on mirrorless systems, not new DSLR bodies. |
| Used DSLRs remain excellent value | A secondhand Nikon D3500 or Canon EOS 250D teaches the same fundamentals for a fraction of a new camera's cost. |
| Start in Aperture Priority | This mode teaches depth of field control without overwhelming a beginner with every setting at once. |
| Inspect before buying used | Check shutter count, sensor spots, and lens mount wear, and confirm any return policy before paying. |
| Structured feedback accelerates progress | Mark Gray's one-day courses and multi-day workshops give hands-on correction that self-study alone can't replicate. |
Table of Contents
- DSLR vs Mirrorless for Beginners: How to Choose in 2026
- Which Beginner DSLR Models Are Worth Buying in 2026?
- How Do You Actually Use a DSLR? Exposure Basics Explained
- Where Should You Buy a DSLR and What Should You Expect to Pay?
- What Should Be in Your First DSLR Starter Kit?
- What's a Realistic Practice Plan for Your First Month?
- How Can Mark Gray Help You Learn Faster?
- How Do You Keep a DSLR Running for Years?
- What Mistakes Do Most Beginners Make With a DSLR?
- How Do You Compose a Strong Photo With a DSLR?
- What Beginners Get Wrong About Learning Photography
- Ready to Turn Practice Into Real Skill?
- Sources
DSLR vs Mirrorless for Beginners: How to Choose in 2026
The camera industry has made its bet, and it's not on DSLRs. Canon, Nikon, and Sony are pouring their engineering budgets into mirrorless mounts. That doesn't make existing DSLRs useless. It does mean you should understand what you're trading off before you spend a dollar.
Where the manufacturers are headed. New DSLR bodies have mostly stopped appearing. Lens development, firmware updates, and accessory support are concentrated on mirrorless systems like Canon's RF mount and Nikon's Z mount. If you buy a new DSLR today, you're buying into a mature but shrinking ecosystem. That's fine for learning. It's a real consideration if you plan to build a serious kit over the next decade.
When a new DSLR still makes sense. Some photographers genuinely prefer an optical viewfinder, which shows you a real-time optical image rather than a digital feed. If you already own EF or F-mount lenses from an older camera, a new DSLR body lets you keep using them without buying an adapter or new glass. A new purchase also comes with a full manufacturer warranty, which matters if you're not confident inspecting used gear yourself.
When a used DSLR is the smart move. If your goal is to learn photography without overspending, a secondhand DSLR is hard to beat. Reviewers who track this market consistently point out that a used Canon Rebel SL3 or Nikon D3500 delivers image quality and control layouts nearly identical to a new mirrorless entry-level body, often for a third of the price. If you're shooting stills only and don't need 4K video or blazing autofocus for sports, the savings are hard to justify skipping.
Run through this checklist before you decide:
- Do you need video capability beyond casual clips, or are you shooting stills 90% of the time?
- Is portability a priority, or are you comfortable with a slightly heavier body?
- Do you already own compatible lenses from a previous camera?
- Is your budget under $500, or are you prepared to spend $800 or more on a new body?
- Do you want the reassurance of a full manufacturer warranty, or are you comfortable buying used?
If you answered "stills only" and "budget under $500," a used DSLR is your answer. If you answered "video matters" or "I want the newest tech," start looking at entry-level mirrorless instead.
Which Beginner DSLR Models Are Worth Buying in 2026?
You don't need dozens of options. Three models consistently show up as the sensible beginner choices, whether you're buying new or hunting the secondhand market.
Nikon D3500 — best for battery life and simplicity. This 24.2-megapixel body shoots 1080p video at 60fps and is built around one of the simplest control layouts Nikon has ever put on a DSLR. Its battery routinely lasts well over a thousand shots per charge, which matters when you're out shooting all day and don't want to carry three spares. It's frequently cited as one of the best entry points for someone who has never held an interchangeable-lens camera before.
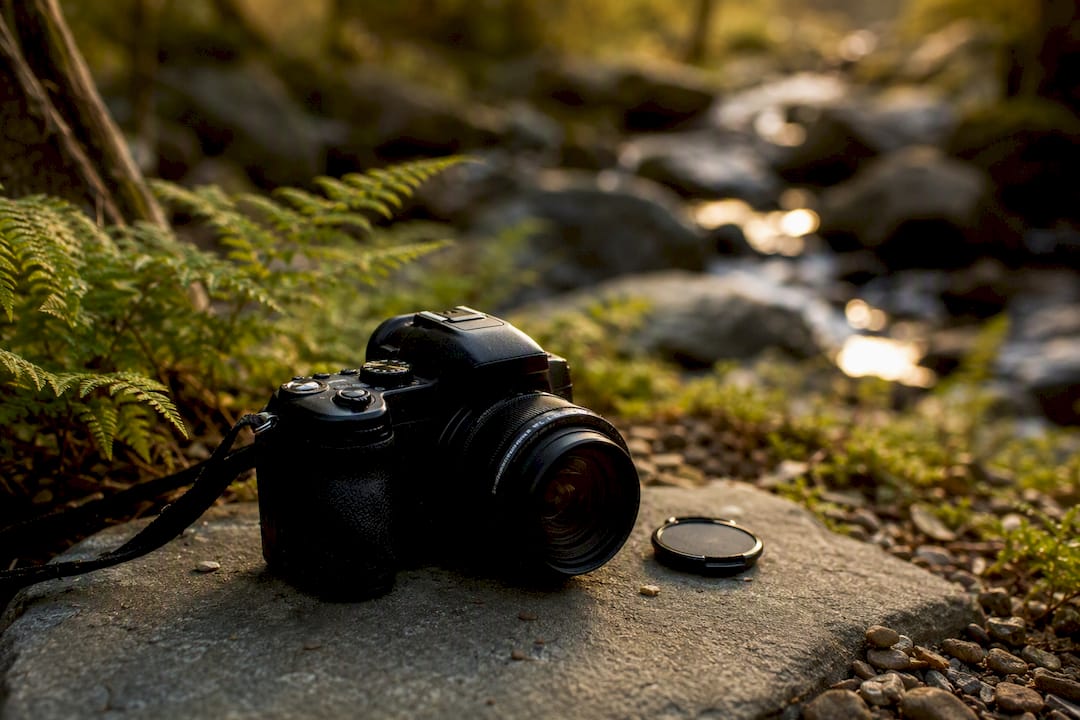
Canon EOS 250D / Rebel SL3 — best for portability and approachability. At under 450 grams body-only, this is one of the lightest DSLRs Canon has made. It packs a 24-megapixel sensor, 4K video, and a fully articulating touchscreen, which makes menu navigation far less intimidating than older DSLR interfaces. If you're upgrading from a smartphone and want something that doesn't feel like a brick around your neck, this is the one to try first.
Canon EOS Rebel T7 / EOS 2000D — best budget entry point where new stock is still available. This is Canon's most affordable DSLR line, and while it lacks some of the refinements of the 250D, like a fully articulating screen, it still delivers a genuine DSLR shooting experience for less money. In Australia, new stock has become patchier as retailers shift shelf space toward mirrorless, so check with camera retailers directly before assuming availability.
All three models turn up regularly on the Australian secondhand market through camera shops, trade-in programs, and specialist resellers. If you're buying used, run through this inspection checklist before handing over any money:
- Check the shutter count using free software or by asking the seller, since DSLR shutters have a rated lifespan and a body with 80,000+ actuations is nearing the end of its practical life.
- Inspect the sensor for dust or spots by taking a test shot of a plain white wall at a small aperture like f/16.
- Check the lens mount for scratches, looseness, or signs it's been dropped.
- Confirm what's included, such as the original battery, charger, and any lens caps, since missing accessories add unexpected cost.
- Ask about the return policy, because a private seller offers none, while a specialist used retailer typically gives you a short inspection window.
Buying from a reputable source over a random online listing costs a little more upfront and saves you from inheriting someone else's problem camera.
How Do You Actually Use a DSLR? Exposure Basics Explained
Every DSLR control eventually comes down to three settings working together, and once you understand how they interact, the rest of the camera stops feeling mysterious.
Start in Aperture Priority, not Auto
Auto mode makes every decision for you, which is convenient but teaches you nothing. The better first step is Aperture Priority, labeled A on Nikon and most brands or Av on Canon. In this mode, you choose the aperture and the camera automatically sets the shutter speed to match. It's widely considered the most effective bridge between full auto and full manual, because it hands you creative control over depth of field without forcing you to juggle every setting at once.
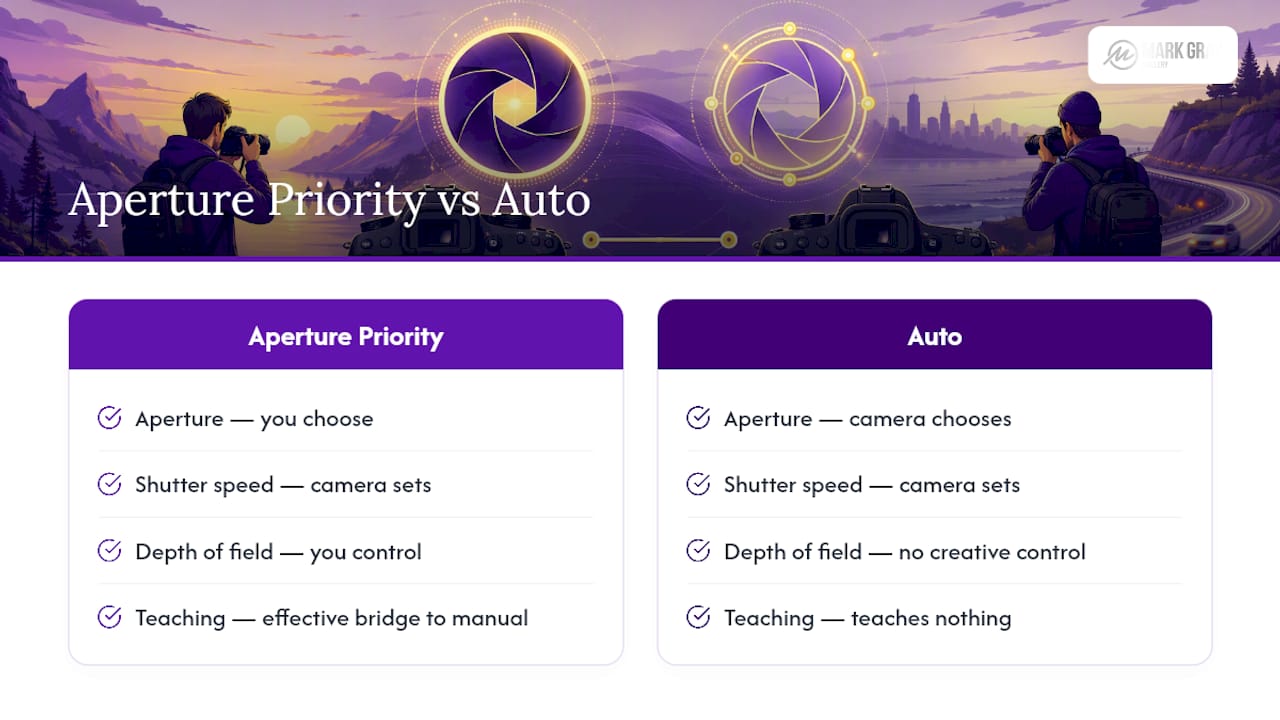
To use it: turn your mode dial to A or Av, pick a subject, and rotate the control wheel to change your aperture. Watch how the background blurs or sharpens as you adjust it. That's the whole lesson in under two minutes.
The exposure triangle in plain numbers
Three settings control how bright and how sharp your photo turns out.
- Aperture (measured in f-stops) controls how much light enters and how much of the scene stays in focus. At f/2.8, your background melts into soft blur, ideal for portraits. At f/8, both your subject and background stay sharp, better for landscapes.
- Shutter speed controls how motion is captured. At 1/1000s, a running dog freezes mid-stride. At 1/30s, that same dog turns into a motion blur, which can look artistic or just look like a mistake depending on your intent.
- ISO controls the sensor's sensitivity to light. ISO 100 gives you clean, noise-free images in bright daylight. ISO 1600 lets you shoot indoors or at dusk, but introduces visible grain, or noise, into the image.
Know your mode dial
- Auto: the camera picks everything. Useful for grabbing a quick shot, not for learning.
- P (Program): similar to Auto but lets you nudge ISO and flash settings.
- A / Av (Aperture Priority): you set aperture, the camera sets shutter speed. Your default learning mode.
- S / Tv (Shutter Priority): you set shutter speed, the camera sets aperture. Useful for sports or moving water.
- M (Manual): you control everything. Save this until Aperture Priority feels automatic.
Exposure compensation, autofocus, and metering
Exposure compensation, the +/- button, lets you brighten or darken a shot the camera has metered incorrectly. It's especially useful when photographing something very bright, like snow, or very dark, which often fools the camera's meter into misjudging exposure.
For autofocus, start with single-point AF rather than the wide-area or automatic tracking modes. Placing one focus point directly on your subject's eyes or the sharpest edge of your subject gives you far more predictable results than letting the camera guess which of a dozen points matters most.
For metering, leave your camera on its default evaluative or matrix metering mode. It reads light across the whole frame and works well for most everyday scenes. Switch to spot metering only once you understand why a scene is fooling the default mode.
Four drills to build muscle knowledge
- Set your camera to Aperture Priority and shoot the same subject at f/2.8, f/5.6, and f/11. Compare how much background blur changes.
- Switch to Shutter Priority and photograph a moving car or a running pet at 1/1000s, then again at 1/60s.
- Raise your ISO from 100 to 1600 in a dim room and study where noise becomes visible.
- Use exposure compensation to correct a backlit portrait where your subject's face looks too dark.
Pro Tip: Read your specific camera's manual before you touch anything else. Generic YouTube tutorials often skip the exact button layout and menu paths unique to your model, and five minutes with the manual saves an hour of guessing.
Where Should You Buy a DSLR and What Should You Expect to Pay?
Buying new is straightforward: go through an authorized retailer, get a full warranty, and pay the sticker price. Buying used takes more care, but it's where most beginners get the best value.
Trusted sources for used gear. Specialist used-camera retailers and established local camera shops typically inspect and grade equipment before resale, and many offer a short warranty window on used stock. Generic marketplace listings can still turn up great deals, but you're accepting more risk with no recourse if something's wrong.
Before buying anything secondhand, run this checklist:
- Ask for the shutter count or check it yourself with free diagnostic software.
- Take a test shot at f/16 against a white wall to spot sensor dust or damage.
- Check the lens mount for looseness or wear that suggests a drop.
- Confirm included accessories: battery, charger, cables, original box.
- Ask directly about the return or warranty policy before paying.
Warranty differences matter. A certified used retailer in Australia often provides a 3 to 12 month warranty on secondhand bodies. Private marketplace sales come with none. If something fails a week after purchase, that difference decides whether you're covered or out of pocket.
What to expect on price. Entry-level DSLRs, when bought new, typically sit in the low-to-mid hundreds for bodies like the Rebel T7. Used bodies like the D3500 or 250D often sell for roughly half that, depending on condition and shutter count. If you're shopping secondhand, it pays to research typical resale values before you negotiate, so you know whether a listed price is fair or inflated.
What Should Be in Your First DSLR Starter Kit?
Resist the urge to buy every accessory you see recommended online. A small, well-chosen kit will teach you more than a bag full of gear you don't understand yet.
Buy these right away:
- Camera body with kit lens, or consider swapping the kit lens for a 50mm f/1.8 prime, which is one of the best-value lenses in photography.
- A spare battery, since running out mid-shoot is the single most common beginner frustration.
- A Class 10 UHS-I (or UHS-II) memory card, fast enough to keep up with continuous shooting and video.
- A basic tripod, essential for landscapes, low-light shots, and any self-portrait work.
- A protective UV or clear filter, cheap insurance against scratches and dust on your lens's front element.
The 50mm f/1.8 deserves special mention. It's consistently rated by beginner gear guides as the highest-value lens a new photographer can own, because its wide aperture produces the soft, blurred backgrounds beginners associate with professional portraits, and its fixed focal length forces you to move your feet and think about framing rather than relying on a zoom ring.
Delay these until you actually need them: external flashes, neutral density filters, a second lens beyond your prime or kit lens, and a camera bag beyond something basic. Buy based on a limitation you've actually hit, not one you're anticipating.
What's a Realistic Practice Plan for Your First Month?
Skills stick when you practice with intention rather than shooting randomly and hoping something improves. A focused four-week plan gets you from Auto-only to confident manual control faster than casual shooting ever will.
- Week one: master holding the camera steady. Practice your grip and stance, then shoot 20 photos of a stationary object using only Aperture Priority. Review them for sharpness before moving on.
- Week two: aperture and portraits. Photograph a friend, pet, or even a plant at f/2.8, f/5.6, and f/11. Study how background blur changes at each setting and pick your favorite look.
- Week three: shutter speed and motion. Shoot moving subjects, cars, cyclists, running water, at both fast (1/1000s) and slow (1/30s) shutter speeds. Notice which choice tells the story better.
- Week four: ISO and low light. Shoot indoors or at dusk, raising ISO from 100 to 1600, and learn where noise becomes a problem for your particular camera.
When reviewing your results, zoom in on the eyes or the sharpest intended point of focus first. Blurriness there means a focusing mistake, not a settings problem. Set yourself two short-term goals: curate your best 100 shots from the month, and complete one themed mini-project, maybe blue hour photography or a single subject shot ten different ways.
How Can Mark Gray Help You Learn Faster?
Books and forums teach you concepts. Real-time feedback on your own shots teaches you faster. That's the gap between self-study and structured learning, and it's the gap Mark Gray's courses are built to close.
Mark's background includes years of published landscape work and international recognition as a photographer, and that experience shapes both the one-day courses and the multi-day workshop tours run across Australia and internationally. A day course gives you hands-on correction, someone watching your grip, your framing, your exposure choices in real time, which is nearly impossible to get from a video.
If you want to prepare before booking, these resources are worth reading first:
- A checklist for getting the most out of a beginner photography course
- How structured courses accelerate skill-building
- What skills you can expect to walk away with
How Do You Keep a DSLR Running for Years?
A DSLR with basic care will easily outlast several years of regular use, but neglect shortens that lifespan fast.
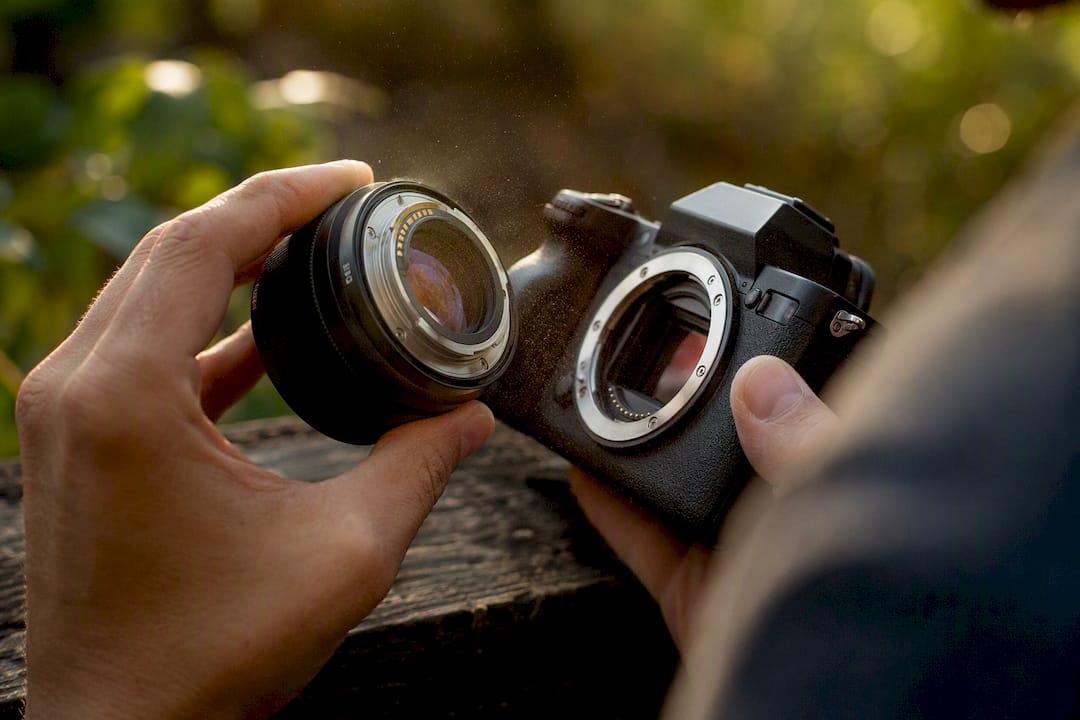
Sensor and body care. Change lenses in a clean, low-wind environment whenever possible, and always point the camera downward while the mount is exposed, since dust falls into an open sensor far more easily than most beginners expect. Use a soft blower rather than compressed air or your breath, which introduces moisture. If spots persist in your photos despite blowing the sensor, a professional sensor clean once every year or two is worth the cost.
Storage habits. Store your camera in a dry environment with silica gel packets if you live somewhere humid, since fungus growth inside a lens is a real risk in tropical climates and can permanently damage the glass. Never leave a camera in a hot car, where interior temperatures can spike well beyond what the internal electronics and battery are rated for.
Battery and mechanical care. Remove the battery if you're storing the camera for more than a few weeks, and avoid letting it sit at a full or completely empty charge for extended periods, both of which degrade lithium-ion cells faster. Keep the shutter count in mind for older or heavily used bodies. It's a mechanical part with a finite lifespan, and knowing roughly how many actuations you're at helps you plan a replacement before it fails mid-shoot.
Handling basics. Use a neck or wrist strap every time you shoot outdoors, and store the camera in a padded bag rather than tossing it loose into a backpack.
What Mistakes Do Most Beginners Make With a DSLR?
Almost every beginner makes the same handful of mistakes, and recognizing them early saves months of frustration.
Leaving the camera in Auto forever. It's comfortable, but it also means the camera is making every creative decision for you. You'll plateau fast if you never move to Aperture Priority.
Ignoring the histogram and chimping the tiny screen. A photo can look correctly exposed on a small, bright LCD outdoors and actually be badly overexposed. Learn to read the histogram, the graph showing your image's brightness distribution, instead of trusting your eyes alone.
Using the center focus point and cropping later. Composing everything dead center, then cropping in editing, throws away resolution and often produces awkward framing. Move your single AF point to where your subject actually needs sharp focus.
Shooting only in JPEG. JPEG files are convenient but discard image data permanently. Shooting in RAW format gives you far more flexibility to correct exposure and color mistakes after the fact.
Skipping the manual entirely. Every DSLR has quirks specific to that model, custom button functions, menu shortcuts, autofocus quirks, that generic online tutorials simply can't cover.
Overbuying gear before mastering the basics. A second lens, an external flash, and a dozen filters won't fix a weak understanding of exposure. Master what you already own first.
How Do You Compose a Strong Photo With a DSLR?
Technical settings get a photo exposed correctly. Composition is what makes it interesting.
The rule of thirds. Most DSLRs let you overlay a grid on the LCD screen or viewfinder, dividing the frame into thirds both horizontally and vertically. Placing your subject along one of those lines, rather than dead center, usually produces a more dynamic result.
Leading lines. Roads, fences, rivers, and shorelines naturally pull a viewer's eye through a photo. Position yourself so one of these lines enters from a corner and travels toward your main subject.
Framing. Use a natural element, a doorway, overhanging branches, a window, to create a frame within your frame. It adds depth and directs attention exactly where you want it.
Foreground interest. In landscape shots especially, an empty foreground makes an image feel flat. Include a rock, a flower, or a texture in the front third of your frame to give the photo a sense of scale and depth.
Negative space. Don't fill every inch of the frame. Leaving open space around a subject, especially in the direction it's facing or moving, gives a photo room to breathe and often communicates more than a tightly cropped shot.
Practice these four ideas one at a time rather than trying to apply all of them in a single shoot. Composition becomes instinctive faster when you isolate one skill and repeat it deliberately.
What Beginners Get Wrong About Learning Photography
Most advice about buying your first camera focuses obsessively on specifications, megapixels, autofocus points, buffer depth, when almost none of that determines whether your photos actually improve. What determines improvement is how deliberately you practice, and that's the part conventional buying guides skip entirely.
The conventional wisdom says buy the newest camera you can afford. I'd argue the opposite, at least for a first camera. A used DSLR that costs a third of a new mirrorless body frees up your budget for the one lens that actually teaches composition, a 50mm f/1.8, and removes the temptation to blame your gear when a photo doesn't work. Cheap, capable gear paired with deliberate practice beats expensive gear used in Auto mode every time.
Where I think most beginners waste effort is chasing settings knowledge before they've built visual instinct. You can memorize the exposure triangle in an afternoon. Learning to see a strong composition before you raise the camera to your eye takes months of repetition, and no amount of reading substitutes for shooting, reviewing, and shooting again.
Prioritize practice over gear, and get feedback on your actual photos early. That's the difference between someone who's owned a DSLR for a year and someone who's actually learned photography for a year.
Ready to Turn Practice Into Real Skill?
Reading about the exposure triangle gets you started. Standing next to someone who can look at your shot and tell you exactly why the focus missed, or why the light on a ridge line works better twenty minutes later, gets you there faster. That's the gap a structured course closes that no article, including this one, can.

Mark Gray runs both formats to match where you are. A one-day course suits someone who owns a DSLR, understands the basics from a guide like this one, and wants a focused day of hands-on correction and location shooting. A multi-day workshop tour suits someone ready to go deeper, into landscape-specific technique, post-processing, and shooting across genuinely striking locations across Australia and internationally, with sustained feedback across several days rather than one. If you're still deciding, read what a masterclass actually teaches compared to self-study alone. When you're ready to lock in a date, check current course availability and book directly at Markgray.
Sources
These manufacturer pages and how-to guides informed the model recommendations and exposure guidance throughout this article.
- Nikon D3500 product page
- Canon glossary: Aperture priority (A/Av)
- How to Use a DSLR in 2026 (And Should You Still Buy One?)