
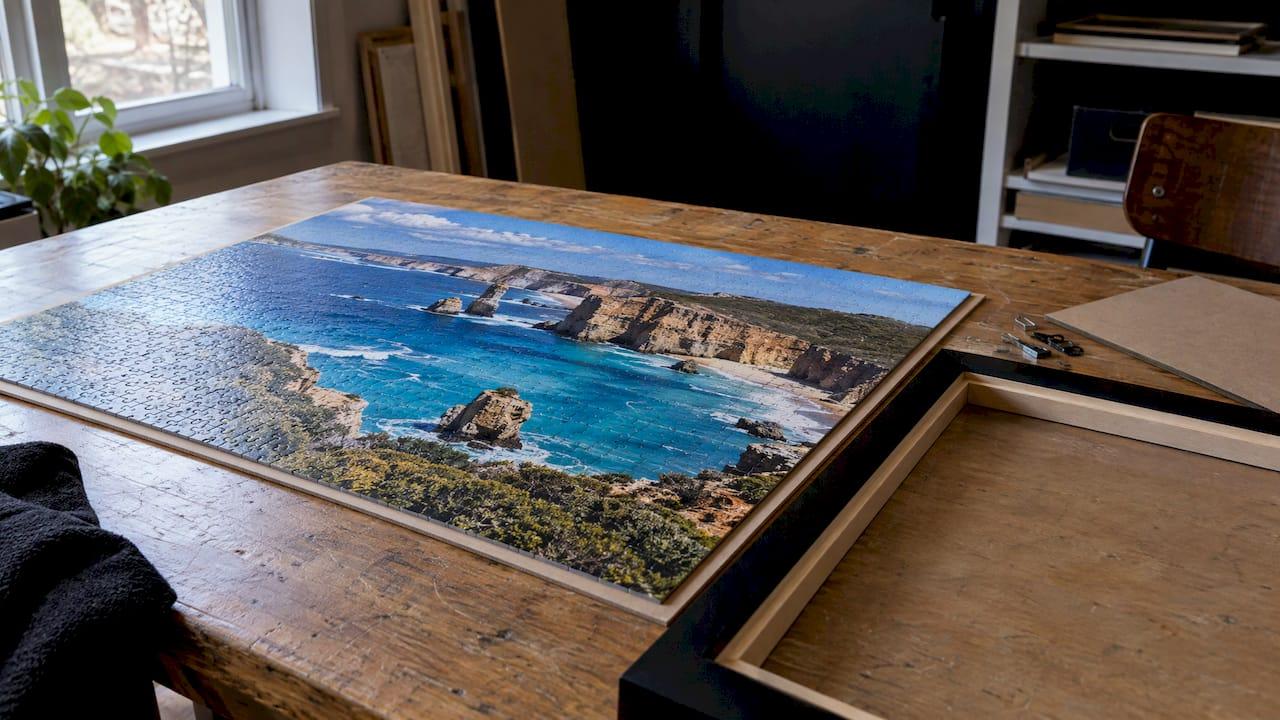
To frame a jigsaw puzzle, you secure the finished picture to a rigid backing, either with glue or an adhesive sheet, then set it in a frame slightly larger than the puzzle. If the puzzle holds together when you lift it by two corners, you can also frame it without glue. Below you will find both methods, how to choose the frame and backing, and how to store puzzles before and after the display.
TL;DR
- With glue: build the puzzle on a flat surface, spread a thin, even layer of clear-drying glue, let it dry fully, then mount it on a firm backer board and into the frame.
- Without glue: do the corner lift test first. If the puzzle stays together, slide it onto a backing board and into a slightly larger frame.
- Frame and backing: measure the finished puzzle, choose a frame a little bigger, and use a stiff backing so the picture never sags.
- Storage: keep unfinished puzzles flat on a rigid board or in sorted trays, and keep finished ones flat and away from moisture, heat and sunlight.
- Display it well: hang it away from direct sun and glare so the picture stays vivid.
Table of Contents
- Why a framed puzzle deserves a proper job
- Before you start: gather your materials
- Framing a jigsaw puzzle with glue, step by step
- Framing a puzzle without glue
- Choosing the right frame, size and backing
- Hanging your framed puzzle
- How to store a puzzle in progress
- Storing a finished puzzle before you frame it
- Our perspective
- Choosing a puzzle worth framing
- From puzzle to wall art with Mark Gray
- Common mistakes to avoid
- FAQ
- Sources
Why a framed puzzle deserves a proper job
A finished puzzle is hours of patient work. The picture on it is also someone's photograph or painting, and a good frame treats it that way. The difference between a puzzle that looks like wall art and one that looks like a craft project comes down to three things: a flat, stable surface, a clean bond between pieces and backing, and a frame that suits the image.
The good news is that none of this is difficult. You need a clear table, an hour or two of drying time, and a little care at the moment you move the puzzle. Most of the damage happens in that move, so we plan everything around it.
Before you start: gather your materials
Have everything within reach before you touch the finished puzzle. Once the pieces are locked together, you do not want to leave the table.
For the glue method:
- A water-based, non-toxic, clear-drying glue made for puzzles, or a general craft glue that dries clear
- A straight edge such as a popsicle stick or an expired credit card for spreading
- Baking paper or wax paper to protect your work surface
- A stiff backer board, such as foam board or the backing that came with the frame
- A clean cloth and a few heavy books
- A pencil and a ruler
- A frame a little larger than the puzzle
For the glue-free method:
- Adhesive sheets applied to the back, or a stiff board and a frame that clamps the puzzle firmly
- A rigid board of cardboard or foam board, cut to the frame size
- Scissors or a craft knife
Measure the puzzle itself rather than trusting the box. Piece counts give you a rough guide only, and the finished size varies by manufacturer. Measure the width and the height with a ruler, then write both numbers down.
Framing a jigsaw puzzle with glue, step by step
Glue gives the most secure result, and it is the method to choose for large puzzles, for puzzles that will hang in a busy room, or when you want the puzzle to stay intact for years. The steps below follow the approach in Loctite's guide to gluing puzzles for display, with a few practical additions.
1. Choose the frame and take out the backing
Select a frame that suits the puzzle and remove the backing board from it. You will use this board, or a stiffer replacement, as the surface the puzzle is glued to.
2. Mark the position
Lay the backer board down and mark with a pencil where the puzzle will sit, so it ends up centered. Light marks near the corners are enough. A puzzle that sits crooked on the board is one of the most common regrets, and it is easy to prevent.
3. Glue the pieces together
Work on baking paper so nothing sticks to your table. Spread the glue in a thin, even layer over the puzzle. Wirecutter's puzzle experts suggest using a straight edge such as a popsicle stick or an expired credit card, because it reduces the brush texture that a paintbrush can leave on the surface. They also point to water-based, non-toxic, clear-drying glue as the type to use.
Pay attention to the seams. The glue has to reach the joins between pieces, since that is what holds the picture together. Keep the layer thin: too much glue pools in the gaps and can leave a visible sheen.
4. Let it set completely
Drying times depend on the product, so follow the instructions on the glue you chose. Do not move the puzzle until the surface is dry and the whole picture feels like a single sheet.
5. Mount it on the backer board
Once the puzzle is a single piece, glue it onto the backer board within your pencil marks. Loctite's method is to cover the puzzle with a clean cloth and weigh it down with books, which presses it evenly and gives a strong bond. Leave it under the weight until the bond is firm.
6. Place it in the frame
Set the mounted puzzle into the frame and bend the tabs on the back to hold it in place. Check the front for dust or fingerprints before you close it up, because they are much harder to remove once the back is sealed.
Framing a puzzle without glue
Glue is not for everyone. Some people want to keep the puzzle reusable, and others simply dislike the idea of coating the picture. A glue-free approach is possible, but it depends on how well the puzzle holds together.
Start with the lift test
Wirecutter recommends a simple check: lift the completed puzzle by two corners. If it stays together, you can place it in a frame that is slightly larger than the puzzle. If it sags, add cardboard or foam board behind it for support.
Do the test over the table, not over the floor, and with the puzzle on its board. A few pieces slipping is a clear sign that this puzzle needs glue or an adhesive sheet.
Use an adhesive sheet on the back
Peel-and-stick adhesive sheets are another option. Wirecutter notes that they go on the back of the puzzle, which keeps the picture side free from anything that could change its look. Build the puzzle on a flat board, cover it with the sheet, press out the air, and then flip it.
Know the trade-offs
The table below compares the approaches.
| Method | Best for | Main consideration |
|---|---|---|
| Glue on the front, mounted on a board | Large puzzles and long-term display | Needs drying time, and a thin even layer matters |
| Adhesive sheet on the back | Keeping the picture surface untouched | Needs a flat, clean surface and careful air removal |
| Glue-free in a snug frame | Small or well-interlocked puzzles | Only works if the puzzle passes the lift test |
Choosing the right frame, size and backing
Do you need a special frame?
No special frame is required. A standard picture frame works, provided it is deep enough for the puzzle plus its backer board and it is a little larger than the finished puzzle. A puzzle has more thickness than a print, so a shallow frame can force the back panel to bow. If you are buying new, hold the puzzle and board together and check the depth first.
Size
Measure the finished puzzle and choose a frame opening that is slightly larger, so the puzzle sits in comfortably without being forced. Odd sizes are common with puzzles, which is why a made-to-measure frame is worth considering for panoramic or unusual formats. Our guide to panoramic framing options covers how to pick a finish for wide, narrow images.
Backing
The backing does the real work. A stiff foam board or the frame's own backer board keeps the puzzle flat, and a thicker board resists bowing as humidity changes. Cardboard that is too thin will curve over time. If the puzzle is large, choose a firm board and make sure the frame has enough tabs or clips to hold it.
Mat, glass or no glass
Glass protects against dust and handling, but it can throw reflections across a glossy puzzle surface. Position the frame away from windows and bright lamps, and read our notes on how to cut glare on framed photos before you choose where it hangs. Going without glass shows the puzzle's texture more honestly, which suits some pictures, though it leaves the surface exposed to dust.
Hanging your framed puzzle
A framed, backed puzzle is heavier than a print of the same size, so the hanging hardware matters. Use fixings rated for the weight, and fix the frame at two points so it stays level. Our guide to print hanging systems in Australia explains the options, and the same thinking applies to a heavy puzzle. For very big pieces, our guide to displaying large format prints is a useful companion.
Keep the frame out of direct sunlight. Sun fades printed colors over time, and heat can stress the glue and the backing. A hallway, a study wall or a living room wall that receives indirect light suits a framed puzzle well.
How to store a puzzle in progress
Before you frame anything, you need somewhere to keep a puzzle you are still working on. The right choice depends on whether you value mobility or stability.
Wirecutter's experts draw that line clearly. Roll-up mats are space-efficient and transportable, and they fit narrow shelves, drawers or the space under furniture. Rigid boards are more dependable for home storage and for frequent table clearing. They also warn that early-stage puzzles are more likely to fall apart when rolled or stored vertically.

Rigid boards
A trifold presentation board or a covered puzzle board is stable and slides under a couch or bed. The puzzle stays flat, so pieces stay in place. If you work on a puzzle over several weeks, this is the most reliable choice. For a comparison of the two styles and more ideas, see these puzzle storage ideas.
Roll-up mats
A roll-up mat suits small homes. Wirecutter points to a mat and tube combination that fits in a cupboard or other narrow space, and the Australian listing it describes is a 120 cm × 80 cm system for puzzles up to 2,000 pieces. Roll it once the puzzle is well advanced and the pieces are locked together, not at the beginning.
Sorting trays and lids
For loose pieces, labelled sorting trays, bins, baking trays or box lids work well, and they stack vertically on a shelf. Sort edge pieces, colors and sections, then label each tray so you can pick up the next session quickly.

Reduce box bulk
If shelf space is tight, keep each puzzle's pieces in a separate resealable bag and put several bags in one larger box, with the reference image from each. Wirecutter suggests this to cut down on bulk, and it keeps each puzzle's pieces from mixing. Whatever method you use, protect it from moisture, heat and direct sunlight.
Storing a finished puzzle before you frame it
Sometimes you finish a puzzle and the frame is not ready. The same principles apply: keep it flat, supported and dry.
- Leave it on its board. If you built it on a rigid board, keep it there and cover it with a clean sheet or the board's lid so dust stays off.
- Store it flat, not on its edge. A puzzle that stands upright puts stress on the seams, and pieces can shift.
- Slide it under furniture. A board under a bed or couch keeps it out of the way. Check that nothing heavy rests on top.
- Avoid damp rooms. Garages and bathrooms are poor choices because humidity can warp both the pieces and the board.
If you plan to glue the puzzle, there is no need to wait. Doing it while the puzzle is still on its flat board avoids the riskiest moment, which is moving the picture.
Our perspective
We think a finished puzzle is at its best when it is treated as a picture worth hanging. The image on the box matters as much as the effort that went into the pieces, and a landscape with real depth and detail rewards a careful frame.
That belief comes from how we make our prints. Mark's work is created with panoramic medium format film and digital cameras, and the results are collected in 35 countries. Our gift range includes jigsaw puzzles, so we think a lot about what happens after the last piece goes in: a flat surface, a clean bond, a frame that suits the image and a wall with soft, indirect light.
If you want the same care for a print rather than a puzzle, our guide to framing limited edition prints professionally explains the thinking behind it, and the gallery grade framing essentials cover the materials we trust.
Mark
Choosing a puzzle worth framing
Not every puzzle suits the wall. Images with strong composition, clean skies and clear detail hold up well when framed, because the eye reads them as a picture rather than a pattern of pieces. If you are picking a photo puzzle, our photographer's checklist on the zoom test, crop and DPI for photo puzzles explains what makes a good source image. And if you enjoy the building as much as the display, read about the four factors that make a landscape puzzle difficult.
From puzzle to wall art with Mark Gray
If you love landscape photography as much as the puzzle, we would be delighted to help you take it further. Our gallery offers limited edition prints and open edition prints from Australia, New Zealand, Norway, Iceland, French Polynesia, Spain and the United Kingdom, as well as acrylic blocks that are ready to display.

Looking for a gift for a puzzle lover? Our gift certificates start from $50 AUD, and you can see everything on the Mark Gray Gallery home page.
Common mistakes to avoid
- Moving the puzzle before it is set. Pieces separate at the edges first. Slide the puzzle on its board, or wait until the glue is dry.
- Using too much glue. A thick layer leaves a sheen and can seep through the seams. Spread it thin with a straight edge.
- Skipping the measurement. A frame that is too tight forces the puzzle, and one that is too loose lets it slip.
- Using flimsy backing. Thin cardboard bows. Choose a stiff board.
- Hanging in direct sun. Colors fade, and heat can affect the glue.
- Storing upright or rolled too early. A puzzle that is not yet locked together can fall apart.
FAQ
Can you frame a puzzle without gluing it?
Yes, if it holds together. Lift the puzzle by two corners as Wirecutter recommends. If it stays intact, place it in a slightly larger frame, and add cardboard or foam board behind it if it sags. If pieces slip, use glue or an adhesive sheet instead.
What is the best way to frame a jigsaw puzzle?
For a long-lasting result, spread a thin layer of clear-drying glue over the finished puzzle, let it dry fully, mount it on a stiff backer board and fit it in a frame. Mark the position in pencil first so the picture ends up centered.
Do you need a special frame for a puzzle?
No. A standard frame works if it is deep enough for the puzzle and its backing board and slightly larger than the finished puzzle. Measure the puzzle itself, since sizes vary between brands and piece counts.
How should I store a puzzle I have not finished?
A rigid board or a trifold presentation board keeps pieces stable and slides under furniture. A roll-up mat saves space, but it suits puzzles that are well advanced. Keep any method away from moisture, heat and direct sunlight.
How do I store completed puzzles before framing?
Keep the puzzle flat on its board, covered with a clean sheet, in a dry room. Avoid storing it upright or in damp spaces such as garages, and do not rest anything heavy on top.
Sources
- How to glue puzzles: Display your beautiful masterpiece, Loctite
- 8 Tips to Store and Display Your Puzzles From Jigsaw Pros, Wirecutter
- Puzzle Storage Ideas for Finished, Unfinished and Kids' Puzzles