
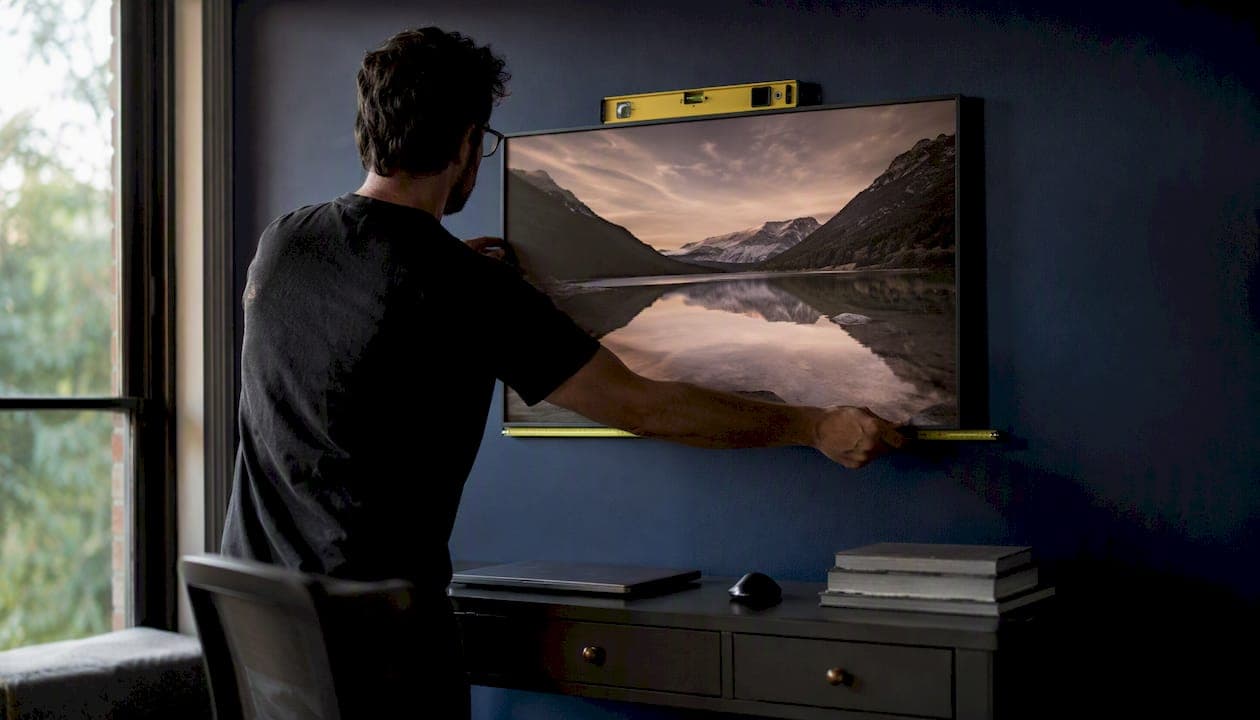
The core rule is straightforward: size your art to 60–75% of the width of the furniture or wall segment beneath it, and hang it with its center at 57–60 inches from the floor. That single formula resolves most sizing decisions before you ever set foot in a gallery or browse a print store.
The formula in practice:
Art width = furniture width × 0.60 to 0.75
A standard sofa calls for art sized to roughly 60–75% of its width. A 72-inch sofa works best with art in the 43–54 inch range.
Quick exceptions to keep in mind:
- When art hangs above furniture, the bottom of the frame should sit 6–12 inches above the furniture top, which overrides the center-height rule if the two conflict.
- When you hang multiple pieces together, measure the outer edges of the entire group and treat that total footprint as one unit before applying the ratio.
- For blank walls with no furniture anchor, the same 60–75% rule applies to the available wall width between architectural features.
Key Takeaways
| Point | Details |
|---|---|
| Core sizing ratio | Art width should equal 60–75% of the furniture or wall segment width beneath it. |
| Hanging center height | Center the art at 57–60 inches from the floor; drop to ~54 inches in dining rooms for seated viewers. |
| Furniture gap rule | Keep the frame bottom 6–12 inches above furniture; this overrides the center-height rule when they conflict. |
| Gallery wall spacing | Treat the full group as one unit; keep 2–3 inches between frames to maintain visual cohesion. |
| Mark Gray Gallery prints | Custom-sized limited edition landscape prints are available with UV glazing and framing matched to your wall dimensions. |
Table of Contents
- What does a good wall art size guide actually cover?
- How do you size art above a sofa, bed, or console?
- How do you size art above a fireplace mantel?
- What size art works on a large blank wall?
- How do you plan a gallery wall that looks intentional?
- What is the right hanging height for wall art?
- Room-by-room sizing and placement quick reference
- Which materials and finishes hold up in each room?
- How do you measure and calculate the right art size?
- What are the most common wall art sizing mistakes?
- Why our print production informs these sizing recommendations
- When the rules are worth bending
- Bring gallery-quality sizing to your own walls
- Sources
What does a good wall art size guide actually cover?
Scale and proportion are the two forces that determine whether a piece of art looks purposeful or accidental. The 60–75% rule works because it creates a visual relationship between the art and its anchor without either crowding or abandoning the space. Designers consistently flag that art covering less than 50% of the furniture width beneath it reads as a postage stamp, adrift on the wall. Push past 80% and the piece begins to overwhelm the furniture, making the room feel compressed.
Two quick checks help you calibrate before buying:
- Viewing distance: Stand at the point where you most often look at the wall. Art that looks right from 8–10 feet in a living room may feel too small in a double-height lobby.
- Ceiling height: Standard 8-foot ceilings suit art up to about 36–40 inches tall for a single piece. Rooms with 10-foot or higher ceilings can carry taller verticals or stacked arrangements without the wall feeling cluttered.
Pro Tip: When you are torn between two sizes, choose the larger one. Designers universally report that art bought too small is the most common and most visible mistake in residential spaces. A piece that is slightly generous reads as confident; one that is slightly too small reads as an afterthought.
How do you size art above a sofa, bed, or console?
Furniture is your primary anchor. Its width sets the upper and lower bounds for art size, and its height sets the hanging gap.
Sofa and couch sizing
| Sofa width | Minimum art width (60%) | Maximum art width (75%) |
|---|---|---|
| 72 inches | 43 inches | 54 inches |
| 84 inches | 50 inches | 63 inches |
| — | 58 inches | 72 inches |
For a long sectional, a coordinated pair or triptych spaced a few inches apart gives the same total footprint with far easier logistics, as Uplift Fine Art notes when advising on large sofa arrangements. For horizontal-format landscape prints over a long sofa, horizontal-line compositions carry the eye naturally across the full width.
Bed and headboard sizing
Apply the same ratio to the headboard width, not the full bed frame.
Console table and dresser sizing
Console table dimensions typically run 48–60 inches wide, which puts the art sweet spot at 29–45 inches. Keep the bottom of the frame 6–12 inches above the surface so the art and the objects on the console read as a composed vignette rather than two separate elements.
Choosing single piece vs. pair or triptych:
- Single large piece: works best when the furniture is a clean horizontal and the wall above it is uninterrupted.
- Pair: suits symmetrical furniture (twin nightstands, matching console lamps) and adds rhythm.
- Triptych: ideal for very wide furniture or when a panoramic image benefits from a natural break.
How do you size art above a fireplace mantel?
Mantel-specific placement notes:
- Maintain the 6–12 inch gap between the top of any mantel objects and the bottom of the frame. If the mantel is deep or carries tall candlesticks, measure from the tallest object, not the shelf surface.
- For a fireplace with a surround that extends above the mantel, measure the surround width as your anchor rather than the shelf, since the surround defines the visual column.
- Going slightly larger than the 75% ceiling (up to about 80%) works well above a fireplace because the architectural mass of the surround provides visual weight that supports a bolder piece.
Pro Tip: Layer the mantel objects in front of the art rather than beside it. Candles, small sculptures, or a clock placed in front of the lower portion of the frame create depth and make the art feel like the backdrop to a curated scene, not a floating rectangle above a shelf.
What size art works on a large blank wall?
Without furniture to anchor the math, use the wall itself. For blank walls, target art that covers roughly 60–75% of the available wall width, measured between architectural features such as windows, doorframes, or corners. A 120-inch wall between two doorways calls for art or a grouped arrangement spanning 72–90 inches.
Choosing your format for a large wall:
- Single large piece: The most direct solution. A single dramatic landscape print at 40×60 inches or larger creates an immediate focal point and suits contemporary interiors with clean lines.
- Diptych or triptych: Splits the visual load and allows you to ship and hang panels more easily. Keep the gap between panels to 2–3 inches so the set reads as one composition.
- Floor-to-ceiling installation: Reserved for ceilings above 10 feet. A tall vertical print or a stacked pair of horizontal prints can fill the vertical dimension without feeling oppressive. For detailed guidance on large-format installations, the large format photography prints guide covers scale, mounting, and sightline considerations.
Pro Tip: Taller ceilings do not just allow larger art; they demand it. A 40-inch-tall piece on a 12-foot wall creates a visual gap at the top that makes the ceiling feel unfinished. Scale up the vertical dimension first, then adjust the width to maintain the aspect ratio of the image.
How do you plan a gallery wall that looks intentional?
A gallery wall succeeds when you treat the entire arrangement as a single compositional object. Designers approach grouped frames exactly this way, calculating the collective footprint before selecting individual piece sizes.
Step-by-step gallery wall workflow
- Decide the footprint first. Using the furniture-ratio rule, determine the total width and height your arrangement should occupy.
- Lay frames on the floor. Arrange your actual frames (or stand-in boxes) on the floor within a taped outline matching your target footprint. Adjust until the composition feels balanced.
- Cut kraft-paper templates. Trace each frame onto kraft paper and cut to the exact outer dimensions. Mark the hanging hardware position on each template.
- Tape templates to the wall. Use painter's tape to fix templates in position. Step back and assess from your normal viewing distance. Live with the layout for at least 24 hours before drilling.
- Drill and hang. Use the hardware marks on the templates as your drill guides. Remove templates and hang frames.
Spacing and layout choices:
| Layout style | Gap between frames | Best for |
|---|---|---|
| Grid | 2–3 inches, consistent | Uniform frame sizes, formal rooms |
| Salon style | 2–3 inches, varied | Mixed sizes, eclectic interiors |
| Loose cluster | 3–5 inches | Organic, relaxed arrangements |
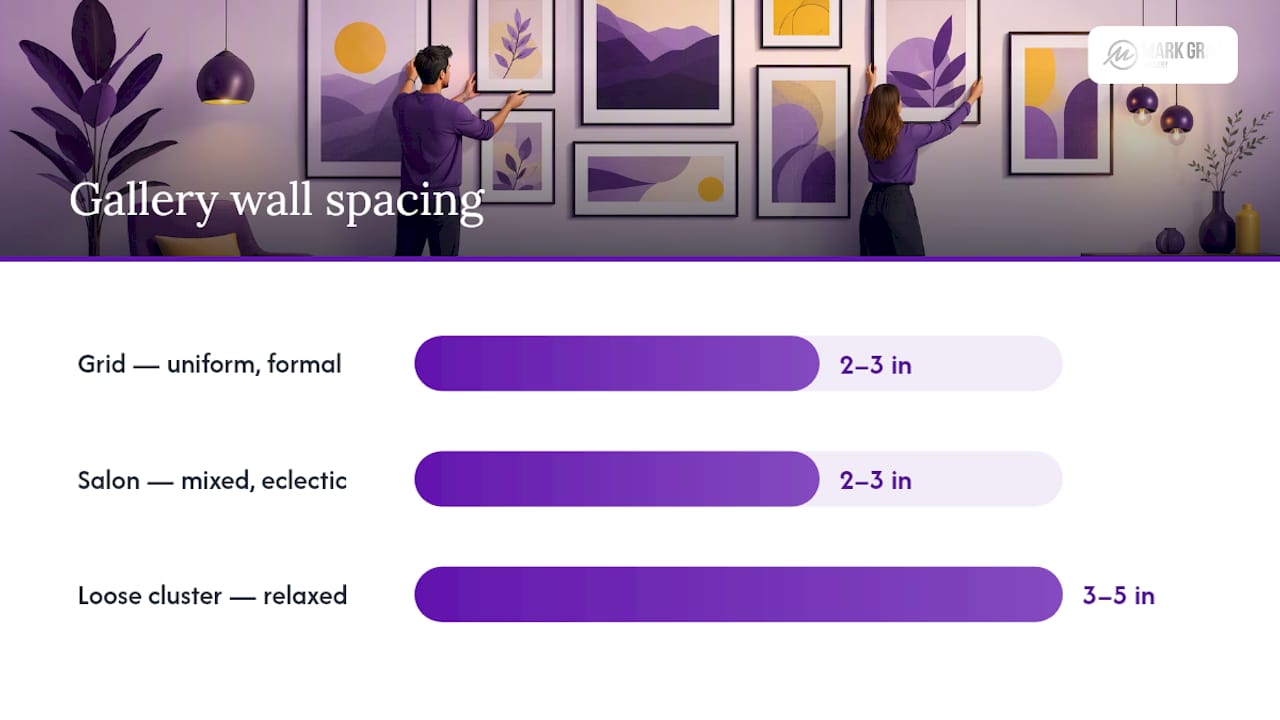
Keep gaps at 2–3 inches to maintain cohesion. Wider gaps cause the eye to read each piece in isolation rather than as a set. For a deeper look at composing a photography-focused gallery wall, the landscape photography gallery guide covers framing, sequencing, and tonal balance across a multi-piece arrangement.
What is the right hanging height for wall art?
Professional gallery practice centers artwork at approximately 57–60 inches from the floor because that range aligns with average standing eye level. Most museums and commercial galleries use 57 inches as their standard. For residential spaces, 58–60 inches is common because furniture and architectural trim shift the visual center slightly upward.
The furniture-gap rule overrides center height. When art hangs above furniture, the bottom of the frame should sit 6–12 inches above the furniture top. If obeying the 57–60 inch centerline would push the frame bottom more than 12 inches above the sofa or console, lower the art until the gap is back within range. The furniture connection matters more than the abstract centerline.
Special cases:
- Stairwells: Step each piece so its center follows the diagonal of the staircase, maintaining roughly 57–60 inches of perpendicular distance from the nearest tread.
- Dining rooms: Drop the center to around 54 inches because viewers are seated. Use the dining table as the anchor, applying the same 6–12 inch gap above the table surface.
- Rooms with ceilings above 10 feet: Scale up slightly, centering at 60–66 inches, and choose taller pieces to fill the vertical dimension proportionally.
Key figure: 57–60 inches from floor to art center is the standard used by professional galleries and interior designers across the United States.
Pro Tip: For a grouped arrangement, decide whether to align the centers or the tops of the frames. Aligning centers creates a calm, unified band. Aligning tops gives a more dynamic, stepped rhythm. Neither is wrong; choose based on the mood of the room.
Room-by-room sizing and placement quick reference
Every room has a primary anchor and a typical viewing distance. Both shape the ideal art size and placement.
Additional room notes:
- Hallways with ceilings above 9 feet benefit from tall vertical prints that draw the eye upward and make the corridor feel less tunnel-like.
- Bathrooms need moisture-resistant materials. Avoid paper-backed prints without sealed framing; acrylic face-mounts or sealed canvas work well.
- Home offices used for video calls benefit from a single, clean large piece rather than a gallery wall. A busy background distracts viewers and reduces the perceived professionalism of the space.
For rug sizing that complements your art and furniture arrangement, a rug size guide helps you balance the full vignette proportion from floor to wall.
Which materials and finishes hold up in each room?
The right substrate protects your investment and keeps colors accurate for years. When a wall receives direct sunlight, UV-filtering glazing or UV-resistant acrylic face-mounts are the practical choice. Standard glass transmits UV light that fades pigments and photographic dyes over time.
Material recommendations by room:
- Living rooms with indirect light: Framed prints under museum-quality glass or acrylic glazing offer excellent color fidelity and protection.
- Sun-exposed walls: Acrylic face-mounts or metal prints resist UV degradation better than paper-backed prints under standard glass.
- Bathrooms and kitchens: Sealed canvas, acrylic face-mounts, or aluminum dibond prints handle humidity without warping or delaminating.
- Hallways and high-traffic areas: Metal prints and acrylic mounts are more impact-resistant than glass-framed works.
Weight and fixing considerations: Large acrylic face-mounts can be heavy. Always locate studs or use appropriate wall anchors rated for the combined weight of the print and its mounting hardware. A 40×60 inch acrylic mount can weigh 15–25 pounds depending on substrate thickness; a standard drywall anchor rated for that load is non-negotiable.
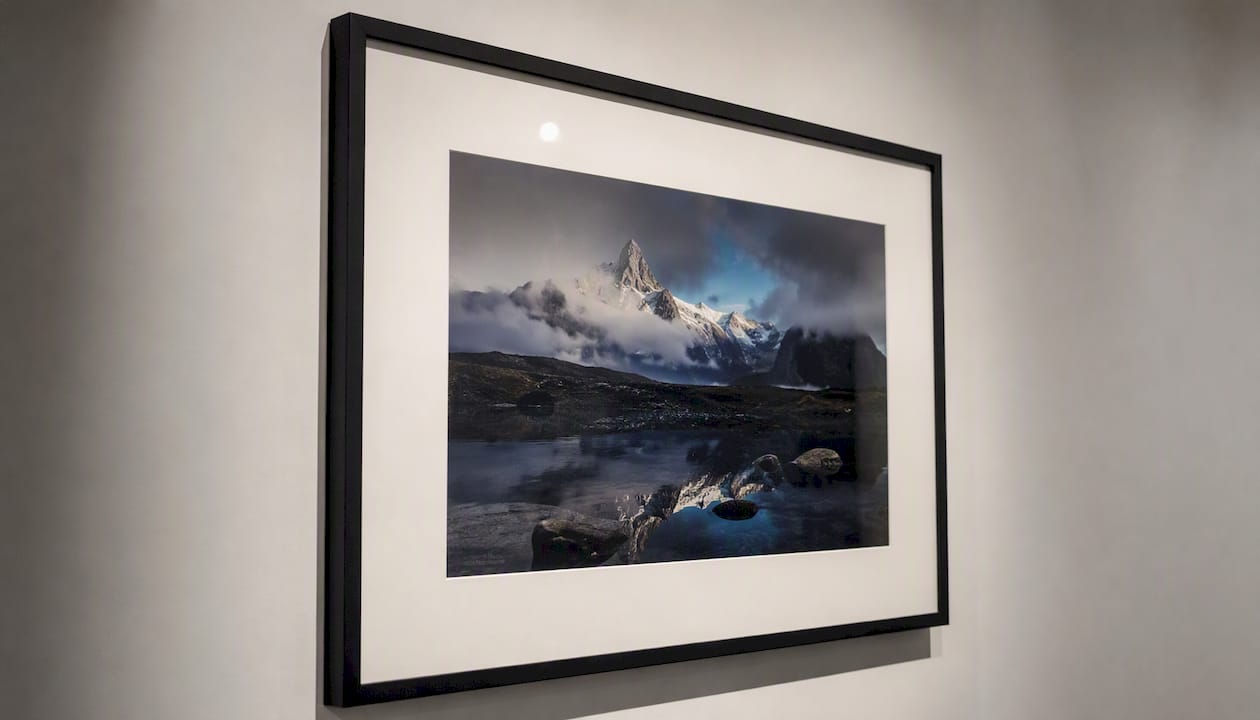
Pro Tip: Always check the framed outer dimensions, not just the print size, when applying the sizing ratio. A 2-inch mat and a 1.5-inch frame profile add 7 inches to both the width and height of the visible print. That difference can push a piece outside your target range or, conversely, make a smaller print fill the space correctly. The framing guide for limited edition prints covers how mat width and frame depth affect the final footprint.
How do you measure and calculate the right art size?
Turn the ratio into a repeatable workflow with five steps.
- Measure the furniture width (or wall width between architectural anchors for a blank wall). Use a tape measure and record the number in inches.
- Multiply by 0.60 and 0.75 to get your minimum and maximum art widths. This is your target range.
- Decide on single piece or multi-piece. If the maximum width exceeds 60 inches, consider a diptych or triptych with 2–3 inch gaps included in the total footprint.
- Account for frame and mat dimensions. Add mat width × 2 and frame profile × 2 to the print size to get the framed outer dimension. Check that the outer dimension falls within your target range, not the print size alone.
- Confirm hanging height. Calculate where the center of the piece will sit. If it falls outside 57–60 inches and there is no furniture below, adjust. If furniture is below, apply the 6–12 inch gap rule.
Worked example:
- Sofa width: 84 inches
- Target range: 84 × 0.60 = 50.4 in. minimum; 84 × 0.75 = 63 in. maximum
- Chosen print: 24×36 inches with a 3-inch mat and 1.5-inch frame → framed outer width = 24 + (3×2) + (1.5×2) = 33 inches. Too small.
- Revised print: 40×60 inches with a 2-inch mat and 1.5-inch frame → framed outer width = 40 + (2×2) + (1.5×2) = 47 inches. Within range.
- Hanging height: sofa back at 36 inches; add 6–12 inch gap → bottom of frame at 42–48 inches; frame height 64 inches (60 + 2×2 mat + 2×1.5 frame); center at 42 + 32 = 74 inches. That exceeds 60 inches, so lower the art until the center sits at 60 inches and verify the gap is still at least 6 inches above the sofa back.
Calculator inputs and outputs (any online sizing calculator or spreadsheet):
- Input: furniture width, desired ratio (0.60–0.75), frame/mat allowance
- Output: minimum and maximum framed art width; recommended center height; suggested formats (single, pair, triptych)
What are the most common wall art sizing mistakes?
Most hanging projects go wrong in predictable ways, and every one of them has a fast fix.
- Art too small: The single most common error. If a piece covers less than 50% of the furniture below it, size up or add a second piece. Designers consistently advise choosing a larger piece or building a gallery footprint rather than leaving a single undersized image on the wall.
- Hanging too high: Art hung at eye level while standing feels disconnected from the furniture below. Lower the center to 57–60 inches, or apply the 6–12 inch gap rule above furniture.
- Measuring the print, not the frame: Always calculate with the framed outer dimensions. A mat and frame profile can add 5–10 inches to each dimension.
- Ignoring the furniture gap: Hanging art at the correct center height but leaving 18 inches of wall between the sofa back and the frame bottom breaks the visual connection. The gap rule (6–12 inches) exists precisely to prevent this.
- Busy gallery walls behind desks: A gallery wall behind a home office desk looks cluttered on video calls. A single, clean large print reads far better on screen.
Pro Tip: Cut kraft-paper templates to the exact framed outer dimensions and tape them to the wall before buying or drilling. Live with the templates for 24 hours. What looks right immediately often reveals an issue the next morning when the light changes. This one step prevents the most expensive mistakes.
Why our print production informs these sizing recommendations
These recommendations are not drawn from theory alone. At Mark Gray Gallery, every limited edition landscape photography print is produced, framed, and prepared for installation with these proportional rules in mind. The practical realities of print production shape the guidance throughout this article.
What hands-on print work reveals:
- Frame depth and mat width change the visible footprint in ways that catch buyers off guard. A print ordered at 30×40 inches can arrive framed at 38×48 inches with a standard mat and frame profile.
- Glazing choice affects both color and glare. Museum-quality acrylic glazing reduces UV transmission and surface reflection compared to standard glass, which matters significantly in sun-exposed rooms.
- Large-format prints (40 inches and above on the long edge) require wall anchors rated for the combined weight of substrate, mat, and frame. This is a practical safety consideration, not an aesthetic one.
- Gallery-quality landscape prints demonstrate how correct sizing and placement transform a room, with real installation examples showing the ratio rules in action.
The sizing rules in this guide reflect the same standards applied when preparing prints for collectors and gallery installations.
When the rules are worth bending
There are moments when intentional deviation produces a more memorable result.
A narrow niche between two windows may call for a tall vertical print that ignores the width ratio entirely and instead addresses the vertical proportion of the space. An heirloom work with sentimental weight deserves placement that honors its meaning, even if the math suggests a different size.
The craft lies in knowing which rules to follow and which to set aside with purpose. Test every deviation with kraft-paper templates first. If the template looks right after 24 hours, the larger or differently placed piece almost certainly will too. Trust the process, and when in doubt, trust the larger size.
Bring gallery-quality sizing to your own walls
Mark Gray Gallery offers award-winning limited edition landscape photography prints sized and framed to the proportional standards described throughout this guide. Prints are available in custom sizes to match your specific furniture widths and wall dimensions, with premium framing options including UV-filtering acrylic glazing for sun-exposed rooms and moisture-resistant substrates for bathrooms and kitchens.

Whether you are selecting a single statement piece for a living room sofa wall or building a multi-panel gallery arrangement for a hallway or office, the team can advise on sizing, framing, and installation. Browse the full collection and request a sizing consultation directly through the gallery. Every print ships with hanging guidance, and custom sizing requests are welcomed.
Sources
The following references informed the sizing rules, hanging-height standards, and material guidance throughout this guide: