
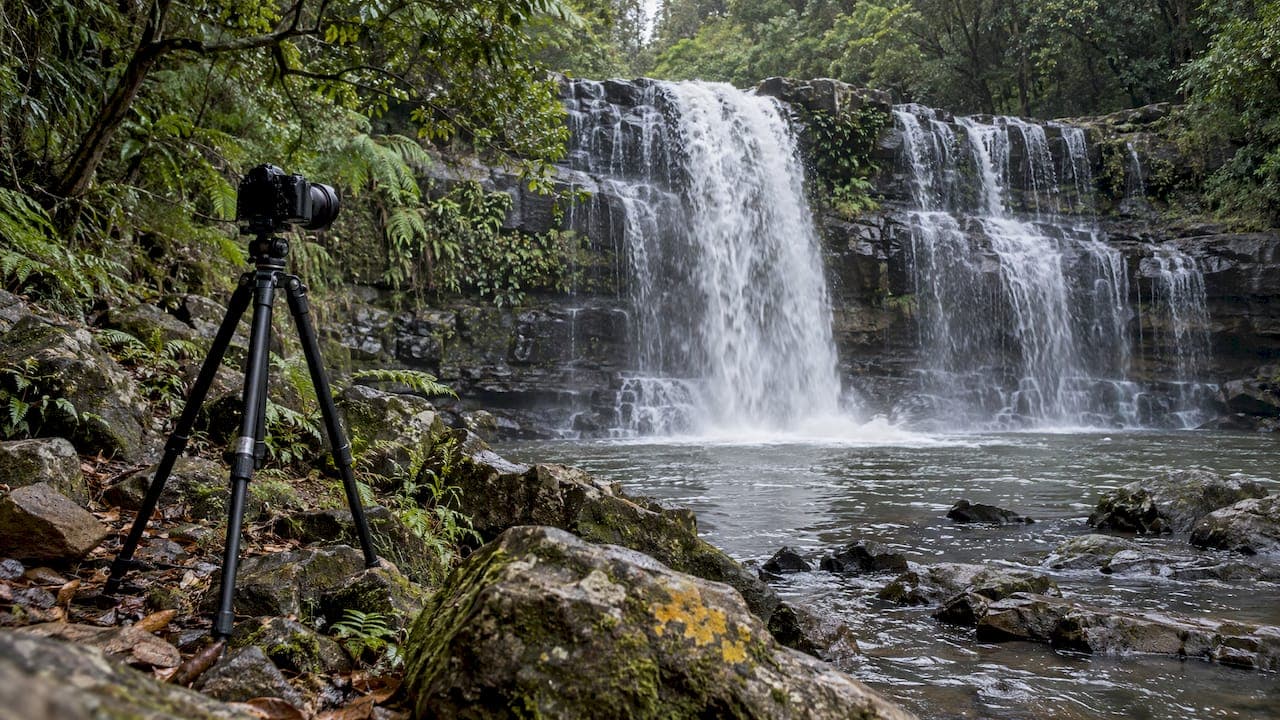
For a silky waterfall, put your camera on a tripod, set the lowest native ISO, close the aperture to around f/11, and slow the shutter until the water turns to soft threads. That usually means somewhere between half a second and a few seconds. In bright light you will need a neutral density (ND) filter to get there without overexposing. The rest of this guide explains each setting, why it matters, and how to adjust it for the light and flow you find on the day.
TL;DR
- Start on a tripod with the lowest native ISO, an aperture around f/11 to f/16 and a shutter speed of roughly 1 to 2 seconds, then adjust after checking a test shot.
- Shutter speed shapes the water: fast speeds freeze it, slow speeds blur it into a silky veil.
- In daylight, an ND filter lets you slow the shutter without blowing out highlights, and a polarizer cuts glare on wet rock and leaves.
- Focus manually before you attach a dark ND filter, and trigger the shutter with a remote or timer.
- Overcast skies, early mornings and late afternoons give the most forgiving light for waterfalls.
Table of Contents
- The settings at a glance
- Shutter speed: the setting that makes the effect
- Aperture: depth of field and exposure
- ISO: keep it low
- Exposure control in bright light
- Focus, tripod and stabilization
- Putting it together in the field
- How to get the silky effect on a smartphone
- Common mistakes and quick fixes
- Our perspective
- Learn it on location
- FAQ
- Sources
The settings at a glance
Use this table as a starting point. Every waterfall differs in height, volume and light, so treat the numbers as a first test shot, not a rule.
| Setting | Starting point | Why |
|---|---|---|
| Camera mode | Manual, or Shutter Priority | Gives you direct control over how the water renders |
| ISO | Lowest native (often 64 or 100) | Cleanest image and a slower shutter without extra filters |
| Aperture | f/11 to f/16 | Depth of field across the scene and a slower shutter |
| Shutter speed | 1 to 2 seconds | Smooth water with some texture left |
| Focus | Manual, on a static rock or log | Autofocus can struggle behind a dark filter |
| Stabilization | Off on a tripod | Prevents the lens correcting for movement that is not there |
| Filters | Polarizer, plus ND as needed | Controls glare and exposure |
The 1 to 2 second, lowest-ISO, f/11 to f/16 starting point matches what Ted's Cameras recommends for a first attempt, and the shutter range is consistent with the 1 to 4 second window that Australian photographer Andrew Murphy suggests for smoothing water in suitable light.
Shutter speed: the setting that makes the effect

Everything about the silky look comes down to shutter speed. Sony's own waterfall examples show the progression clearly: 1/1250 second freezes the water, 1/20 second records more dynamic flow, and 1/4 second renders it silky.
That gives you a useful mental map:
- Fast (1/500 second and quicker): every droplet frozen. Powerful and dramatic for big, thundering falls, but it rarely reads as elegant.
- Medium (about 1/20 to 1/4 second): streaks of movement with real texture in the flow. Often the best choice for large, fast falls where too much blur loses the sense of power.
- Slow (about 1/2 second to several seconds): soft, smooth, cotton-like water. This is the look most people mean by the silky effect.
A sensible method is to begin around half a second and work toward five seconds, checking each result. Natural Photographer's Australian waterfall guide recommends exactly that approach. Murphy adds that the right speed depends on the light, the exposure you want, any moving vegetation near the frame, and the height and flow of the waterfall itself.
Match the speed to the flow
A thin ribbon of water over a short drop smooths out quickly, so a fraction of a second may be enough. A wide, high-volume fall carries so much movement that it can take longer to look silky, but go too slow and the white water merges into a featureless blob with no shape. Take several frames at different speeds and compare them on the back of the camera. Zoom in on the brightest water and check for blown highlights on the histogram.
Watch the surroundings
A long exposure also records everything else that moves. Ferns, tree branches and grasses beside a waterfall will blur in a breeze, even when the water looks perfect. If the foliage smears, shorten the exposure slightly or wait for a lull. Rocks and trunks, in contrast, stay crisp, which is part of why the contrast between solid stone and soft water works so well.

Aperture: depth of field and exposure
There is no absolute aperture for waterfalls, but f/11 to f/16 is a dependable range. It keeps foreground rocks, the falls and the background sharp, and it lets in less light, which helps you reach a slower shutter speed.
Two cautions apply:
- Do not stop down to the smallest aperture. Very small apertures such as f/22 can soften fine detail through diffraction. Murphy, for instance, identifies f/9 as the sharpness sweet spot of his own lens, which shows that every lens has a favorite zone. Test yours once at home and you will know it for years.
- Think about your closest object. If you are composing with a mossy boulder a metre from the lens, depth of field becomes harder. Our guide to hyperfocal distance for landscapes explains how to place focus so that near and far both hold up, and when focus stacking helps if a single frame cannot do it.
ISO: keep it low
Set the lowest native ISO your camera offers, which is commonly 100 or sometimes 64. A low ISO gives the cleanest files and the slowest shutter for a given aperture. Raising ISO makes your life harder in two ways: more noise in the smooth water, and a faster shutter that works against the effect you are after. If you find yourself raising ISO in daylight, the answer is almost always to add a filter instead.
Exposure control in bright light
This is where most first attempts go wrong. In midday sun, even at ISO 100 and f/16, your shutter may be a fraction of a second, and it will not give you silk. Ted's suggests that if a test shot shows the shutter still is not slow enough, a 3 to 6 stop ND filter can help in bright conditions, and it also recommends shooting in the golden hours.
The light itself matters as much as the filter. Australian Photography advises that overcast light avoids high contrast, while in direct sun an ND filter helps control light for a long exposure and a polarizer reduces glare. For rainforest gullies and fern-lined creeks, a cloudy day is often the best day. The canopy tends to hold the light even, and you avoid bright patches of sun on the water.
Working out the exposure with an ND filter
Each stop of light an ND filter blocks doubles the exposure time. Australian Photography notes that apps such as PhotoPills can do the calculation for you. A worked example:
- Your metered exposure without a filter is 1/15 second at f/11 and ISO 100.
- You want about 2 seconds. From 1/15 second to 2 seconds is roughly 5 stops of extra time (1/15, 1/8, 1/4, 1/2, 1, 2 seconds is five doublings from 1/15 to 1/2... and a couple more to reach 2).
- A 6 stop ND filter would take you from 1/15 second to roughly 4 seconds, so you would shorten the time a little or open the aperture one stop.
You do not need to be exact. Take the shot, look at the result, and adjust by a stop either way.
For a deeper look at how filters shape the picture, read our article on why landscape photographers use ND filters.
Strong filters: a few practical points
- Some brands introduce a color cast at long exposures. Australian Photography says this can typically be corrected through white balance adjustment when you process the RAW file, so shoot RAW.
- With 10 stop or stronger filters, light can leak in through the viewfinder. The same source advises using a viewfinder cover or positioning the camera to prevent leaks.
- Exposures beyond 30 seconds may require Bulb mode, which means a reliable remote or timer, according to Australian Photography. Most waterfalls never need that long.
Focus, tripod and stabilization
The settings above only work if the camera is perfectly still and the focus is placed where you want it.
- Compose first, on a sturdy tripod. Set it low and wide for stability, and take care on wet rock. A tripod is not optional for exposures of a second or more.
- Focus before you add the filter. Australian Photography recommends manually finding focus before attaching the ND filter, because autofocus can hunt unsuccessfully through a dark filter. Focus on a static rock or log rather than the moving water.
- Switch off image stabilization. On a tripod, in-lens or in-body stabilization can introduce blur of its own.
- Release without touching. Use a remote release, or the camera's 2 second timer, to avoid vibration.
- Use a circular polarizer. It reduces glare on wet rock and foliage, deepens greens and makes the scene look richer.
Putting it together in the field
Here is the sequence we would follow at a new waterfall:
- Walk the location and decide on the composition before unpacking everything. Look for a foreground, a leading line in the stream, and a clean edge to the frame.
- Mount the camera on the tripod, level it, and fit the polarizer.
- Set Manual mode, lowest native ISO and an aperture around f/11.
- Focus manually, then switch off stabilization.
- Take a test shot and read the histogram. If the shutter is faster than you want, add an ND filter or wait for softer light.
- Bracket your shutter speeds: half a second, 1 second, 2 seconds, 4 seconds. Waterfalls reward variety.
- Check the highlights on the water and the sharpness of the rocks on the screen before leaving.
If you like the idea of seeing how these choices play out in dramatic scenery, our Great Ocean Road photography guide and our overview of types of landscape photography techniques cover related settings for coastal and general landscape work.
How to get the silky effect on a smartphone
You do not need a big camera to try this. On compatible iPhones, you can enable Live Photo, then choose the Long Exposure effect in the Photos app, which blends the frames into a smooth-water look. For more control, use the Pro or manual mode in your camera app, lower the shutter speed, and rest the phone on a tripod or a firm rock so it stays sharp. The result will not match a larger sensor with a proper ND filter, but it is a good way to practice reading light and flow before you invest in gear.
Common mistakes and quick fixes
- Blown white water: the brightest part of a waterfall clips easily. Underexpose slightly, shoot RAW and check the histogram, not just the screen.
- Muddy, blobby water: the exposure was too long for a high-volume fall. Try a medium shutter speed that keeps some texture.
- Soft rocks: the tripod moved, stabilization was on, or you pressed the shutter by hand. Fix the setup, not the settings.
- Strange color: a cast from a strong ND filter. Correct white balance in RAW processing.
- Flat, dull scene: swap midday for early morning or late afternoon, or for an overcast day, and look for a stronger foreground.
Our perspective
Waterfalls teach patience better than any other subject. The settings are only half of it. The other half is arriving when the light is soft, walking the scene until the composition feels right, and being willing to take the same frame five times at five different shutter speeds.
Across the years I have photographed landscapes in Australia, New Zealand, Norway, Iceland and beyond. My award-winning prints are made with panoramic medium format film and digital cameras, because the detail in wet stone, moss and moving water deserves it. Our approach is designed to put that experience in front of you: in small groups, with luxury arrangements, led by me and our team of professional photography instructors.
If you want to learn these techniques at the water's edge instead of from a screen, our workshops are built for exactly that. And if you simply want to bring the feeling of a landscape into your home, our limited edition prints are made for collectors in 35 countries.
Mark
Learn it on location
Reading about shutter speeds is useful, but standing beside a real waterfall with someone who can check your histogram and fine-tune your filter choice is faster. Our 1 day photography courses run across Australia and cover the fundamentals of light, exposure and composition. If you want to go further, our multi day photography tours take small groups to some of the most photogenic landscapes in Australia and around the world. For a look at the skills you build along the way, see what landscape photography courses teach.

Prefer a one-to-one session? We also offer private lessons. And if a waterfall scene has already caught your eye, browse our limited edition landscape prints to see how these techniques look when printed at gallery quality.
FAQ
What is the best shutter speed for waterfalls?
There is no single best speed, but half a second to about 4 seconds is the most common range for a silky look. Start near 1 to 2 seconds, check the result, and adjust for the flow. A thin fall smooths out quickly, while a powerful one may look better with a shorter exposure that keeps some texture.
Do I need an ND filter to photograph waterfalls?
Not always. In shade, in a rainforest gully or on an overcast day, a low ISO and small aperture can reach a slow enough shutter without one. In bright daylight you will usually want an ND filter, and a 3 to 6 stop strength is a practical place to start. Take a test shot, and if the shutter is still too fast, add the filter.
What aperture should I use for waterfall photography?
f/11 to f/16 is a reliable range. It gives good depth of field and helps slow the shutter. Avoid the smallest apertures, which can soften detail, and test your own lens to find where it is sharpest.
Should I turn off image stabilization on a tripod?
Yes. With the camera locked on a tripod, stabilization can create blur instead of preventing it. Switch it off, focus manually, and trigger the shutter with a remote or the self-timer.
Can I get a silky waterfall effect with my phone?
Yes. On compatible iPhones, use Live Photo and apply the Long Exposure effect. On other phones, use a Pro or manual mode to lower the shutter speed, and keep the phone perfectly still on a tripod or a solid surface.
Sources
- Waterfall Photography Cheat Sheet: 8 Pro Tips, Ted's Cameras
- How to Take Perfect Waterfall Photographs, Andrew Murphy Photography
- How To Get This Shot: Silky Australian Waterfall, Natural Photographer
- Shutter Speed and S-Mode, Sony USA
- Photo Tip of the Week: How to Master Landscape Lighting, Australian Photography
- Photo Tip of the Week: What ND Filter?, Australian Photography
- Photo Tip of the Week: Take Better Waterfall Shots, Australian Photography