
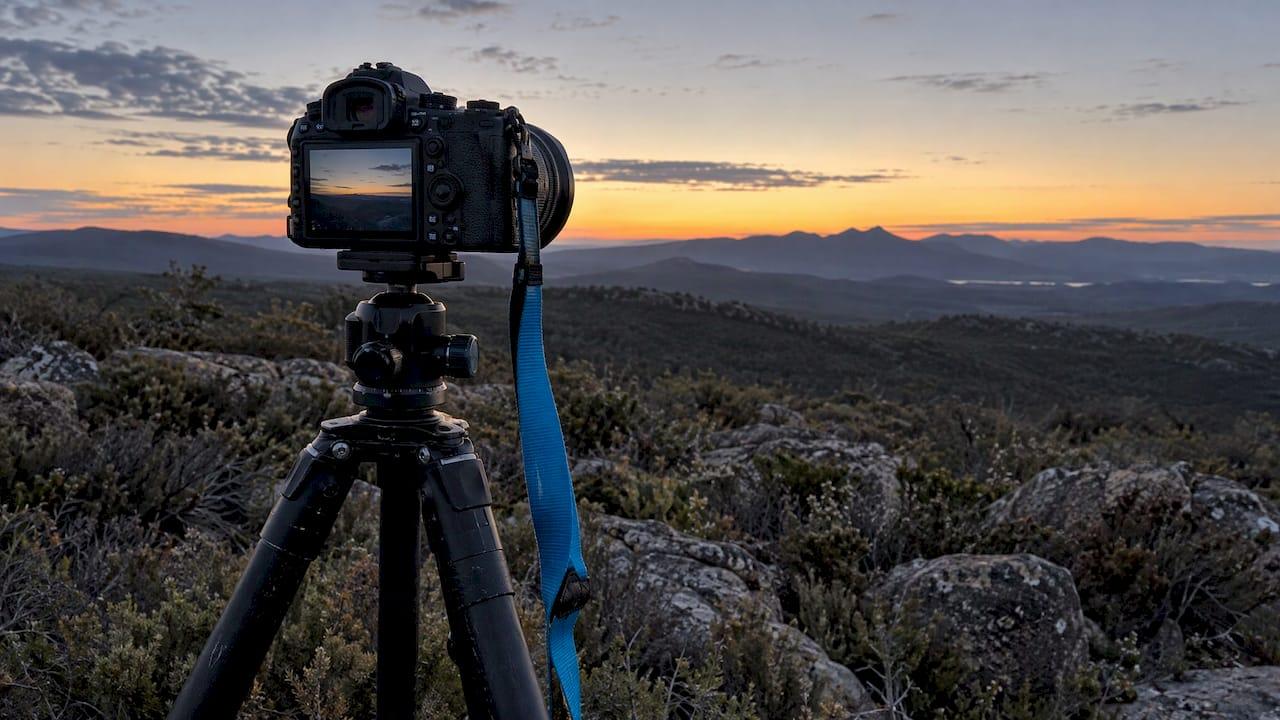
For most sunrise landscapes, shoot RAW on a tripod, set ISO 100, choose f/8 to f/11, and let the shutter speed do the adjusting as the sky brightens. Check the histogram every few minutes and keep a little under-exposure in reserve for the sun itself. Those settings are only a starting point. The light changes minute by minute at dawn, so the real skill is knowing what to change, and in what order, as the sky goes from deep blue to gold.
This guide gives you the opening settings, a minute-by-minute way to adjust them, and the exposure techniques that keep both the glowing sky and the dark foreground intact. It is written from the way we approach dawn on our landscape photography tours and in our own gallery work.
TL;DR
- Start with RAW, a tripod, ISO 100 and an aperture of f/8 to f/11. Let shutter speed absorb the changing light.
- Arrive at least 30 to 45 minutes before sunrise and take test shots while it is still dark.
- Use the histogram rather than the rear screen, and underexpose slightly or bracket to protect the bright sky.
- As the light rises, adjust in this order: shutter speed first, then ISO, then aperture only if you need more depth.
- A graduated or ND filter can tame the bright horizon when one exposure is not enough.
Table of Contents
- The starting settings that work for most sunrises
- How to adjust as the light changes
- Keeping the sky and the landscape both in the frame
- Sharp focus, stable camera
- A dawn routine you can repeat
- Common sunrise mistakes and quick fixes
- Our perspective on shooting sunrise
- Learn sunrise light with us
- FAQ
- Sources
The starting settings that work for most sunrises
No single recipe fits every dawn, but the published advice clusters tightly. Most guides land on a low ISO and a mid-range aperture for landscapes. Tamron's sunrise guide suggests ISO 200 to 800 with a high aperture such as f/11 or f/16 in Aperture Priority. CameraPro AU recommends RAW, Aperture Priority or Manual, the camera's base ISO (around 100) and f/8 to f/16 to keep foreground and background in focus. Nikon's golden hour guidance for backlit scenes suggests manual mode, ISO 100 to 400, f/8 to f/11 and a shutter speed starting around 1/250 second.
Here is how we would summarize those into a working table for a landscape on a tripod:
| Setting | Where to start | Why |
|---|---|---|
| File format | RAW | Keeps the most flexibility in highlights and shadows |
| Mode | Manual, or Aperture Priority | Manual gives you control as light shifts, Aperture Priority lets the camera choose shutter speed |
| ISO | 100 (your camera's base) | Cleanest files; raise only when the shutter gets too slow |
| Aperture | f/8 to f/11 | Depth of field across the scene without over-stopping |
| Shutter speed | Whatever the meter and histogram say | Seconds before dawn, a fraction of a second later |
| Exposure compensation | Around -0.3 to -1 EV | Protects the bright sky |
| Focus | Single AF, then manual if facing the sun | Dependable focus on a fixed scene |
Two cautions on the numbers you will see online. First, advice for shooting wide open at f/1.8 to f/4 is aimed at handheld or portrait work, not landscapes where you want depth. Second, treat every figure as an opening bid. The same aperture and ISO can need a 30-second exposure half an hour before sunrise and a tiny fraction of a second once the sun clears the horizon, as this Queensland sunrise guide is often summarized, so your numbers will differ from anyone else's.
If you want the reasoning behind shooting RAW rather than JPEG for dawn light, our piece on why landscape photographers shoot RAW covers it in detail.
How to adjust as the light changes
Sunrise is not one exposure but a sequence of them. A useful way to think about it is in three stages.
Before the sun appears: blue hour and pre-dawn glow
This is when your exposures are longest. One practical sequence, described by a landscape blogger, starts before dawn at ISO 100 and f/8, then shortens the shutter speed as the horizon brightens, from around four seconds to 1/125 second. PhotoPills notes that in blue hour you may need a larger aperture such as f/4 because of the low light, while in golden hour a smaller aperture of f/8 or f/11 gives greater depth of field.
With the camera on a tripod, a slow shutter speed costs you nothing for a still scene. Only wind in trees, grass or moving water will force a faster shutter. If you want to understand the colors of this window, our blue hour photography guide is a good companion.

As the sky colors: the fast-changing minutes
This is where most missed shots happen. The light can roughly double every few minutes, so an exposure that was right a short time ago is now noticeably too bright. Rather than chasing it with every control at once, use a priority order. Joel Kelly of Aperture Authority describes it for the sinking sun as keeping the shutter speed safe first, then raising ISO, and stopping down only for more depth. For sunrise, the logic runs in reverse: as the sky brightens, you shorten the shutter speed first and bring ISO back to base.
If you prefer a semi-automatic approach, Nigel Danson describes using Manual with Auto ISO for fast-changing sunrise and sunset light: set the aperture and shutter speed you need, let ISO float with a sensible upper limit, and watch the histogram so the highlights are pushed right without clipping.
After the sun clears the horizon
Once the sun is up, contrast climbs sharply. Shutter speeds shorten quickly, ISO sits at base, and the sun itself becomes the exposure problem. One published settings table, from Picstack, shows ISO falling to 100, f/8 to f/11 for landscapes, and shutter speeds rising from 1/125 to 1/500 and beyond, with exposure compensation of -0.3 or -0.7. That matches our experience that a small amount of negative compensation protects the glow around the sun.
Keeping the sky and the landscape both in the frame
The central difficulty of sunrise is dynamic range: a bright sun and sky above a dark foreground. Your camera's meter will average them and often give a mediocre result. REI's outdoor experts point to exactly this, and recommend bracketing as the solution. There are four tools to combine.

The histogram. Judge exposure by the histogram, not the rear screen, which looks brighter as your eyes adjust to the dim light. PhotoTraces describes exposing to the right: make the image as bright as possible without clipping the highlights, then lower exposure in post-processing.
Slight underexposure. Great Walks recommends exposure bracketing or slightly underexposing to preserve bright highlights while keeping the sky's color rich. In practice, dial in -0.3 to -1 EV and check the sky first.
Bracketing. Take three or five frames, one stop apart, so you can blend them later. It is cheap insurance when the sun is in the frame or the foreground is deep in shadow. Our guide to post-processing in landscape photography explains how to merge them naturally.
Spot metering. Gary Ayton, an Australian landscape photographer, suggests spot metering off the sky 20 to 30 degrees from the sun to find a workable shutter speed. It is a quick way to get a baseline before you refine with the histogram.
When filters earn their place
When the contrast is beyond what one frame can hold, a filter solves it in camera. A contributor to Australian Photography found a soft graduated filter effective at reducing horizon blowout, and used 8- and 10-stop ND filters for long exposures, including one 122-second frame at f/11 and ISO 160. For sunrise skies where the brightest band sits right at the horizon, see our guide to reverse graduated ND filters. If you want silky water or streaking clouds, read why landscape photographers use ND filters.
Sharp focus, stable camera
Exposure gets the attention, but a soft sunrise frame is usually a stability or focus problem.
- Use a tripod. Photo Review states that a tripod is mandatory with long lenses in low light, and that stabilization is needed once your shutter speed is slower than the reciprocal of the focal length. In-lens or in-body stabilization typically buys two to three stops, but on a tripod it is a bonus, not a substitute.
- Delay the shutter. Nikon's setting guide for the Z7II and Z6II suggests a 1-second exposure delay to reduce blur from pressing the shutter button, along with Single AF, Single-point AF and Low-light AF for dim scenes. A remote release or a 2-second timer does the same job on any camera.
- Switch to manual focus facing the sun. Tamron recommends manual focus when the sun's intensity confuses autofocus. Focus on a distant, contrasty point, check at magnified live view, then leave it.
- Choose your aperture for depth, not sharpness alone. f/8 to f/11 is usually the sweet spot. Going much smaller can soften fine detail through diffraction. When the foreground is very close, focus stacking gives you front-to-back sharpness without over-stopping the lens.
A dawn routine you can repeat
- Scout the night before. Know where the sun will rise and where your tripod will stand.
- Arrive early. Great Walks advises arriving at least 30 to 45 minutes before sunrise, when blue and pink twilight can be spectacular.
- Set the base. RAW, ISO 100, f/8, tripod, 2-second timer or remote.
- Take test shots in the dark. Settle on your composition and check the histogram while nothing is at stake.
- Shoot through the whole sequence. Keep shooting after the color peaks. The sun clearing the horizon often delivers the strongest rays and the cleanest light.
- Bracket the sun. Once it is in the frame, add under-exposed frames for the highlights.
- Review at home on a calibrated screen. The histogram will tell you more than the camera's screen did.
For how dawn light compares with the evening, our article on sunrise versus sunset photography helps you choose the right light for a given landscape, and the landscape lighting conditions guide goes deeper on how conditions change the exposure.
Common sunrise mistakes and quick fixes
| Problem | Likely cause | Fix |
|---|---|---|
| Washed-out sky | Exposing for the foreground | Reduce exposure by 0.7 to 1 EV, or bracket |
| Muddy, dark foreground | Exposing for the sun | Blend a brighter frame, or use a graduated filter |
| Soft details | Camera shake or autofocus hunting | Tripod, timer, manual focus |
| Noisy shadows | ISO raised too early | Slow the shutter first, keep ISO at base |
| Blurred water or foliage | Shutter too slow for movement | Raise ISO or accept intentional blur with ND filters |
| Flat colors | JPEG shooting or auto white balance | Shoot RAW and set white balance at the edit |
If your dawn shoot includes moving water, our waterfall photography settings guide shows how to balance shutter speed against sharpness.
Our perspective on shooting sunrise
Sunrise is the most generous light a landscape photographer is given, and also the least forgiving. It arrives quickly, and it rewards the photographer who has already made decisions before the first color appears.
Our own approach is simple: be in position early, work on a tripod, keep the exposure in the camera's best range, and protect the highlights, because they are the part of the image you cannot rebuild. The prints in our gallery are made with panoramic medium format film and digital cameras, and that detail only holds when the capture is clean at dawn.
The best way to learn this light is alongside someone who has stood in it hundreds of times. That is why our workshops are small-group and led by our team of professional photography instructors. We would love to see you on location.
Mark
Learn sunrise light with us
Settings are easier to learn with a guide beside you. Our 1 day photography courses run across Australia, and our multi day photography tours take small groups to dawn locations in Australia and around the world, with luxury arrangements and expert instruction. If you would prefer one-to-one coaching, ask about private lessons.
If you would rather bring a sunrise home than shoot one, explore our award-winning limited edition prints, or give a friend the choice with a gift certificate, available from A$50.
FAQ
What are the best camera settings for sunrise photos?
Start in RAW on a tripod with ISO 100, f/8 to f/11, and either Manual or Aperture Priority. Let shutter speed change as the light rises, and use slight negative exposure compensation to protect the sky. Confirm with the histogram, since the right shutter speed changes every few minutes.
When should you start a sunrise photoshoot?
Arrive at least 30 to 45 minutes before the listed sunrise time, as Great Walks advises. That gives you time to compose, take test shots in the dark and catch the blue and pink twilight before the sun appears. Keep shooting well after sunrise too.
Should I use manual mode or aperture priority at sunrise?
Both work. Aperture Priority is quick and reliable if you use exposure compensation and check the histogram. Manual, or Manual with Auto ISO, gives you more control when the light is changing fast or when you need a specific shutter speed for moving water or wind.
Do I need a filter to photograph sunrise?
Not always. Bracketing and careful exposure can handle many scenes. A graduated filter helps when the horizon is far brighter than the land, and ND filters let you slow the shutter for smooth water or cloud movement. Our filter guides above explain when each is worth carrying.
What ISO is best for sunrise photography?
Use your camera's base ISO, usually 100, whenever a tripod lets you. Guides such as Ted's Cameras suggest raising it gradually as the sky darkens, with around ISO 800 as a sensible ceiling before grain becomes obvious, though this depends on your camera.
Sources
- Tamron: Best Settings for Sunset and Sunrise Photos
- CameraPro AU: 10 Tips for Stunning Landscape Photography
- Nikon: Make the most of golden hour with backlighting
- Debbie Photos: Best Camera Settings for Sunrise Photography
- PhotoPills: Sunrise Photography Guide
- Aperture Authority: Golden Hour Photography
- Nigel Danson: Setting up a new camera
- Picstack: Golden Hour Photography
- REI: How to Take Better Sunrise and Sunset Photos
- PhotoTraces: Best Camera Settings for Sunrise and Sunset
- Great Walks: How to photograph a sunrise
- Gary Ayton: Photographing sunrises and sunsets
- Australian Photography: How to make striking long-exposure images
- Photo Review: Photographing Sunrise and Sunset
- Nikon Z7II/Z6II setting guide