
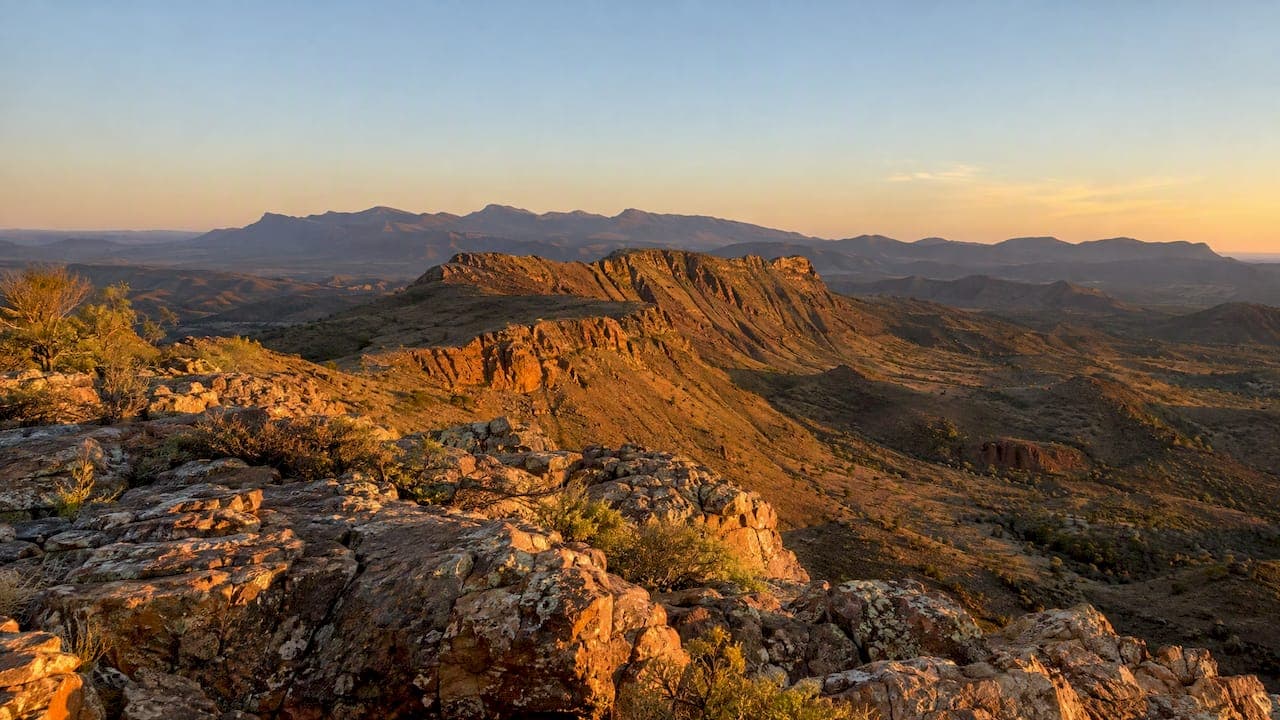
Golden hour landscapes are made in the stretch of light just after sunrise and just before sunset, when the sun is low, the light is warm and directional, and every ridge, dune and wave picks up shape and texture. The window is not a fixed 60 minutes. It changes with your latitude and the season, so the skill is knowing when it opens where you are, and being in position before it does.
This guide covers what golden hour is, how long it lasts in Australia, how it differs from blue hour, and a field method you can repeat. It also covers the mistakes that cost the most good light.
TL;DR
- Golden hour is the period shortly after sunrise or before sunset. Its length depends on latitude and season, not on the clock.
- Arrive 30 to 45 minutes early, use a tripod, shoot RAW, and stay 10 to 20 minutes after the sun has gone.
- Choose golden hour for warmth, texture and drama. Choose blue hour for calm, cool, even tones.
- Some cloud helps. Roughly 30% to 70% cover tends to give the best color.
- Simple compositions win. What you leave out matters as much as what you include.
Table of Contents
- What golden hour is, and why it looks the way it does
- How long golden hour really lasts in Australia
- Golden hour vs blue hour
- A field method for golden hour landscapes
- Common mistakes
- Perspective: why we plan our days around the light
- Learn it in the field
- Where to shoot golden hour in Australia
- Using golden hour images commercially
- FAQ
- Sources
What golden hour is, and why it looks the way it does
In photography, golden hour is the period shortly after sunrise or before sunset, when daylight is redder and softer than when the sun is high). Photographers also call it magic hour. The sun sits low, so its light travels through more atmosphere. That filters out much of the blue and leaves warm reds and oranges. The low angle also rakes across the land, which is what gives a scene depth.
That raking light is the real reason landscape photographers chase it. At midday the light falls from above and flattens everything. At golden hour, a sand ripple or a rock face throws a small shadow, and the eye reads that shadow as dimension. Warm color is a bonus. Texture is the reason.
There is an emotional side too. Landscape artists have long used the play of light to evoke connection to place. ABC News described how Arthur Boyd's Shoalhaven paintings capture the passing of time over a single river, and the best golden hour photographs work on the same instinct. They show a place the way you remember feeling in it. If that idea interests you, our piece on how landscape photography captures place identity goes further.
How long golden hour really lasts in Australia
The word "hour" misleads. The duration is set by how quickly the sun climbs or sinks through the first few degrees above the horizon, and that depends on where you stand. Near the equator the sun can cross a large altitude range in as little as 16 minutes, while in Los Angeles it takes about an hour to reach 10 to 12 degrees).
Australia spans a wide range of latitudes, so the window differs between Darwin, Sydney and Hobart. In general the sun moves faster in the tropical north, and golden hour is shorter there. Further south, and especially in winter, the low sun lingers and the window stretches.
For a concrete example, on 23 October 2026 one sun-times tool lists Sydney's evening golden hour starting at about 6:40 PM, with sunset at 7:14 PM. The morning window ends at about 6:39 AM after a 6:05 AM sunrise. That is a window of roughly 35 minutes, well short of an hour. Check the times for your own location and date before you leave, because they shift by a minute or more each day around the equinoxes.
We also suggest seasonal planning. Light angle, weather and the position of sunrise along the horizon all move through the year, which changes which locations work when. Our guide on how seasons change landscape photography covers this in detail.

Golden hour vs blue hour
This is the comparison most readers want, and the two are partners, not rivals. Blue hour comes directly before sunrise or after sunset, when the sun is roughly 4 to 8 degrees below the horizon. The light is cool and blue-dominated because red wavelengths are filtered out, and it typically lasts 20 to 30 minutes, again depending on latitude and season.
| Golden hour | Blue hour | |
|---|---|---|
| Sun position | Low, near the horizon | Below the horizon, about 4 to 8 degrees |
| Light quality | Warm, directional, textured | Cool, soft, even |
| Mood | Dramatic, glowing, inviting | Calm, quiet, moody |
| Shadows | Long and defined | Almost none |
| Crowds | Popular spots fill up | Often quieter |
| Best for | Mountains, dunes, coastlines, forests | Harbors, lakes, cityscapes, long exposures |
PetaPixel notes that experts value blue hour for its comparative peacefulness and lack of crowds, and that it is less dependent on clear sunlight than golden hour. So on a day when the sun never breaks through, blue hour can still deliver.
A simple rule of thumb: pick golden hour when texture, warmth and drama are the point of the scene. Pick blue hour when calm and atmosphere matter more, or when there are lights in the scene, such as a jetty, a lighthouse or a town. Better still, stay for both. The best sunsets often run straight into a blue-hour finish. If you are new to the cooler window, our beginner's guide to blue hour photography walks through it.
A field method for golden hour landscapes
Good golden hour pictures are mostly planned. Here is the sequence we recommend.
- Scout in daylight. Visit the location earlier in the day or the day before. Find your foreground, your angle and your fallback position. Our scenic drives photography guide is a good starting point for finding places worth the early start.
- Check the sun and sky. Confirm sunrise or sunset time and the direction the sun will rise or set, then look at the cloud forecast.
- Arrive early. Australian photography experts suggest getting to your location 30 to 45 minutes before sunrise or sunset so you capture the full range of twilight, using a sturdy tripod to allow lower ISO settings and sharper images.
- Set up and compose first. Frame the scene, level the camera and test exposure while the light is still soft. That way you are ready when the color peaks.
- Shoot RAW. High-contrast scenes lose detail in JPEG. Exposing for the highlights and recovering the shadows in post-production is standard practice, as the same Australian Photography feature explains.
- Stay after the sun has gone. Many photographers pack up the moment the sun appears or disappears, but some of the most dramatic light comes 10 to 20 minutes later as conditions keep evolving.
Direction matters
Shooting toward the sun gives silhouettes, flare and glowing rim light on grasses and waves. Shooting with the sun to your side gives the strongest texture. Shooting with the sun behind you gives saturated color but flatter form. Walk around the scene before you decide. The same hill can look like three different pictures from three positions.

Let clouds work for you
A clear sky is not the best sky. Between 30% and 70% cloud cover often gives the strongest golden and blue hour conditions. A fully overcast day lacks light quality, while a cloudless horizon misses the reflections that happen when the sun lights clouds from underneath. If clouds are building at sunset, stay. A broken sky can turn a flat evening into a spectacular one in minutes.
Simplify the frame
Gear does not fix a messy picture. Landscape photographers consistently stress that what you leave out of the frame is as important as what you put in. Golden light is generous, and it makes every bush and fence post glow equally. Choose one subject, one supporting foreground and a clean edge. Our overview of landscape photography techniques shows how different approaches handle this.
Common mistakes
- Arriving at the minute of sunrise. The best color often starts before the sun appears. Be set up early.
- Leaving too soon. The afterglow is frequently stronger than the sunset itself.
- Ignoring the shadow side. In low light the shadows go dark fast. Expose carefully for highlights and recover detail later.
- Skipping the edit. Warm light needs a restrained touch. Heavy saturation can turn a natural glow into an unnatural one. Our article on the role of post processing in landscape photography explains how to keep it honest.
- Chasing exotic places only. Adorama makes the point that beautiful landscapes near home are often overlooked in favor of remote ones. A local headland or paddock in good light beats a famous spot in poor light.
Perspective: why we plan our days around the light
We build our landscape work around the light, not the location. A famous place at noon is an ordinary picture, and an ordinary place at the right minute can become a print people want on their wall. Mark's work is award-winning and collected in 32 countries, and it is made with panoramic medium format film, which rewards the same discipline described above: patience, preparation and the willingness to wait for the last ten minutes of light.
Film also changes how you work. With limited frames, you do not fire away. You choose the position, wait for the cloud and the color to line up, then make the exposure. That habit carries over to digital, and it is the most useful thing we can pass on to a photographer who wants better golden hour images.
One more point from experience: the light you remember is rarely the light on the clock. Some of the best moments come when conditions look wrong, with a storm clearing, mist lifting or a gap opening on the horizon. Those moments only reward those who are already standing there.
— Mark
Learn it in the field
Reading about golden hour helps, but nothing beats being on location when the light turns. If you want guided practice, we run 1 day photography courses across Australia, and multi day photography tours in Australia and around the world. Our workshops are small-group, with luxury arrangements, and are led by internationally acclaimed photographers. If you would rather work one to one, private lessons are also available.
If you would rather bring the light home, our limited edition landscape prints are made from film captured in exactly these conditions. Gift certificates are available from 50 AUD for the photographer in your life.
Where to shoot golden hour in Australia
Australia rewards early starts. Coastlines facing east give sunrise color over water, and west-facing beaches deliver sunset. Mountain country such as the Blue Mountains holds mist and low light well, and our guide to a Blue Mountains photography workshop explains what to expect there. In the interior, red earth and low sun are a famous pairing, and our article on what Australian outback landscapes really are is worth reading before you go.
For inspiration on how the country has been photographed, see 9 defining examples of Australian nature photography. And if you want a framework for judging light across the day, our landscape photography lighting conditions guide covers it.
What to wear
It is a question people ask, and for landscape work the answer is practical. Golden hour is often cold, windy or damp, particularly at sunrise. Wear layers, closed shoes with grip, gloves if you will handle a tripod in the cold, and bring a headlamp for the walk in or out. Muted colors keep you from standing out if you are in a frame with other people.
Using golden hour images commercially
If you are a business looking for warm, high-quality landscape images for websites, brochures, signage or splashbacks, image licensing lets you use Mark's landscape photographs for commercial purposes.
FAQ
What is so special about the golden hour?
The sun is low, so light passes through more atmosphere and becomes warmer, softer and more directional. That raking light adds shadow and texture, which gives landscapes depth that midday light cannot. Warm color is the bonus.
Why is it called the golden hour?
It is named for the warm, golden tone of the light. The "hour" is a loose label, since the real length varies with latitude and the time of year) and can be well under an hour.
Is golden hour better than blue hour for landscapes?
Neither is better in general. Golden hour suits scenes where texture, warmth and drama matter, and blue hour suits calm scenes and those with city or building lights. Many photographers shoot both in one session, as blue hour follows sunset directly.
How early should I arrive for golden hour?
Aim for 30 to 45 minutes before sunrise or sunset, so you can compose and test exposure before the best light. Plan to stay 10 to 20 minutes after the sun is gone, because the afterglow can be the highlight.
Do I need a tripod?
It is strongly recommended. A sturdy tripod lets you use lower ISO settings and get sharper images in low light, and it makes careful composition easier.
Sources
- Golden hour (photography), Wikipedia)
- Blue Hour, timeanddate.com
- Blue Hour: The Photographer's Guide, PetaPixel
- Image Doctor: The critiques, Australian Photography
- How to photograph a sunrise, Great Walks
- How to Use the Blue Hour and Golden Hour in Landscape Photography, Adorama
- Pushing the limits, Camera House
- Arthur Boyd Shoalhaven River paintings, ABC News
- Sydney sunrise and sunset times, Alpenglow